Replicating the CERV 1
By Steve Temple and Tony Briski
Photos by Tony Briski and Ed Baumgarten
Truth be told, creating a custom fiberglass body is not for the faint of heart. The magnitude of such a project can be overwhelming. (Which is why so many replica companies “splash” a mold off an existing body, whether from a competitor or an original car.)
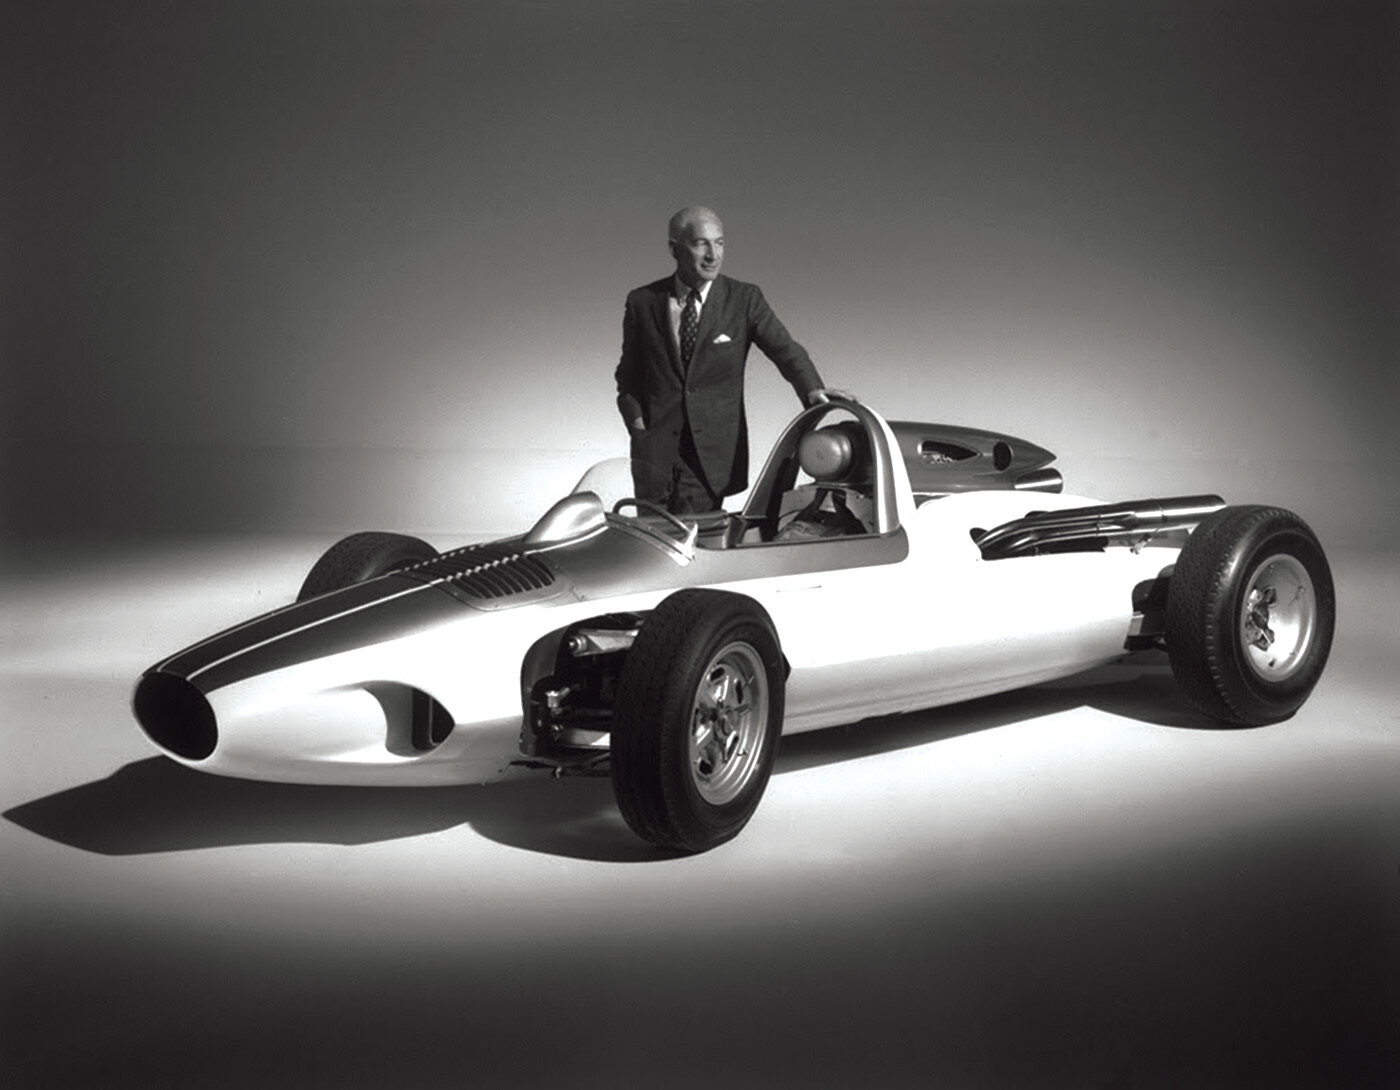
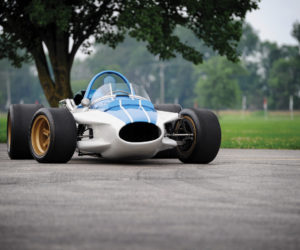
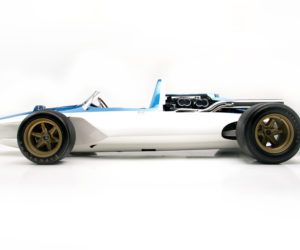
Given that warning, if you still want to forge ahead with your own unique body shape, we have a project that we’d like to share which will show just how involved such an endeavor can be. (We’ll be focusing on the chassis and drivetrain in a later issue.) As mentioned in our previous issue, it’s a replica of the CERV 1, a test bed developed in the early ‘60s by
Corvette engineer Zora Arkus-Duntov. Today, the historically significant CERV 1 is on display at the MY Garage Museum at Mid America Motor Works, but will likely be sold at auction by the time you read this piece.
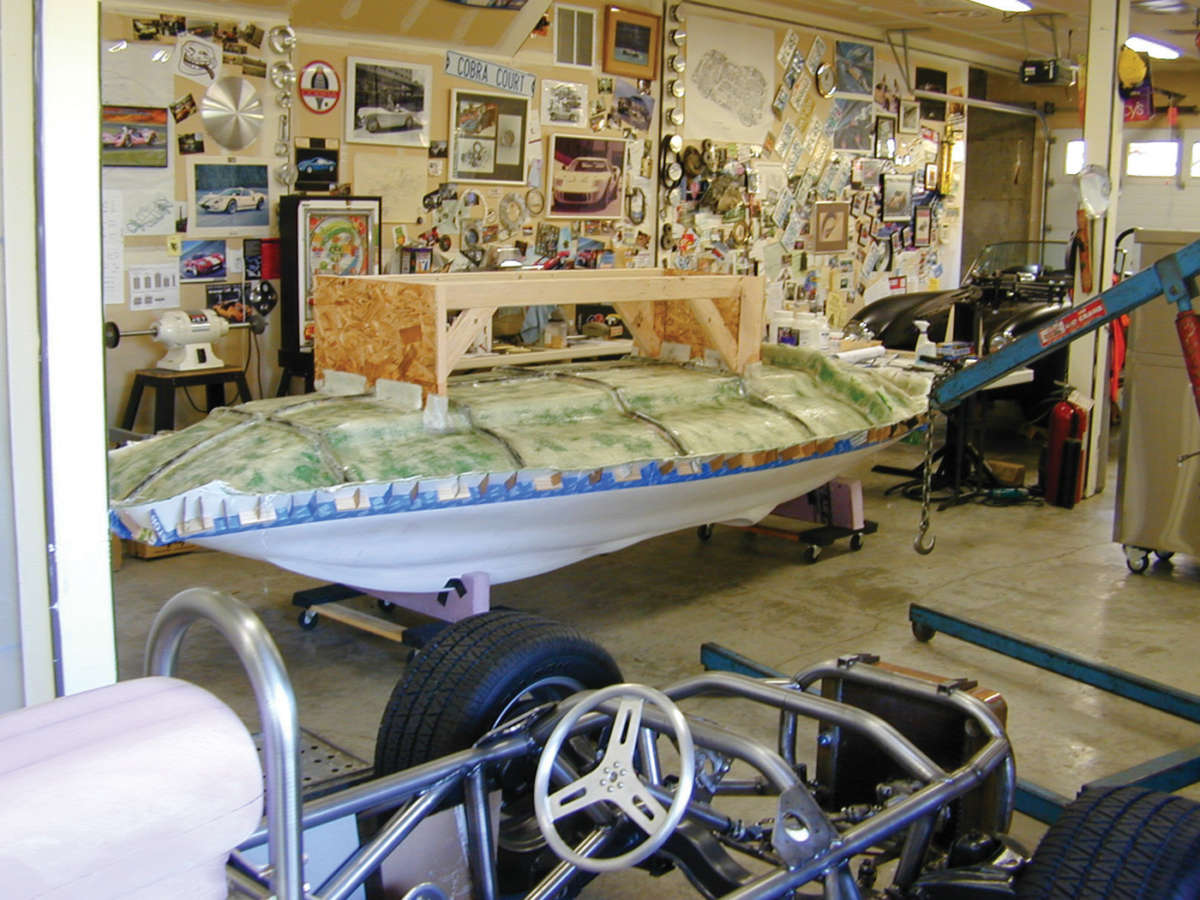
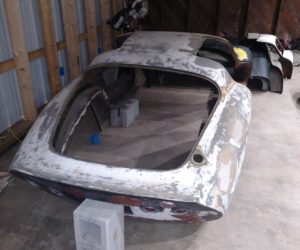
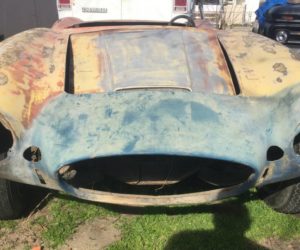
Since that one-of-kind car is not available for taking molds from, a hand-built reproduction of the early-body CERV 1 is now underway by Tony Briski, a retired former GM engineer. He supplied a number of photos showing the process, along with some tech tips along the way.

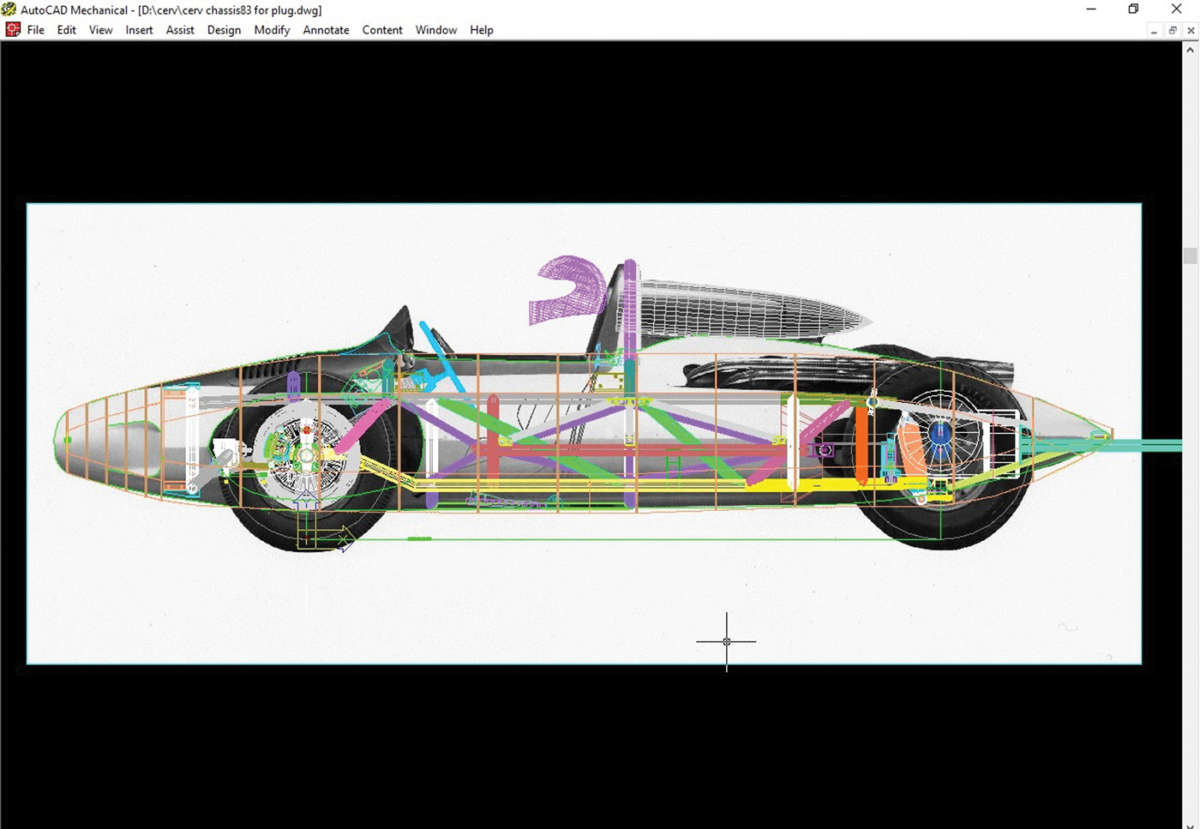


Outlining the process in general, the first step is to make good drawings, preferably with a CAD system, as Tony did. Even if you don’t have a way to do computerized renderings, drawing is the best way to develop those good lines you want. If you’re not trained in lofting, study books on naval architecture at the library. Making every line “fair,” having all views correspond, and creating sections through the form all require a great deal of accuracy, so take your time.
A small-scale model will allow you to “see” the whole car and take templates anywhere. If the model is made of good-quality, oil-based, non-drying clay, it will hold a shape as long as you want, yet it can be changed quickly. Whatever material you use, don’t make your model less than a foot long overall. It is hard to scale-up small templates, and details are hard to incorporate.
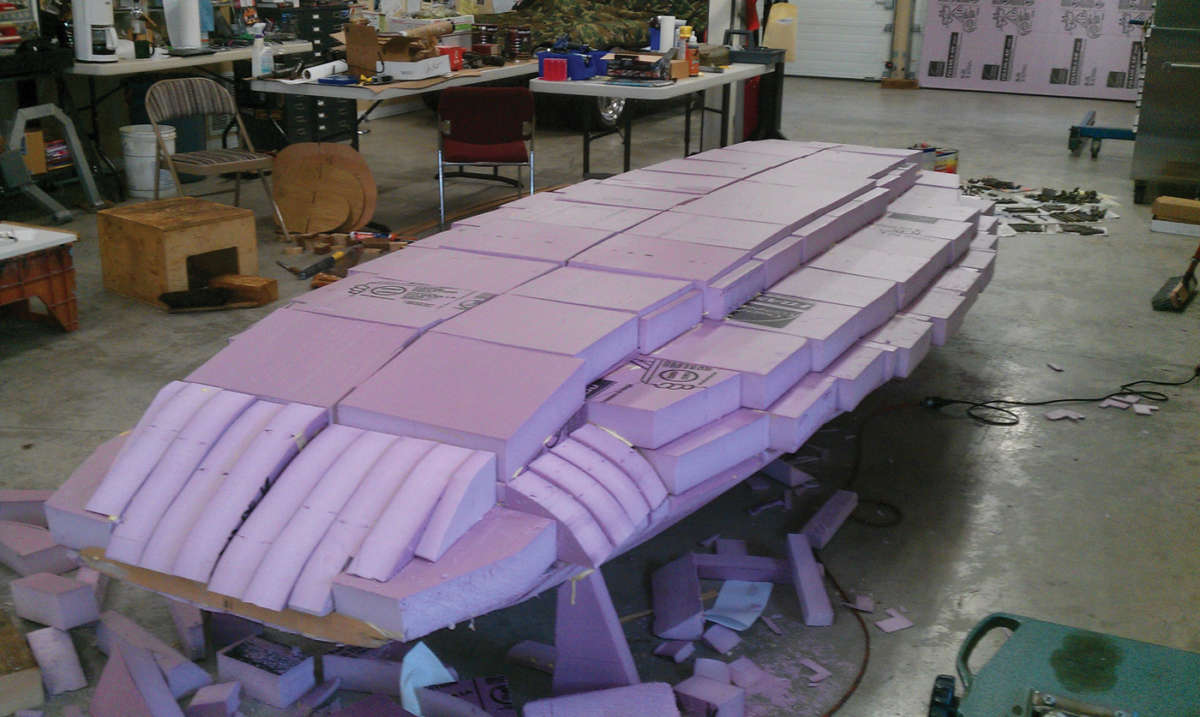
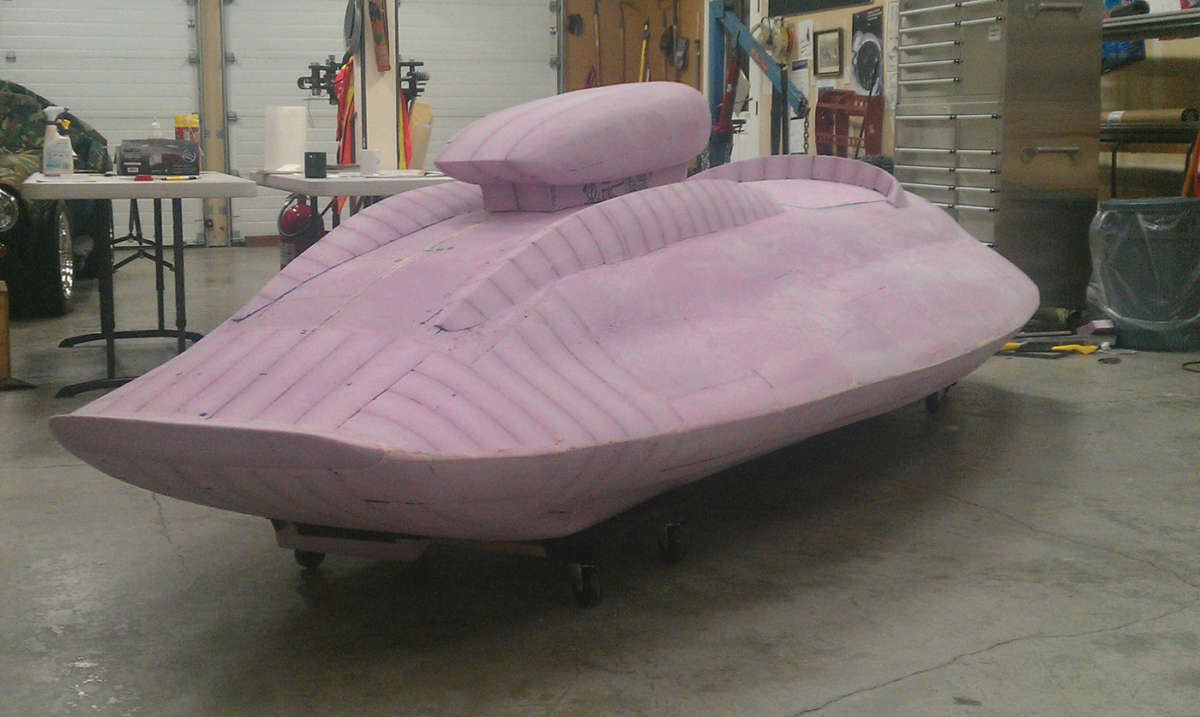
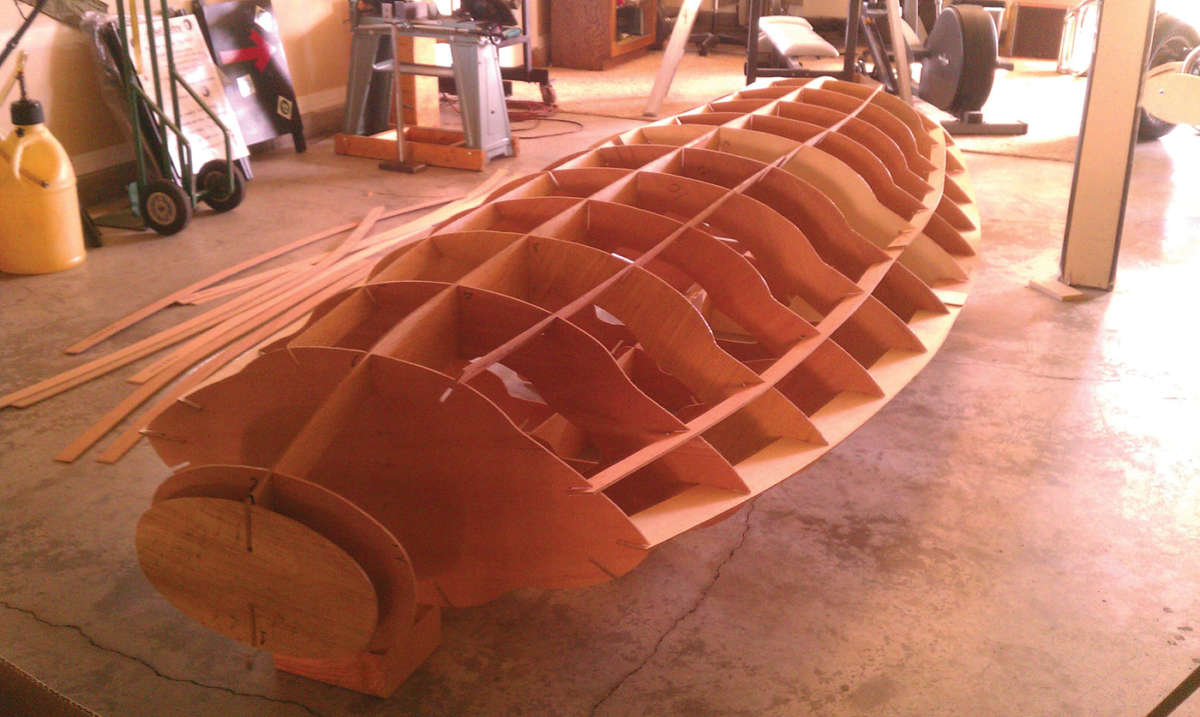
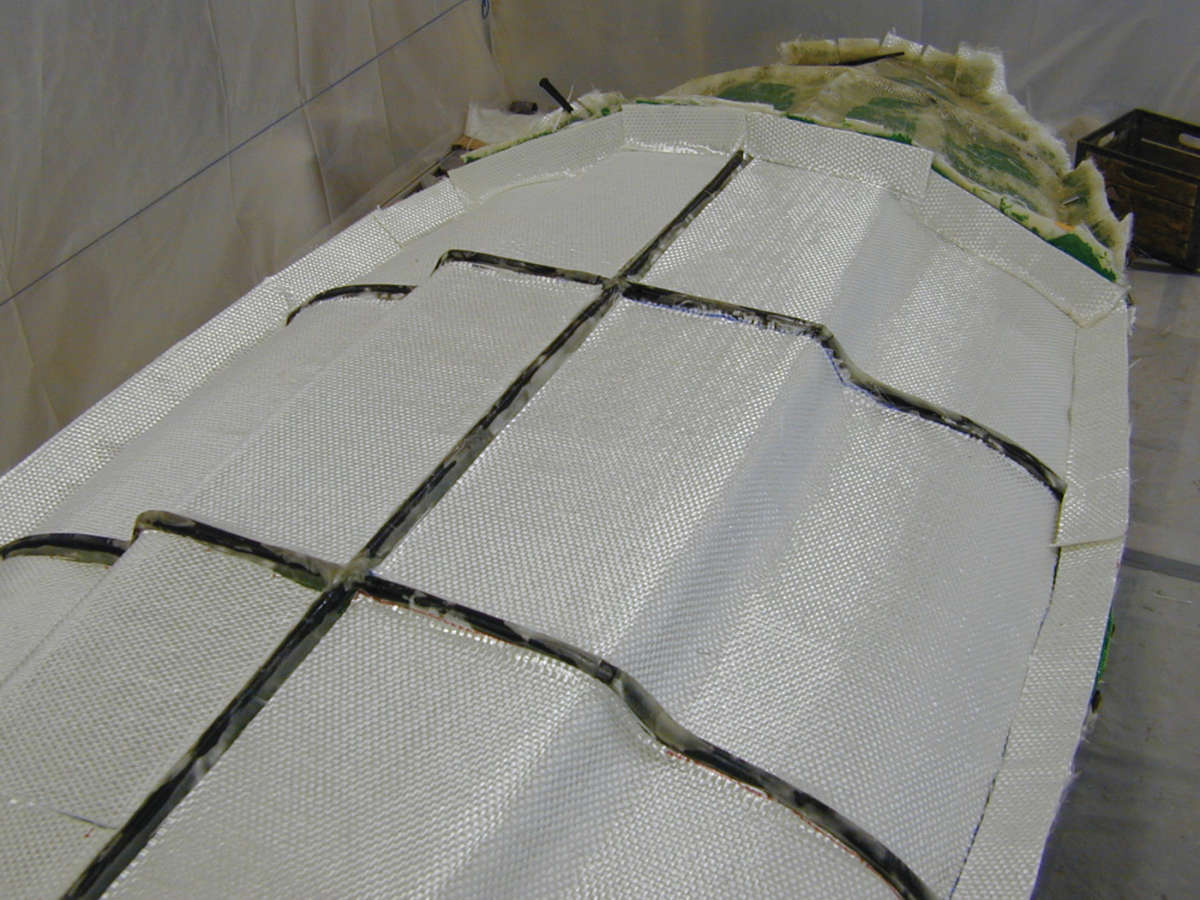
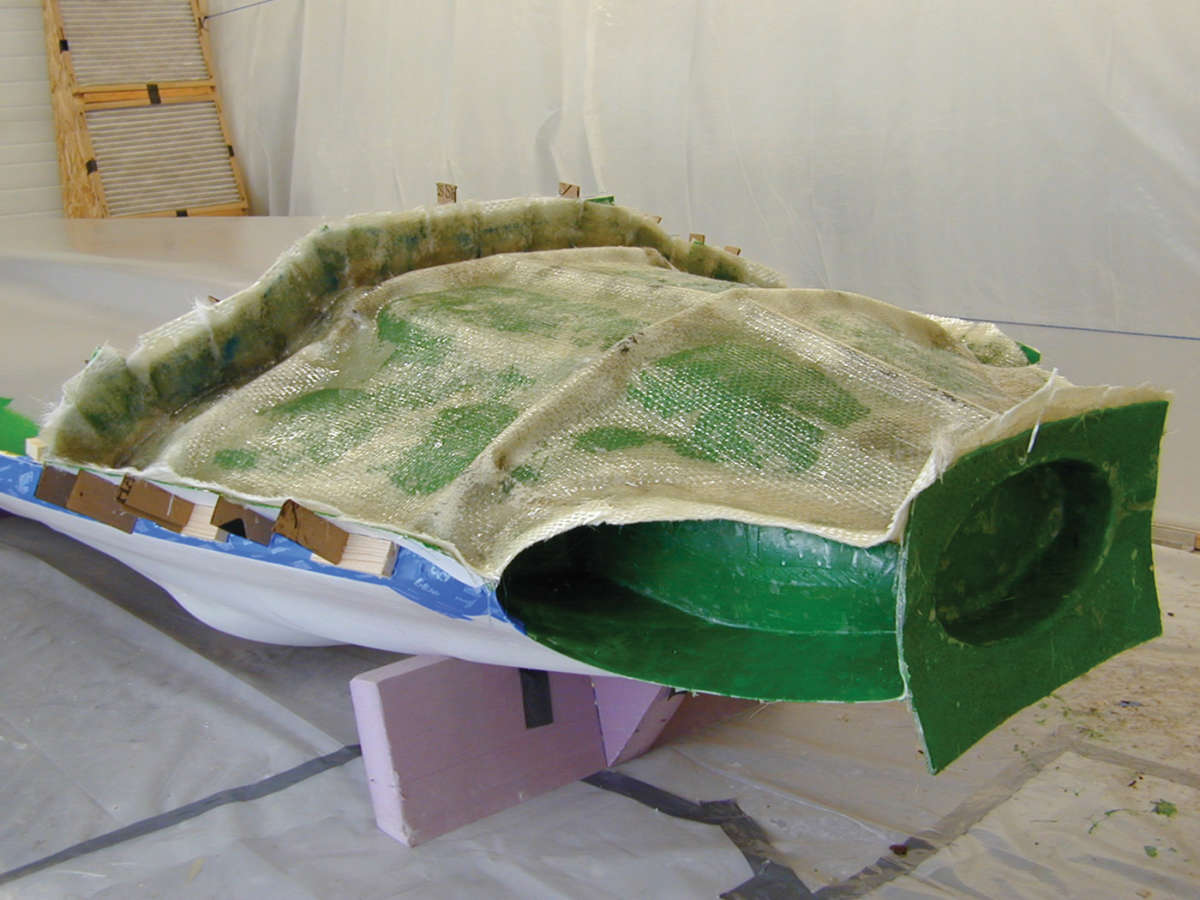
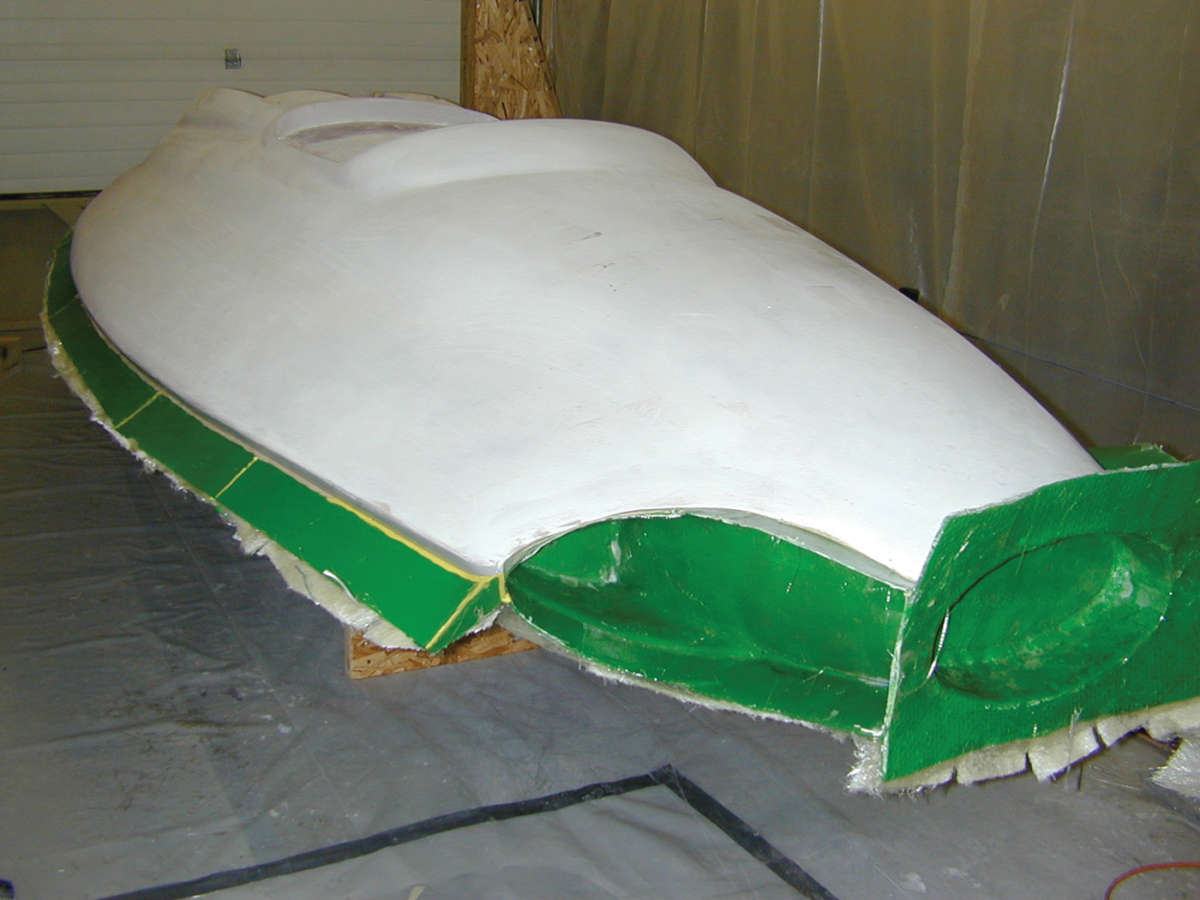
When designing the shape, you’ll need to keep the draft angles in mind. Sharp angles and flat surfaces are hard to make molds for, while rounded shapes are ideal. The challenge of pulling molds off the master form and pulling skins out of the molds will determine parting planes and the car’s shape. Fiberglass works better in large panels, so try to design your body so that you can pull it out of no more than five molds. Study your sketches to see how the number of molds affects the shapes permitted. For strength with lightness, use plenty of shape in the surfaces. So keep your drafts and joints simple, but curve the surfaces in all planes all the time. Once you have your design worked out you’ll be ready to build your master body form – a male mold variously known as a plug, buck, or male die. It amounts to a full-scale version of the model you made before.
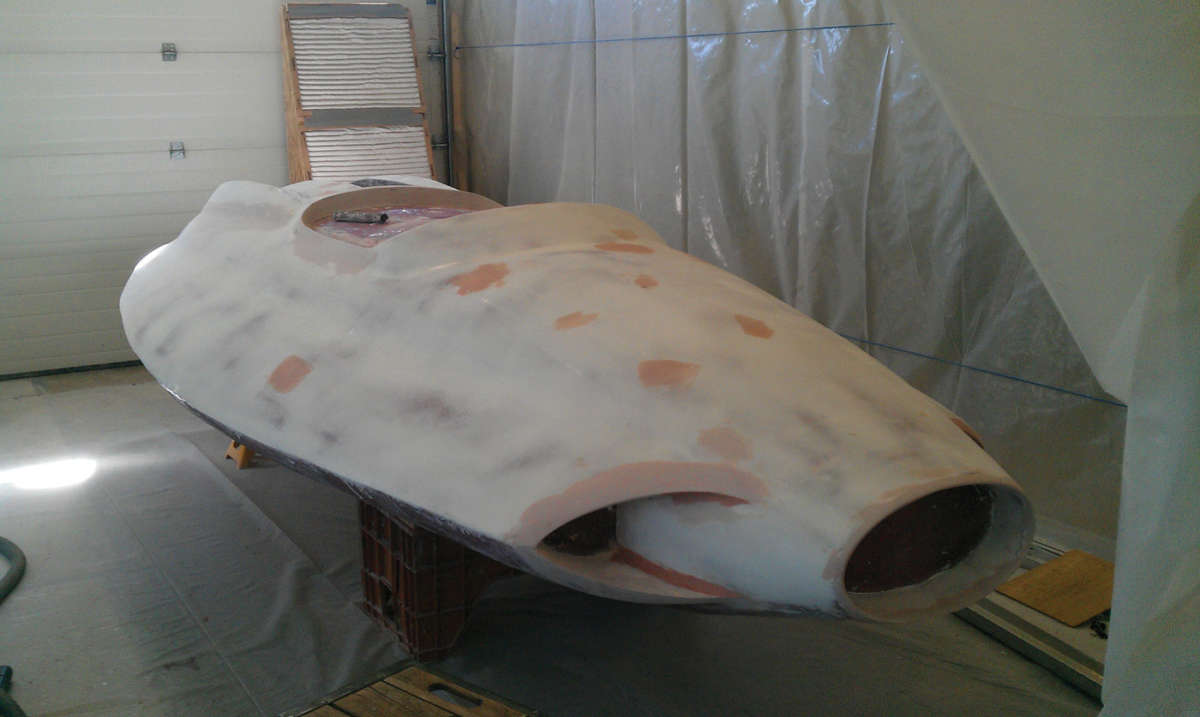
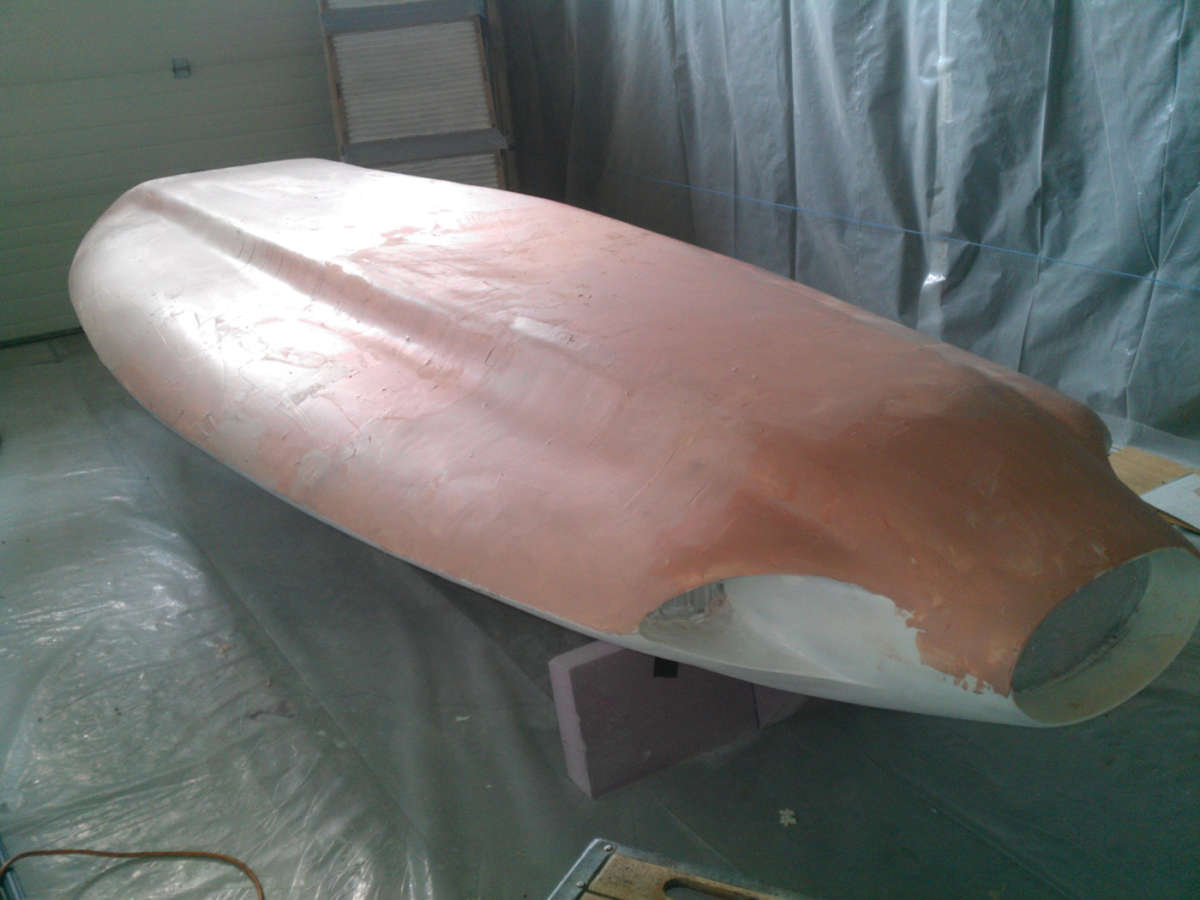
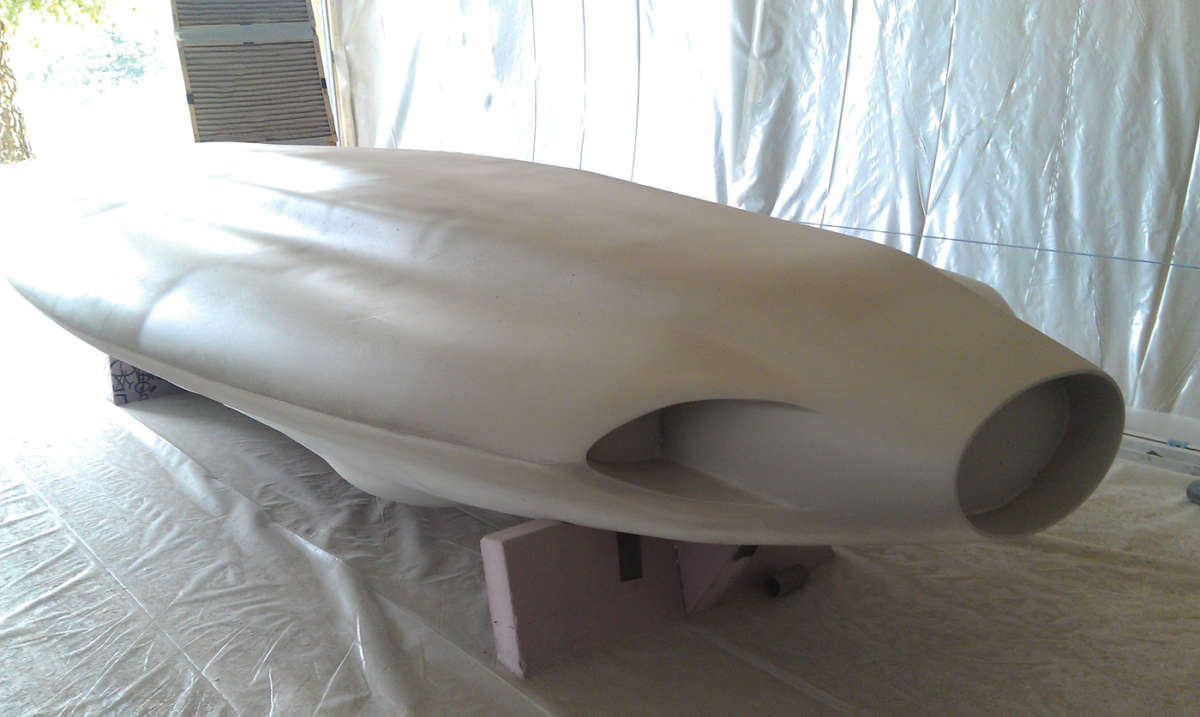
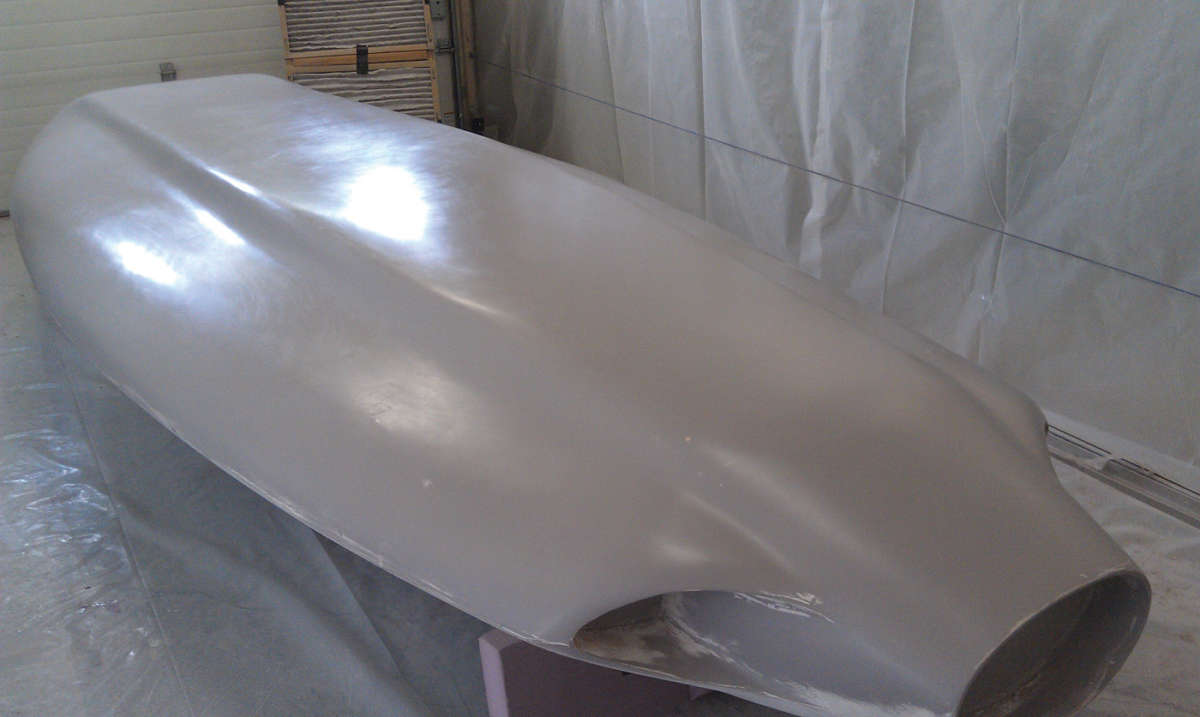
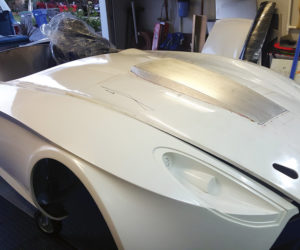
What about material? Clay (the type used by the auto industry) is expensive and you need a lot of it. Good, dry, clear-grained, warp-free wood is not cheap either, and working it takes a long time and much equipment. Plaster is cheap but messy. Foam is much easier to work with, as Tony has done on his CERV 1 repro.
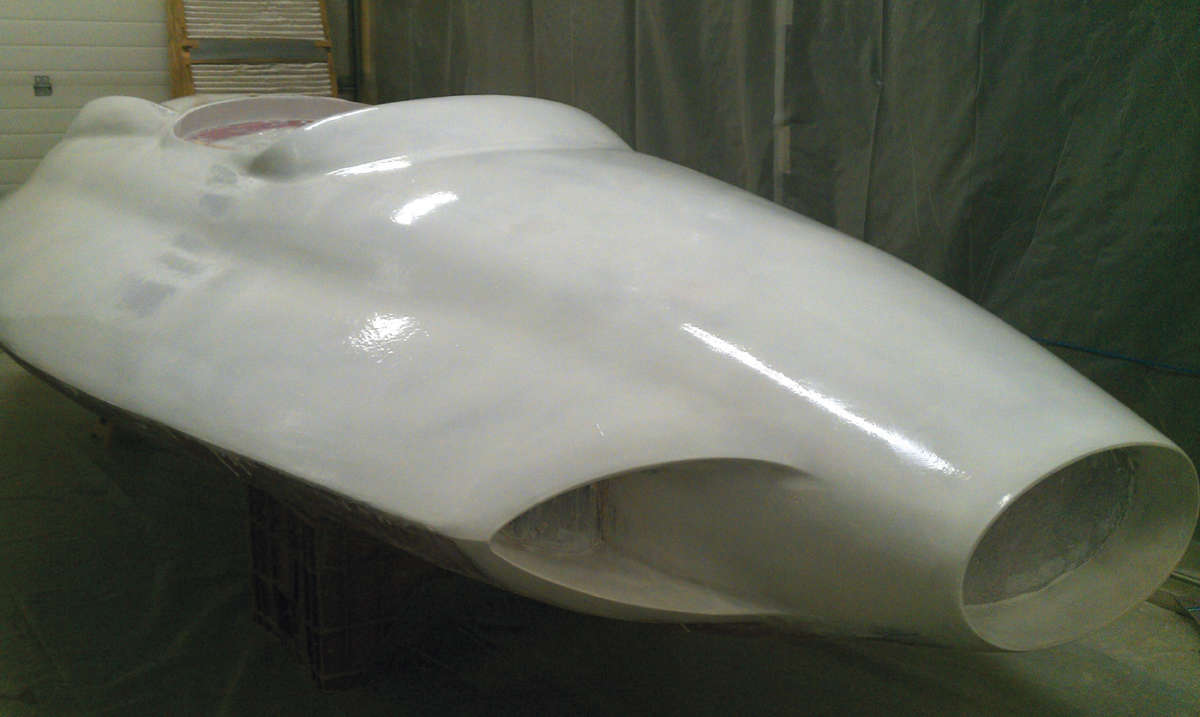
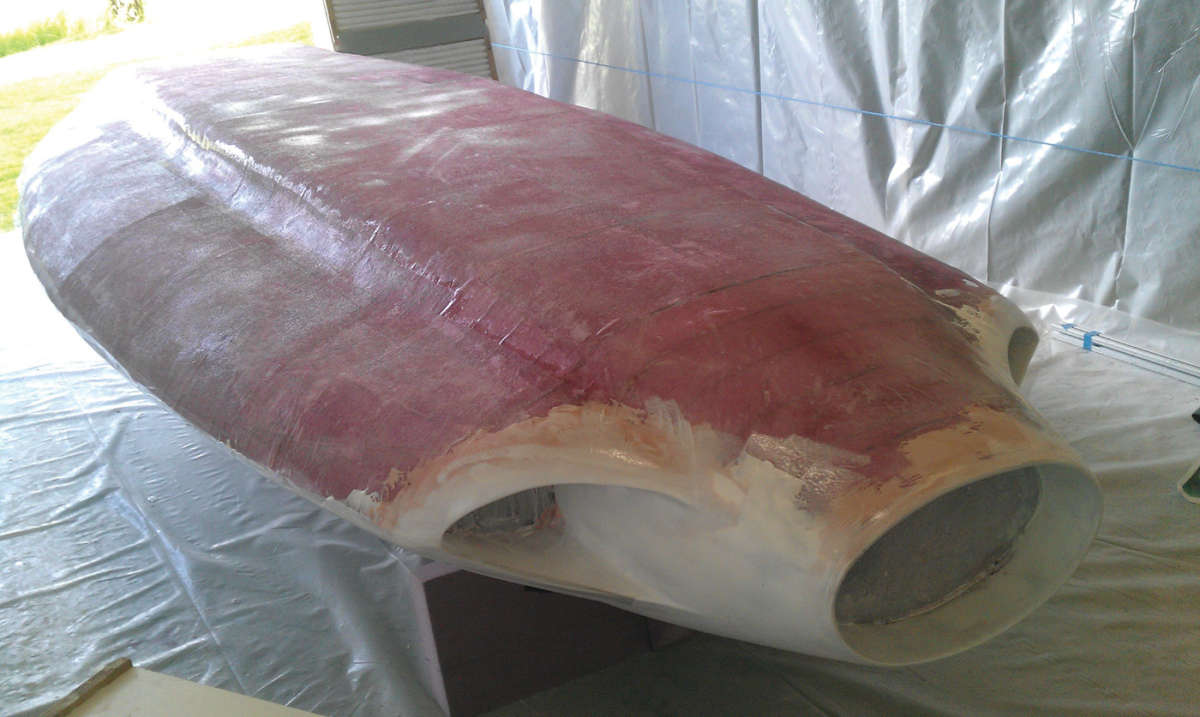
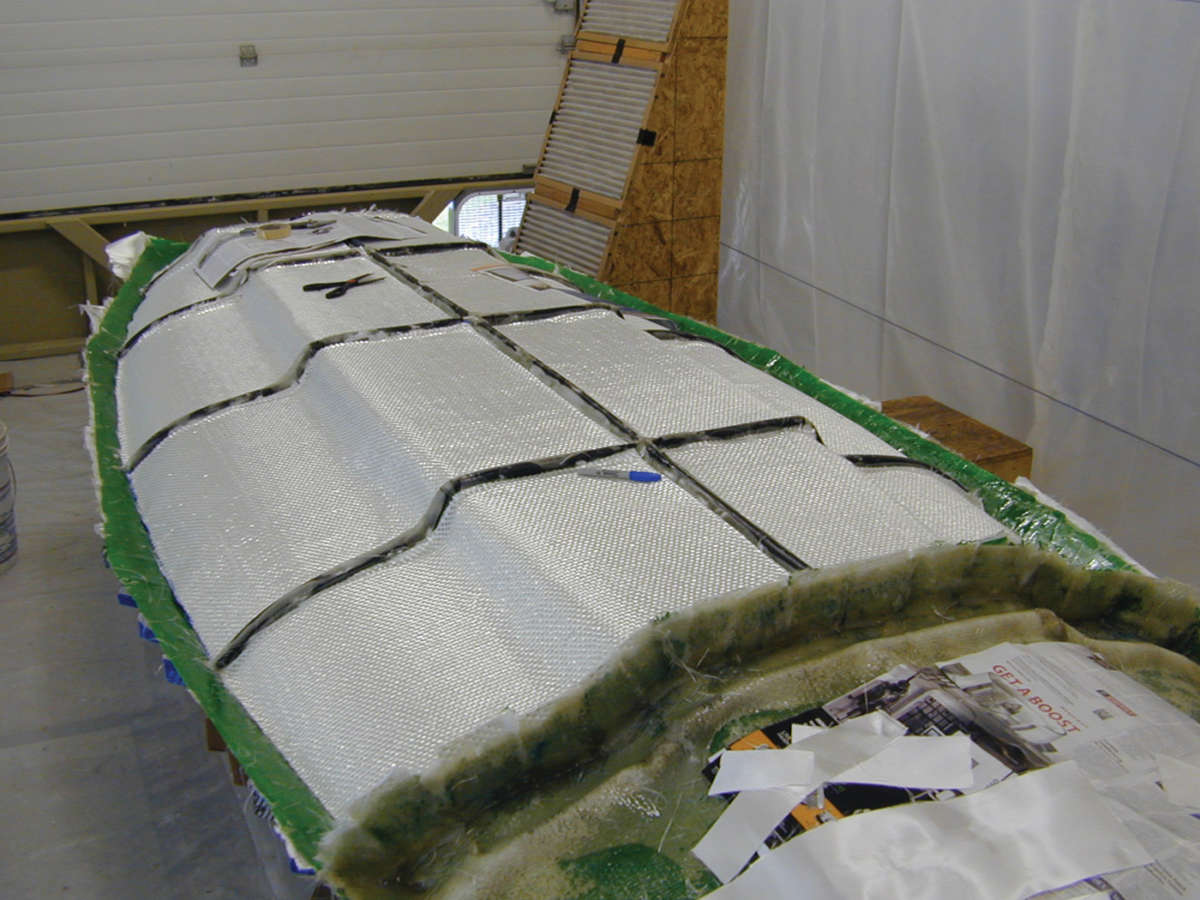
Once the foam is shaped to the form you want, several additional steps and fiberglassing materials are required to complete the mold plug, as shown in the accompanying photos and captions. There are several different types, such as chopped strand, woven roving (fine for molds, but not for lightweight bodies), mat (in various weights and thicknesses), and cloth (generally a straight weave, in various weights).
So before you dive in to your custom body project, take a few tips from Tony’s project, and learn from his experience.


Comments for: Body Language
comments powered by Disqus