Building an S2000-powered McSorely 400 Super 7
By Dale Van Blokland
I have my son Brian to thank for the success of this project, which all began in 2008. He was attending WyoTec technical school in Laramie, Wyoming, to become an automotive specialist, and his training really came in handy as our build progressed.
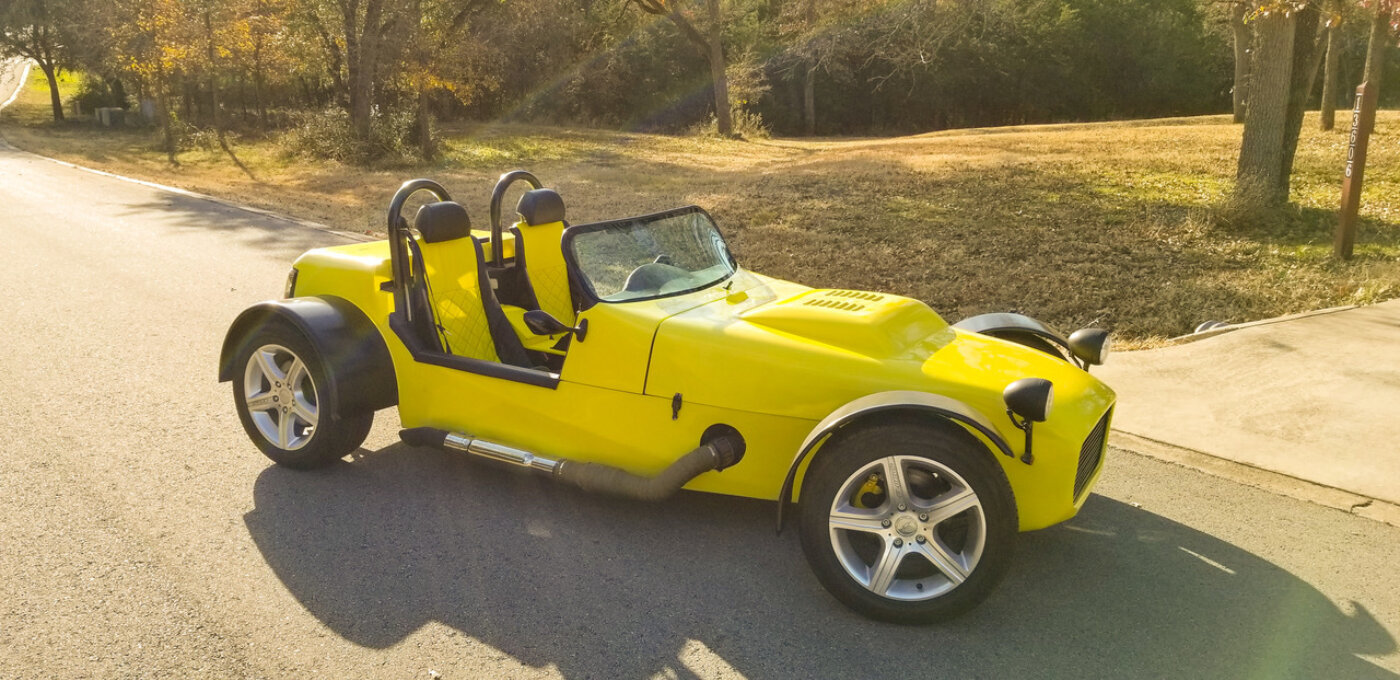
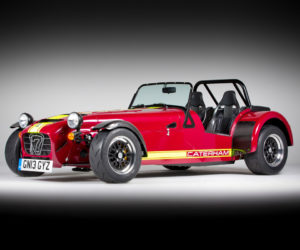
Brian had bought Ron Champion’s book, How to Build Your Own Sports Car, along with Keith Tanner’s How to Build a Cheap Sports Car. In Champion’s book, there were plans on how to build the chassis. But because we knew the original chassis was quite narrow, we elected to follow an alternative design — called the McSorley 400. This design adds an additional 4 inches of width (explaining the title’s reference to supersized), and while that might not sound like much, it’s a big deal in a finished car.
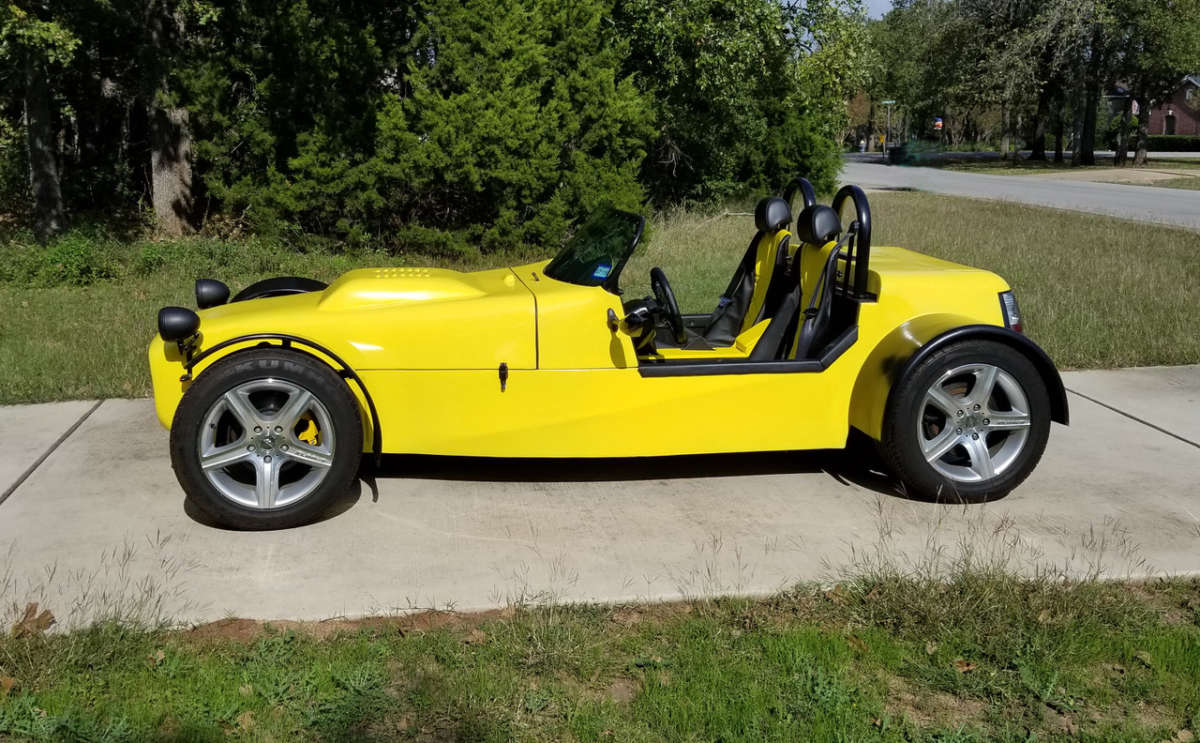
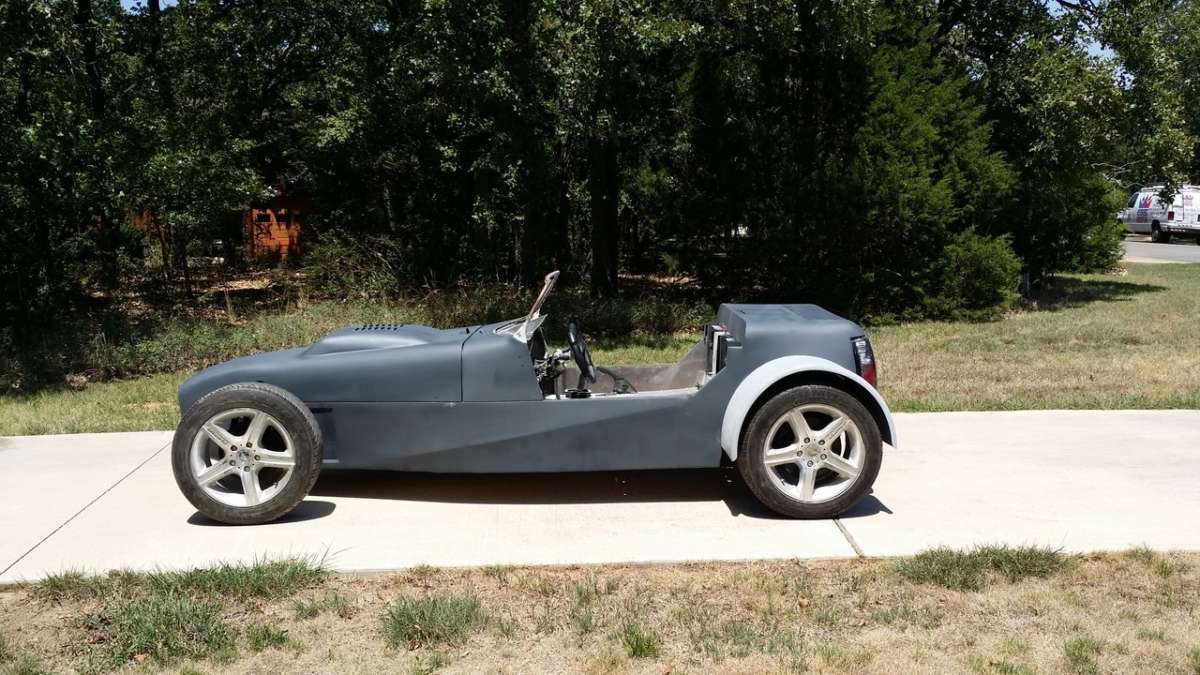
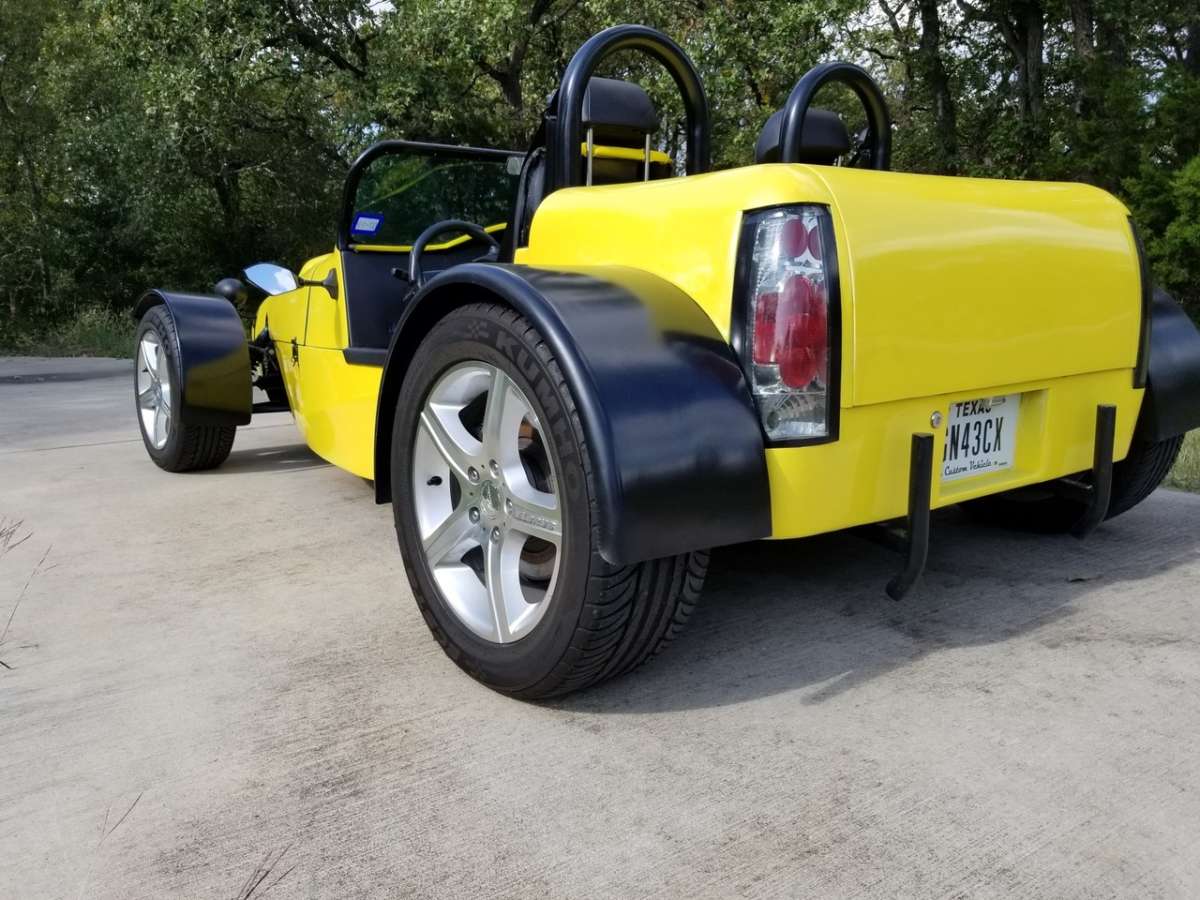
As it sits today, you’ll note some clear differences in the appearance of our car. An original Lotus Super 7 has a distinctive look, primarily made with aluminum panels and a flat windshield, resulting in a squared-off look. But I wanted something a little different, and we looked to the more streamlined Elfin from Australia for inspiration.
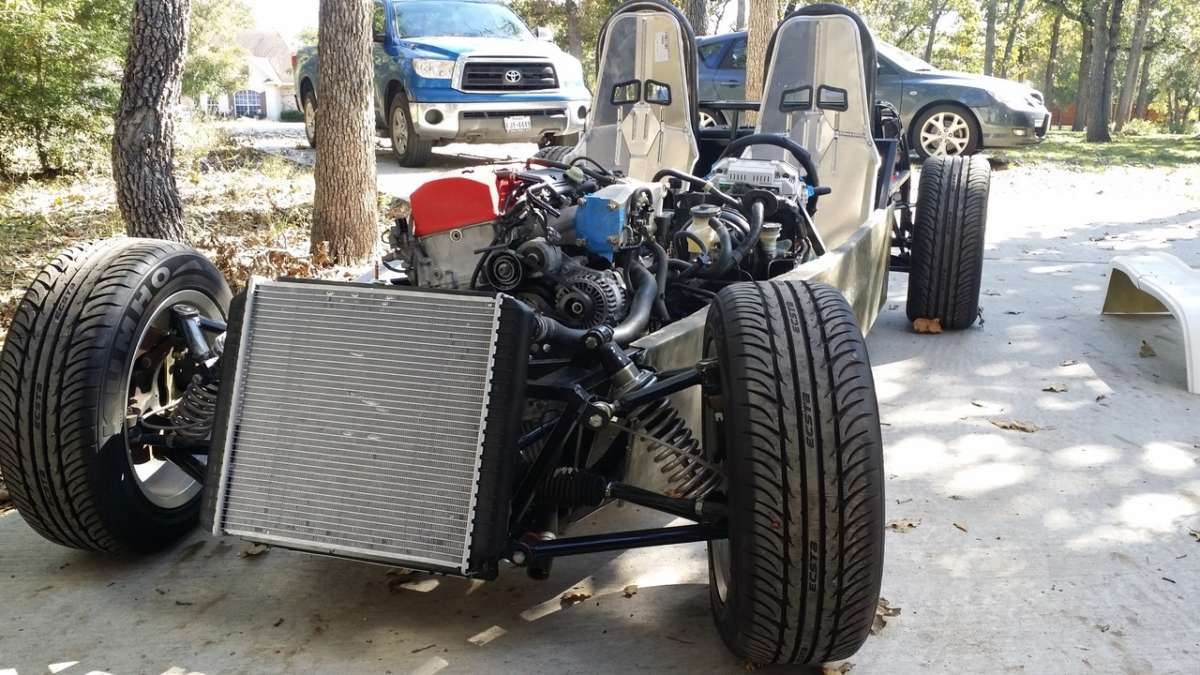
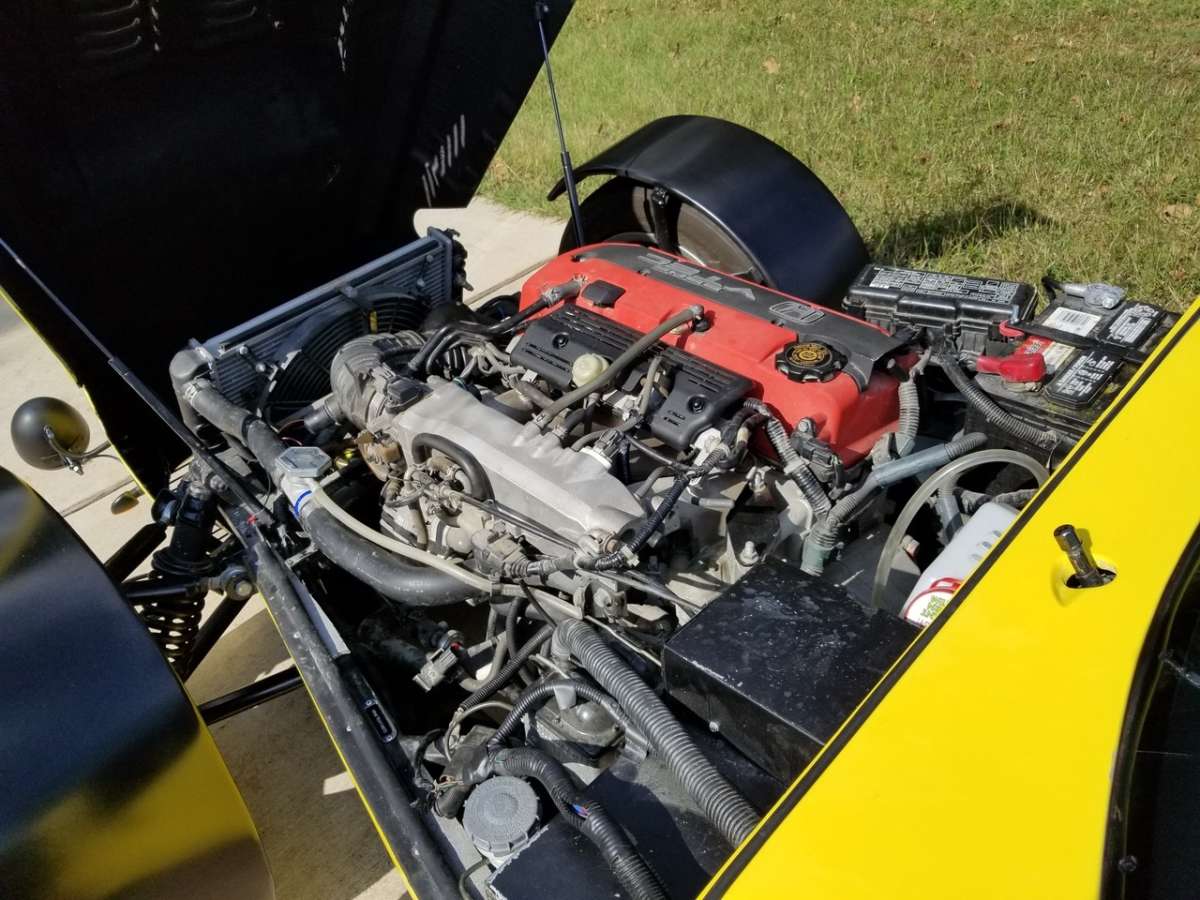
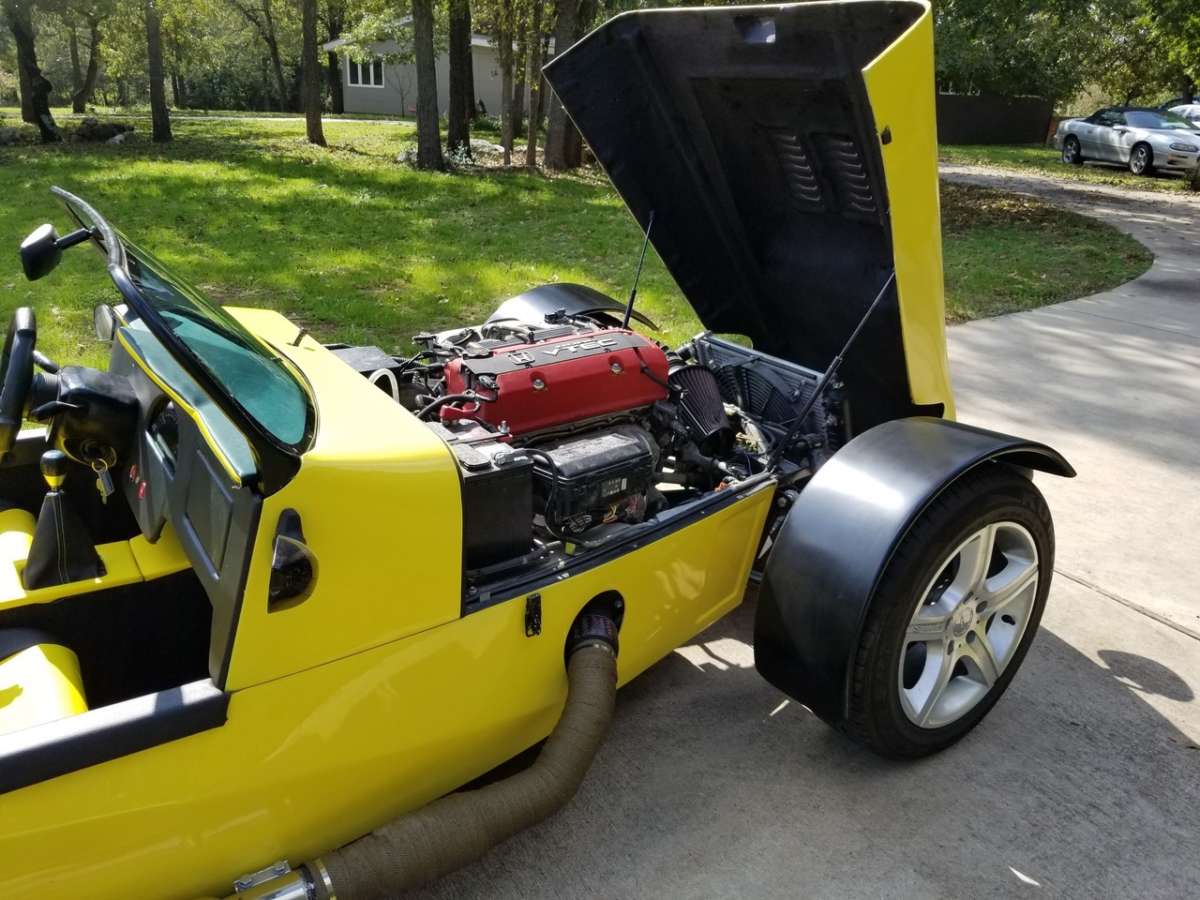
Getting back to the beginning, Brian built the chassis as part of his classwork on chassis fabrication. Since no car is complete without a drive train, he also procured the engine, transmission and rear end from a 2002 Honda S2000.
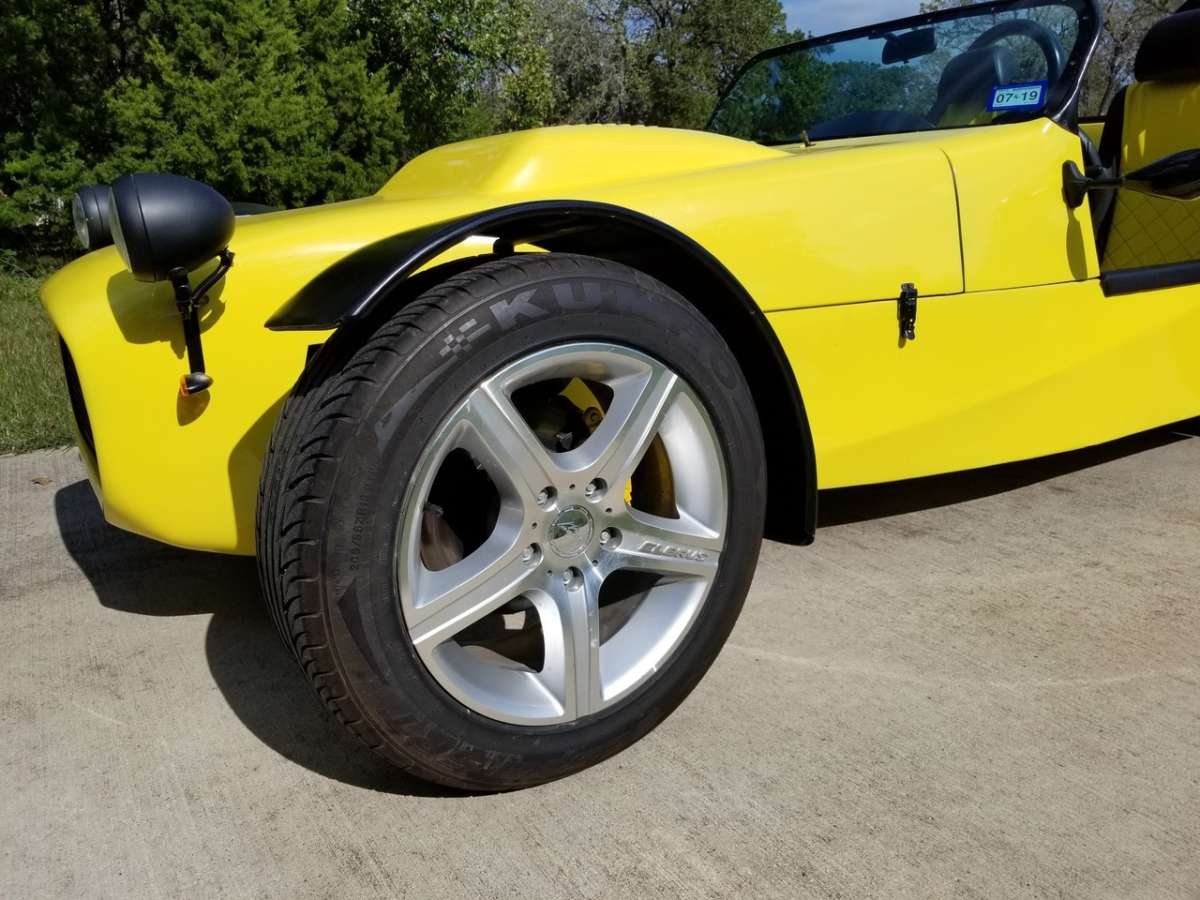
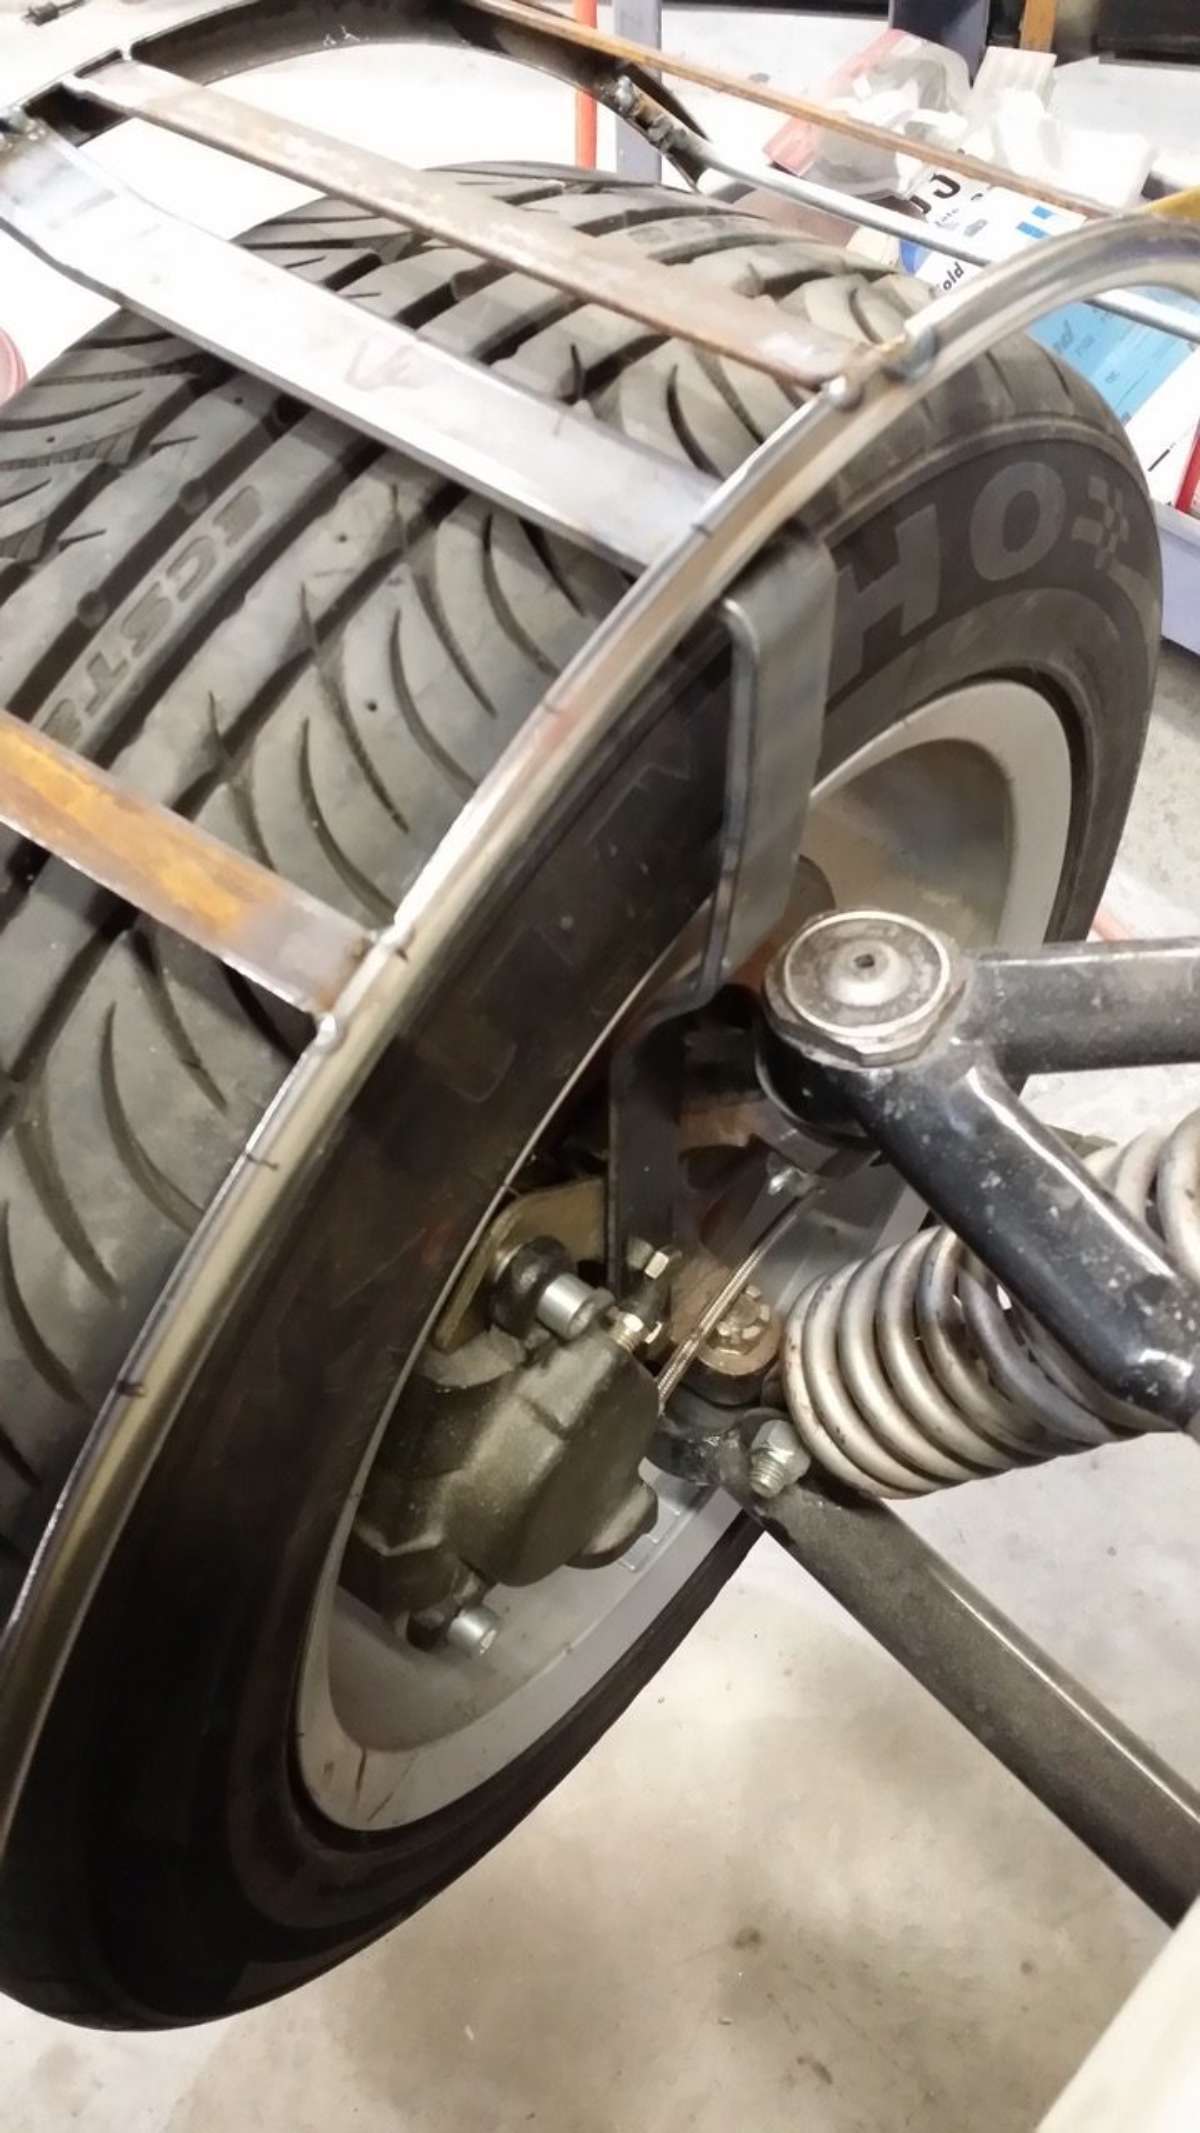
Once Brian graduated from WyoTec, we hauled the chassis and drivetrain back to Texas, and soon began fabricating the front and rear suspension systems. The setup in the front uses the basic dimensions from Champion’s book, but we incorporated different ball joints and GM spindles. We had a more difficult time with the rear however.


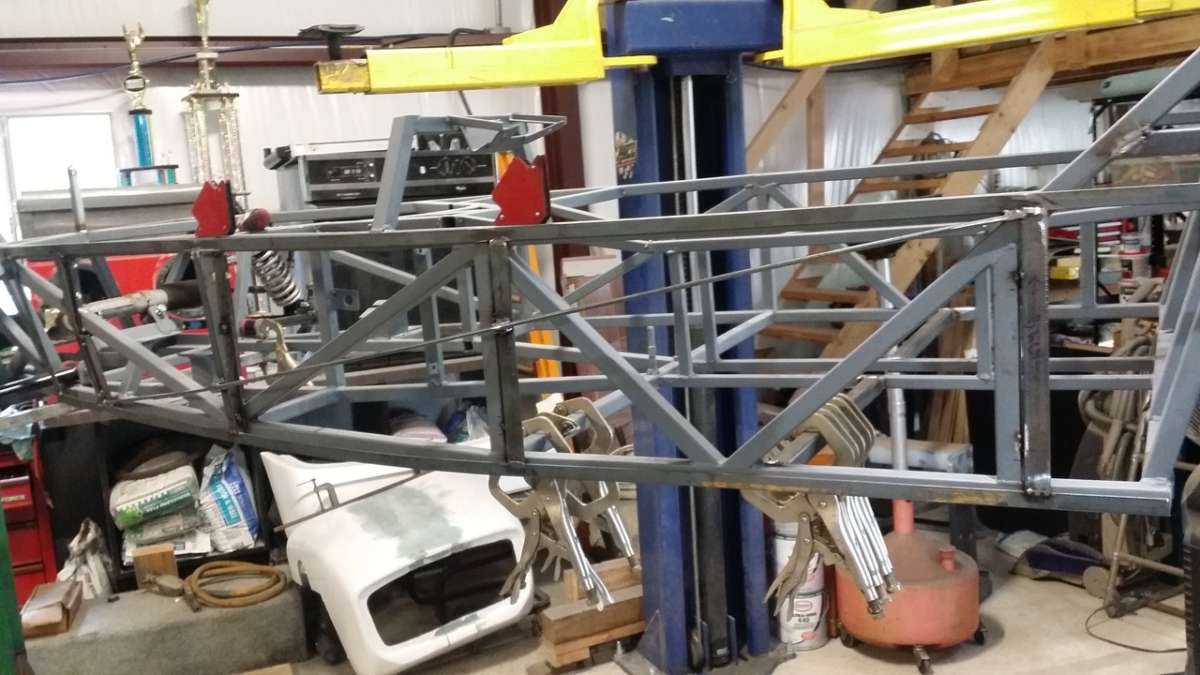
Even though the rear suspension from the S2000 was all there, it did not easily integrate into the existing chassis. So we removed the back portion of the frame and fabricated a new section to accommodate the differential, A-arms and sway bar. I was able to make a jig from the original S2000 frame, and then fabricate a new structure that would be welded onto the chassis.
Next came trial fitting the engine and transmission in order to figure out the motor mounts and the modifications to be made to the drive shaft. Once that was done, it was time to mount the steering rack.
I had a Firebird rack that was left over from my other builds. (Did I mention I had built five other cars? First a Sterling, a Bradley GT II and then three Lamborghini replicas.) Anyway, Tanner’s book showed how to shorten the steering rack, which I did. But after seeing the feedback on the forums saying not to do that for safety reasons, I eventually took their advice and replaced it with a Mustang II rack. Next, I mocked up a pedal assembly to figure out clearance around the steering column. In the final configuration, I had moved the pedals three different times and eliminated the brake booster to have enough spacing.
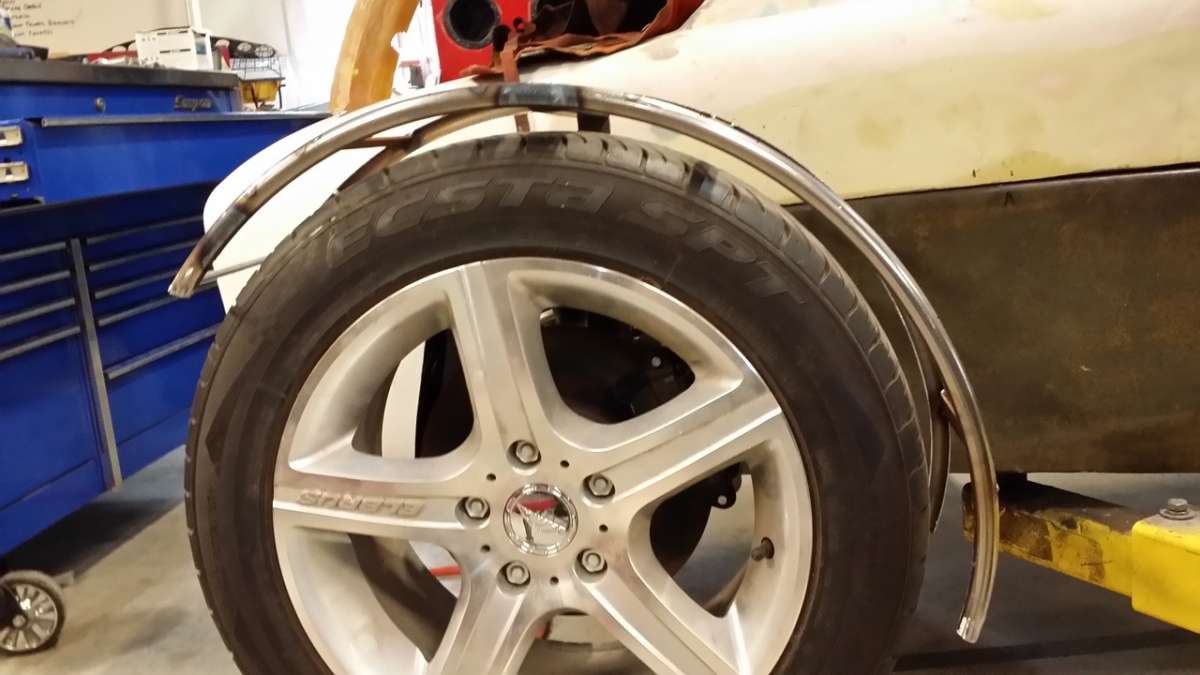
Getting back to the suspension, I eventually found that the wheels didn’t clear the ball joints. So I had to have the spindles reamed out to allow the ball joint to fit down farther to clear the wheel. The work up to this point took us from 2008 to June of 2011. I was unable to work on the car again until February of 2015. We designed and built a house during this hiatus, including a 30 x 40-foot workshop, which has the tools, lift, compressors, welders, etc. needed to finish the project.
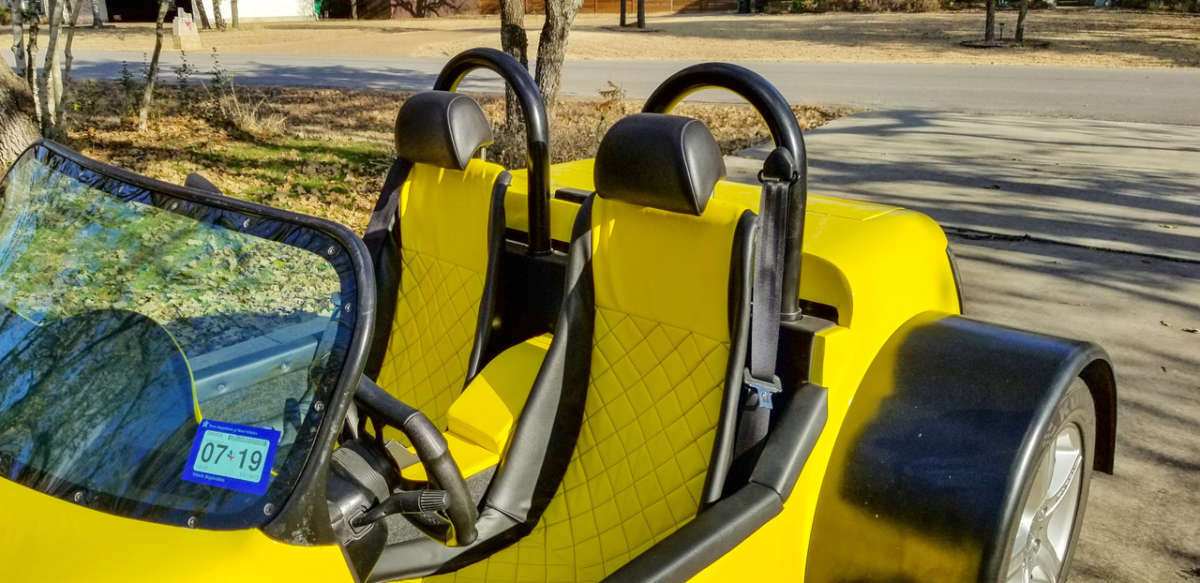
Upon resuming the build, I disassembled everything and cleaned the chassis so it could be primed and painted. I had a rotisserie that we used for one of the Lamborghini replicas, which allowed me to finish up the chassis. During this time, I installed two roll bars and the gas tank. I also ordered a fiberglass cowl for the front end.
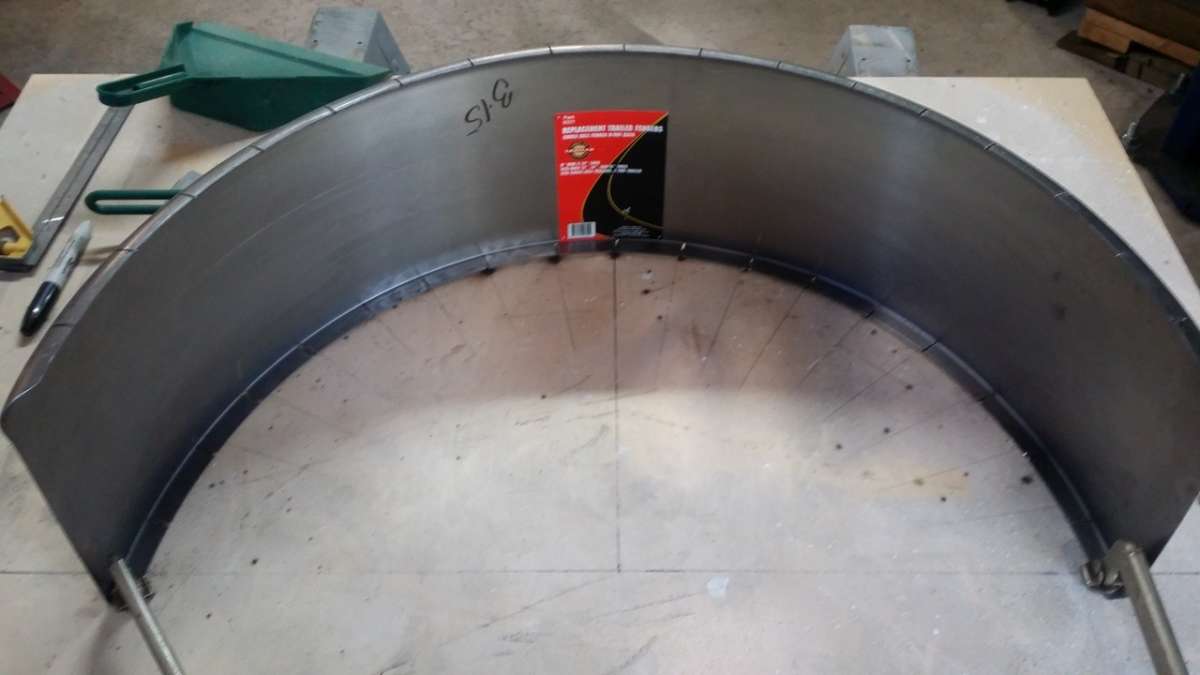
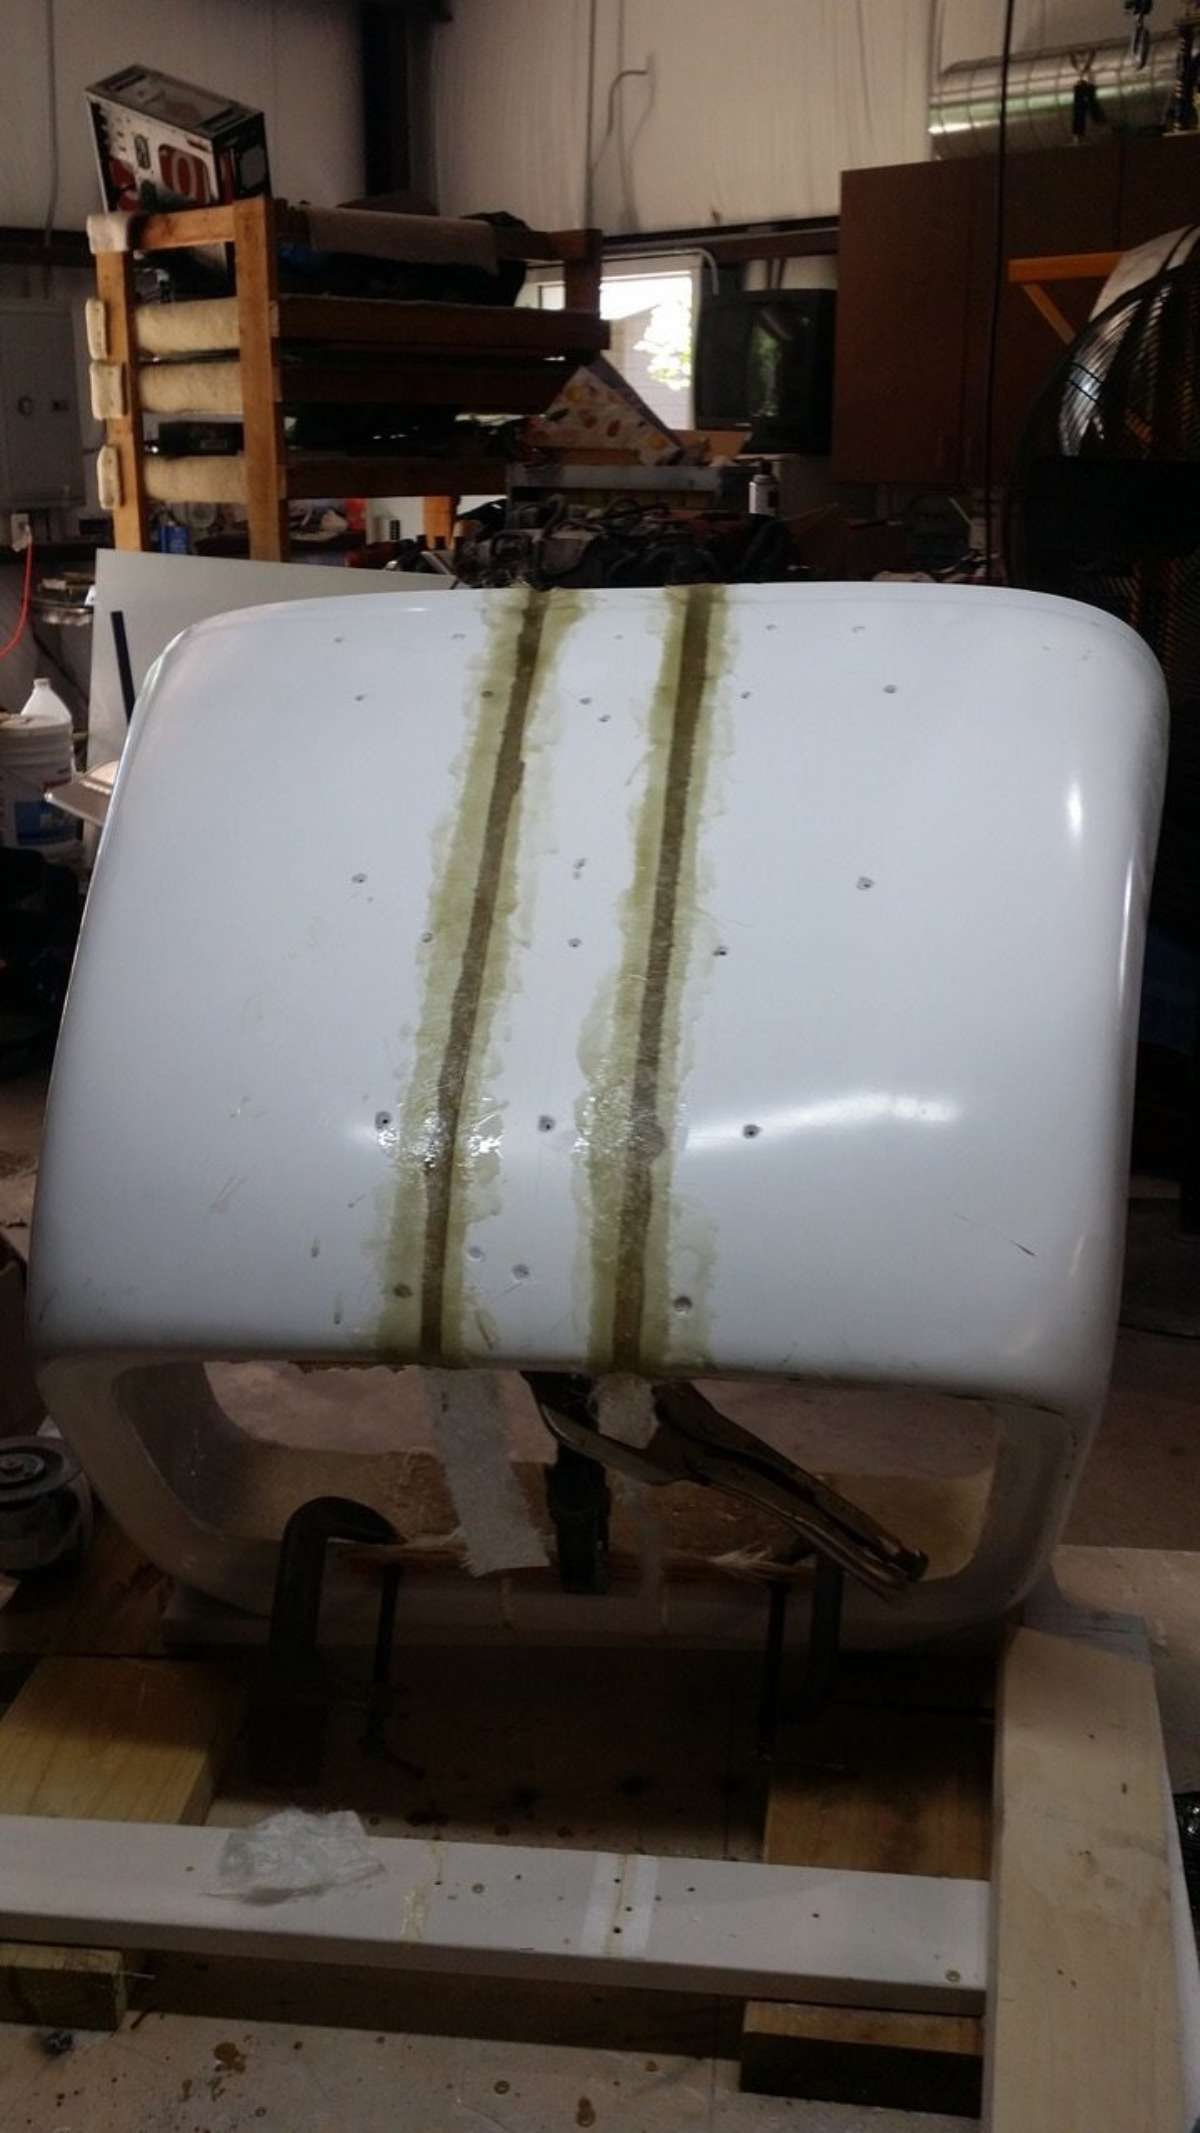

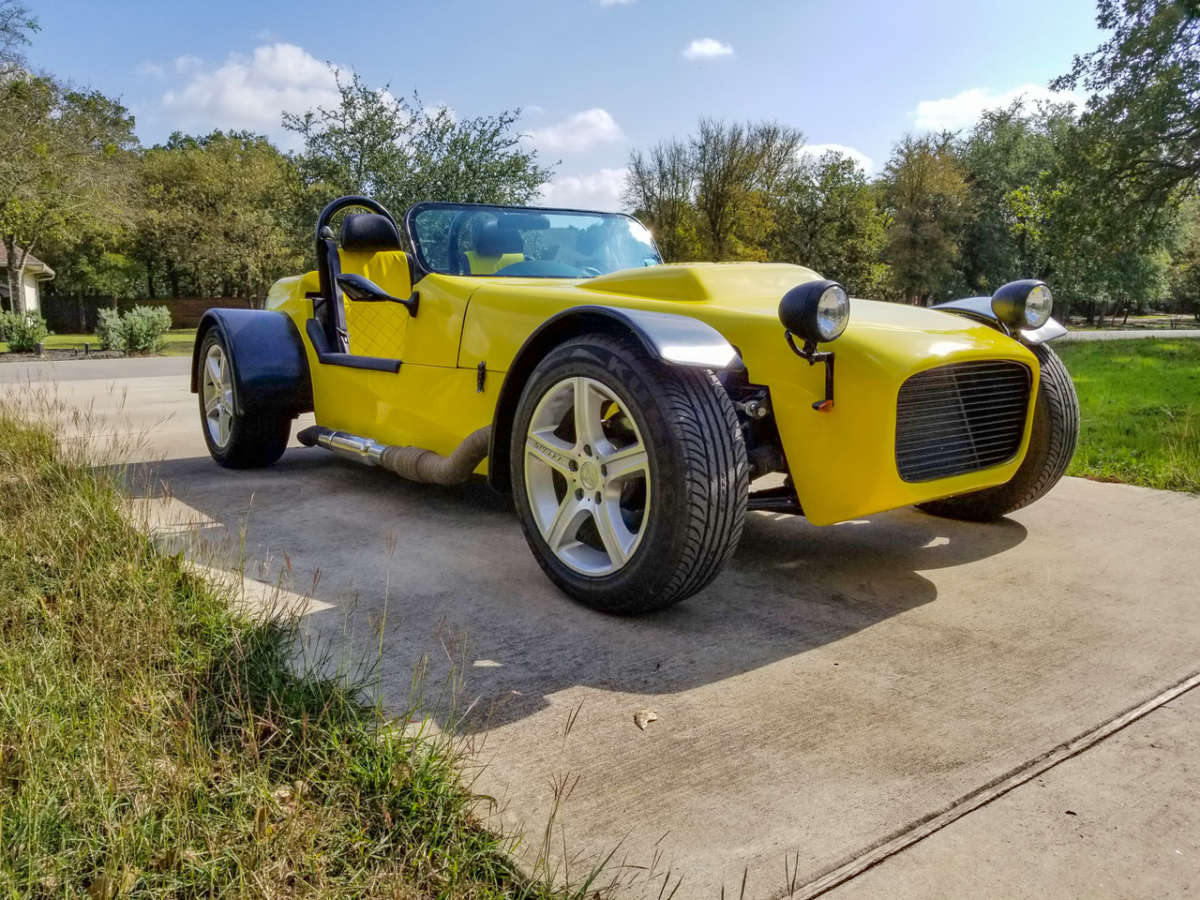
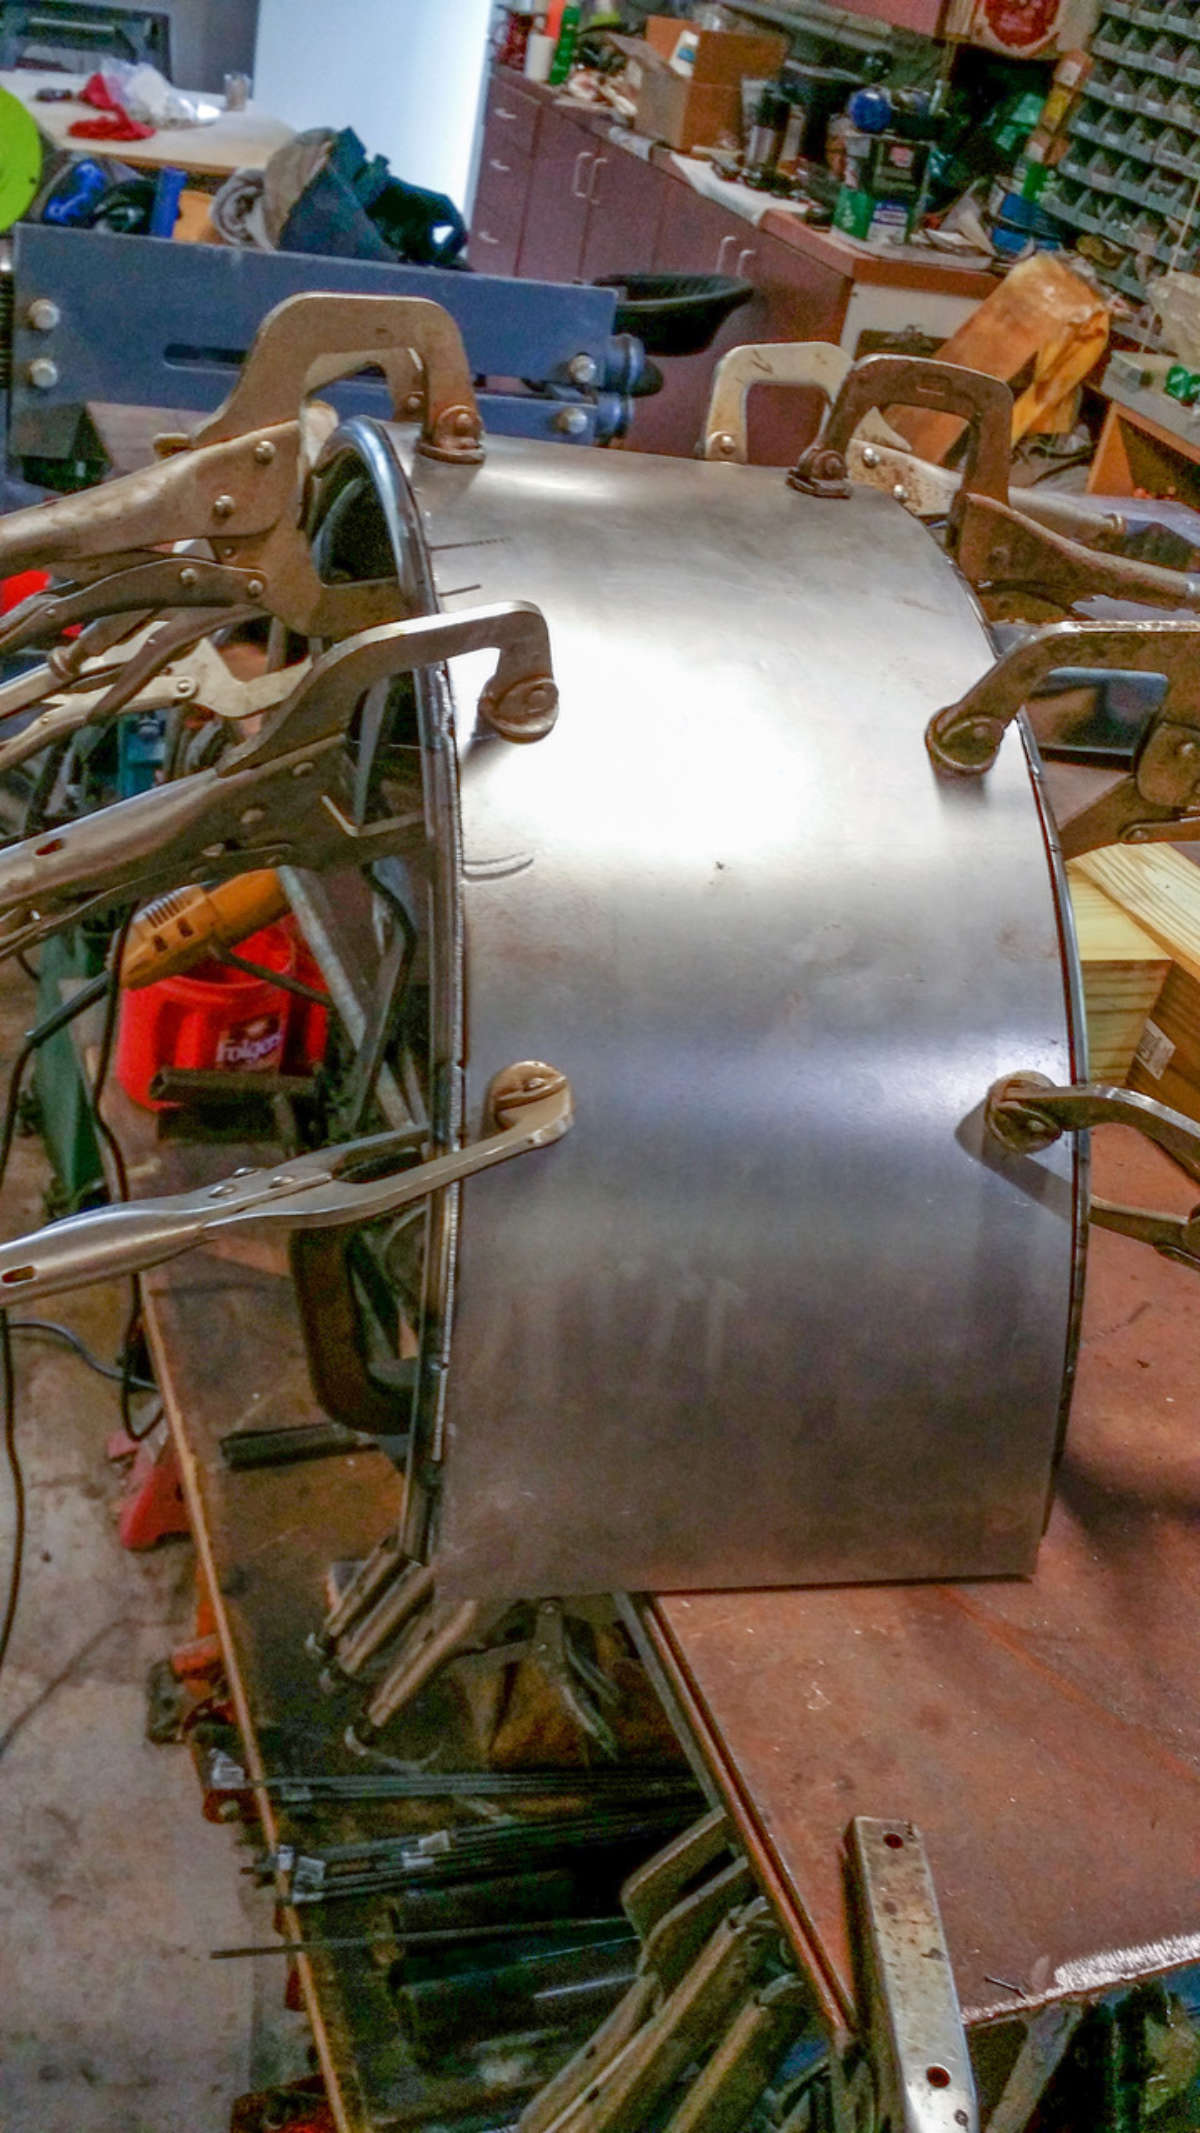
For the rear fenders, I picked up some generic pieces at Tractor Supply Co. However, they were a bit too big and I needed to tighten up the radius. So I scribed the correct radius on a board and made small cuts around the flange on the fender, and then welded up the slices. Another major modification involved the front cowl, as ours was too narrow given the extra width in our design. So I cut it up and added a 4-inch strip to fit my chassis.
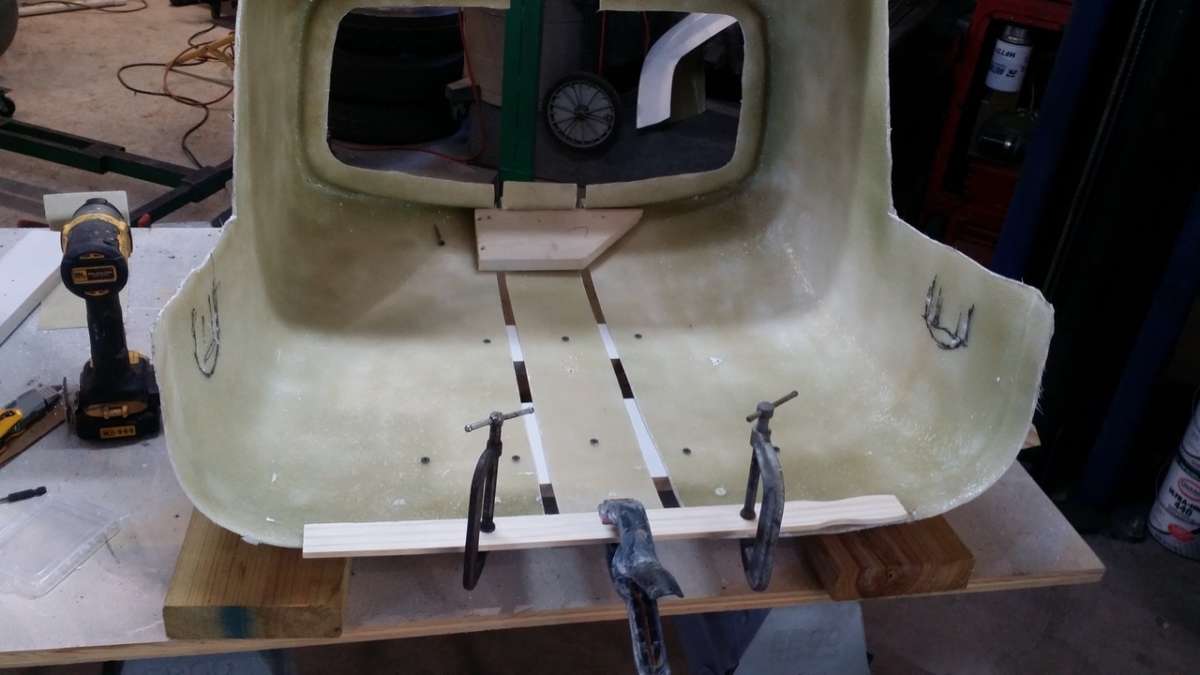
Moving on to the cockpit, I purchased two 4 x 10-foot sheets of aluminum for the floorpans and interior panels. It all came together after lots of drilling, Cleco fasteners and pop rivets. For the latter, I ended up investing in an air-powered rivet gun — definitely a wise choice.
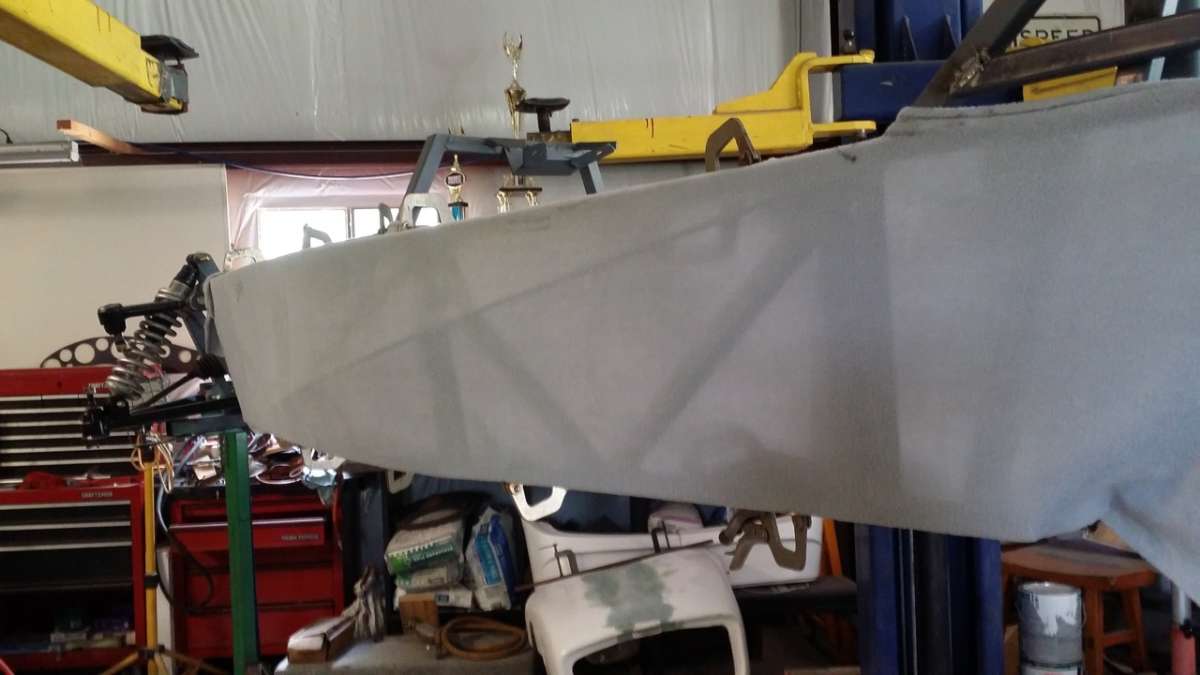
For the body side panels and trunk, however, I wanted to do something a little different than the pop-riveted aluminum panels. I heard that you could stretch fleece material over a frame, coat it with resin and then add fiberglass cloth for strength. So I fabricated frames for the lower sides and trunk, and also inserted a diagonal rod along the sides to create a different look.
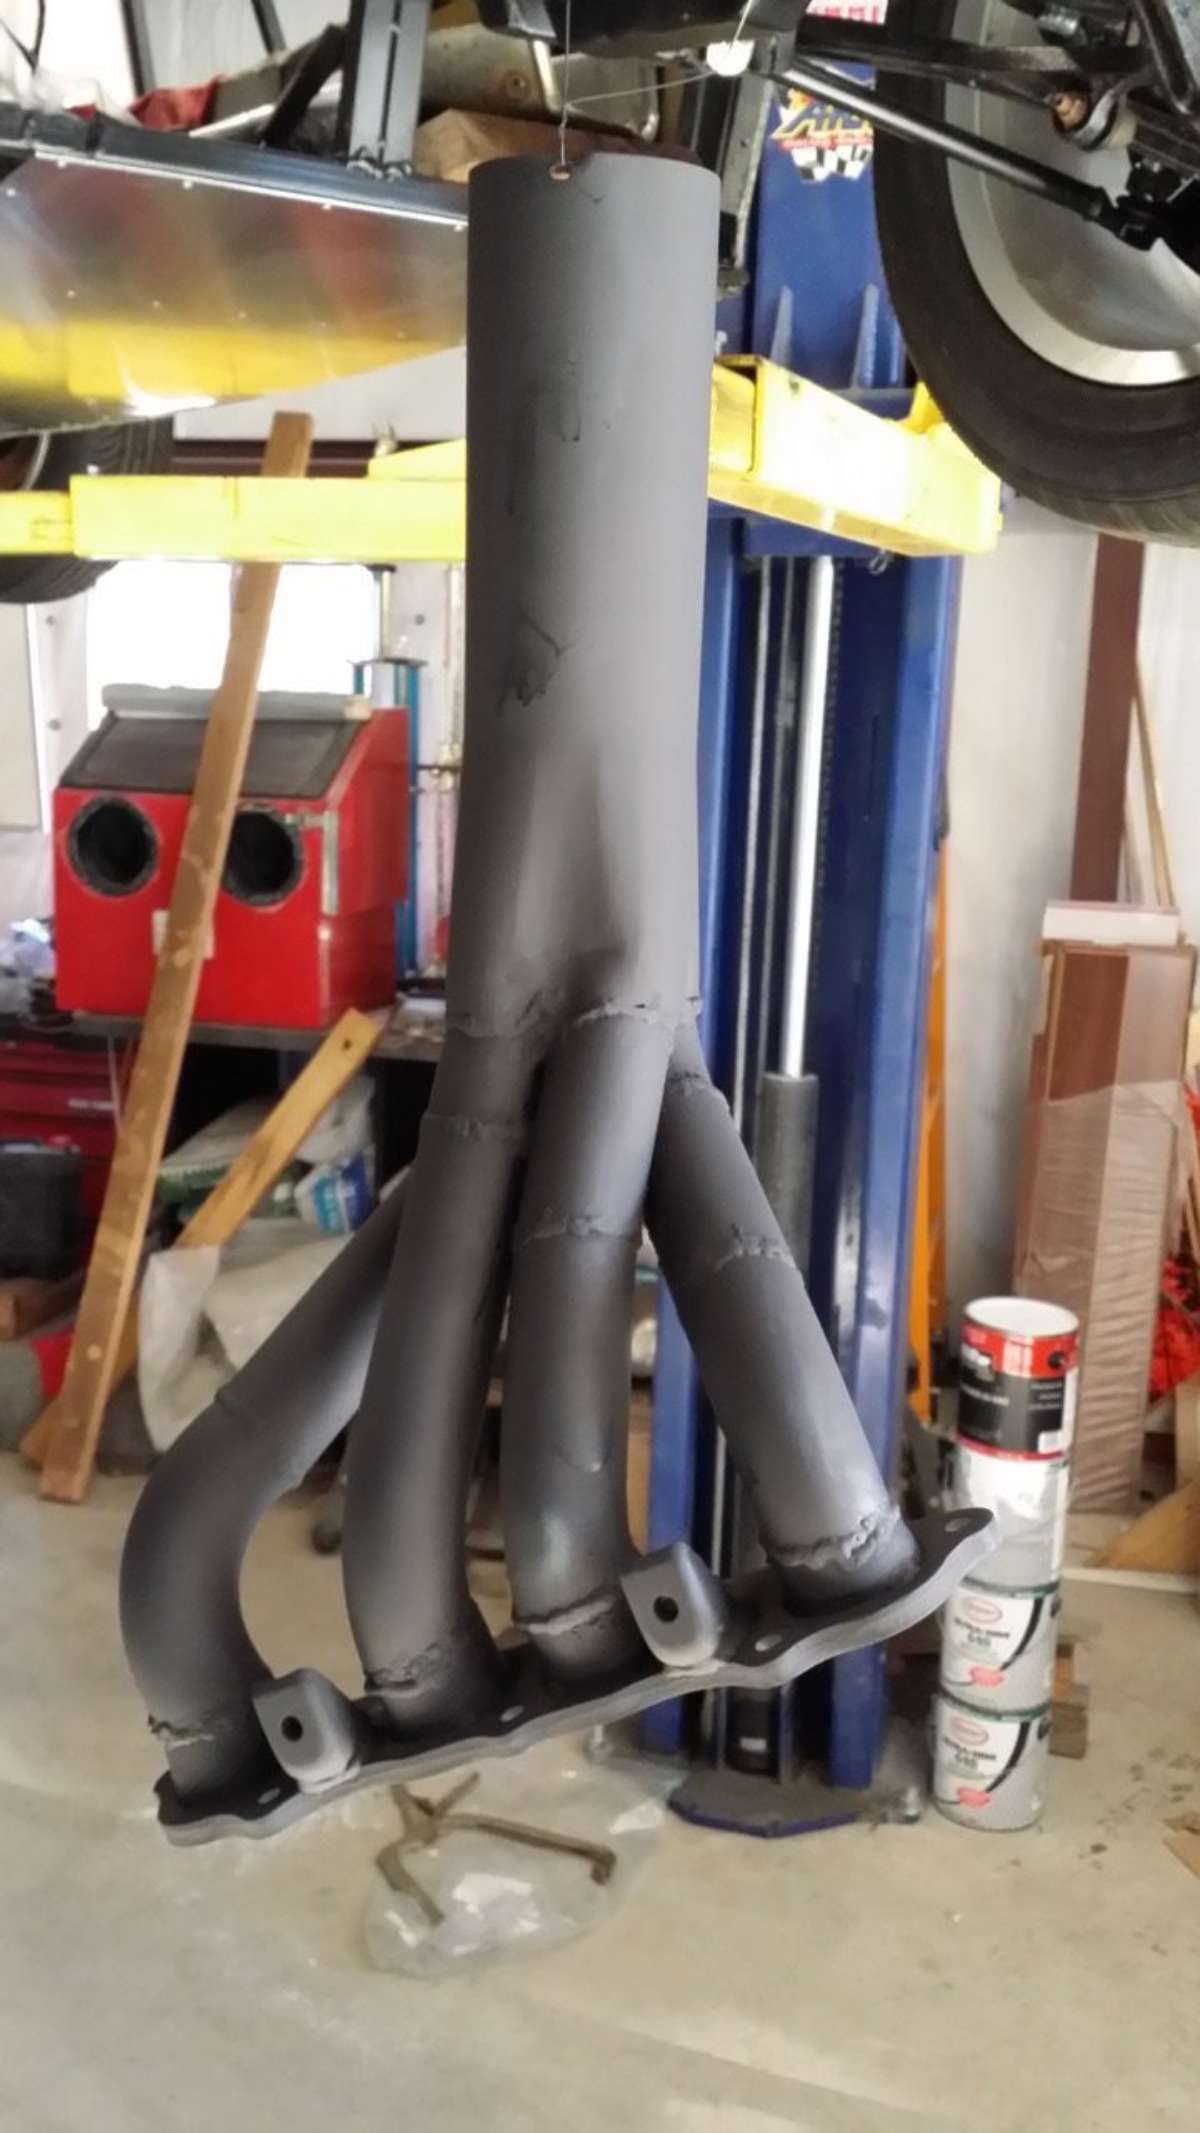
Now I was ready to shoehorn the engine back into the car. I installed a 1993 Volvo radiator, the driveshaft and suspension, and I then had the makings of a car. But the real question is whether it would run after sitting for eight-plus years. After sorting out some wiring and computer issues with Brian’s help (since the S2000 has an immobilizer system), the engine finally started. It ran rough at first and needed a couple new injectors.
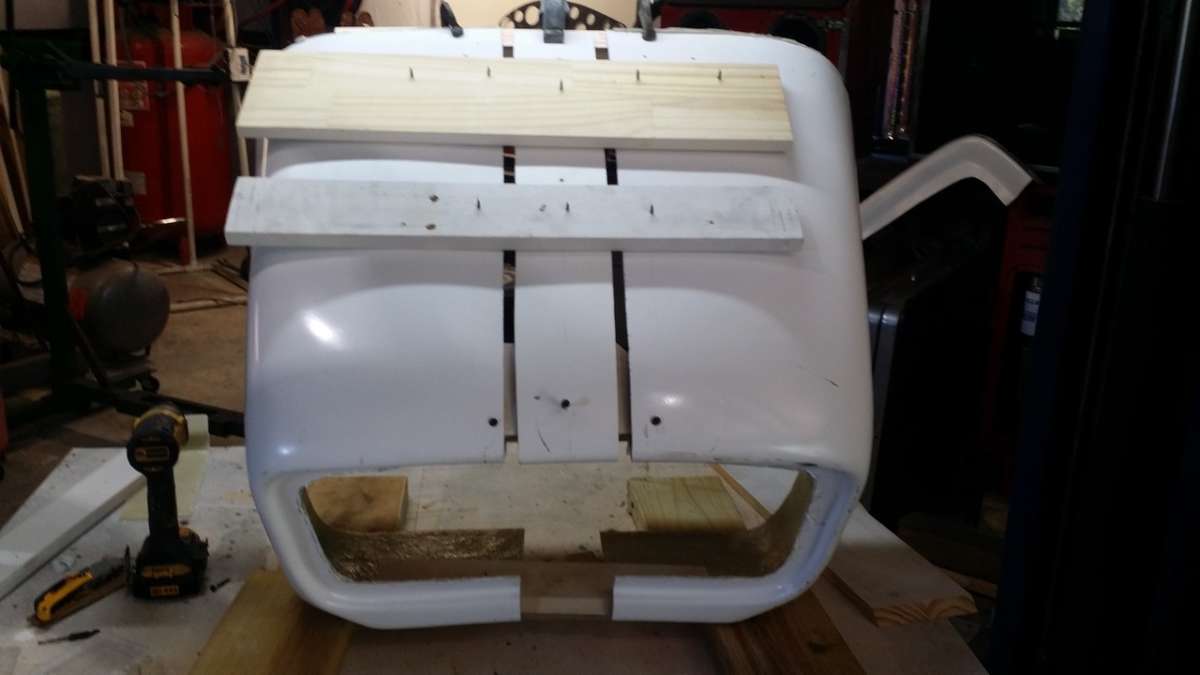
It was great to finally have our engine up and running, but there were still several loose ends to tie up. I wanted a one-piece hood and cowl that would lift up, and that involved fabricating a metal frame and using cardboard and fiberglass to complete the piece. I ended up hinging the hood at the front, and it easily lifts and is held up by gas shocks. I later added two sets of louvers over the engine to vent heat, and tackled the grille construction at this time. A simple round bar shaped to match the opening, with welded-in horizontal bars forms the grille. I also added some hidden tabs for fastening as well.
Getting back to rear fenders, I had tightened up the radius, but now realized that they were about two inches too narrow. So I cut them in two and welded in a filler piece. After a little bodywork they were good to go.
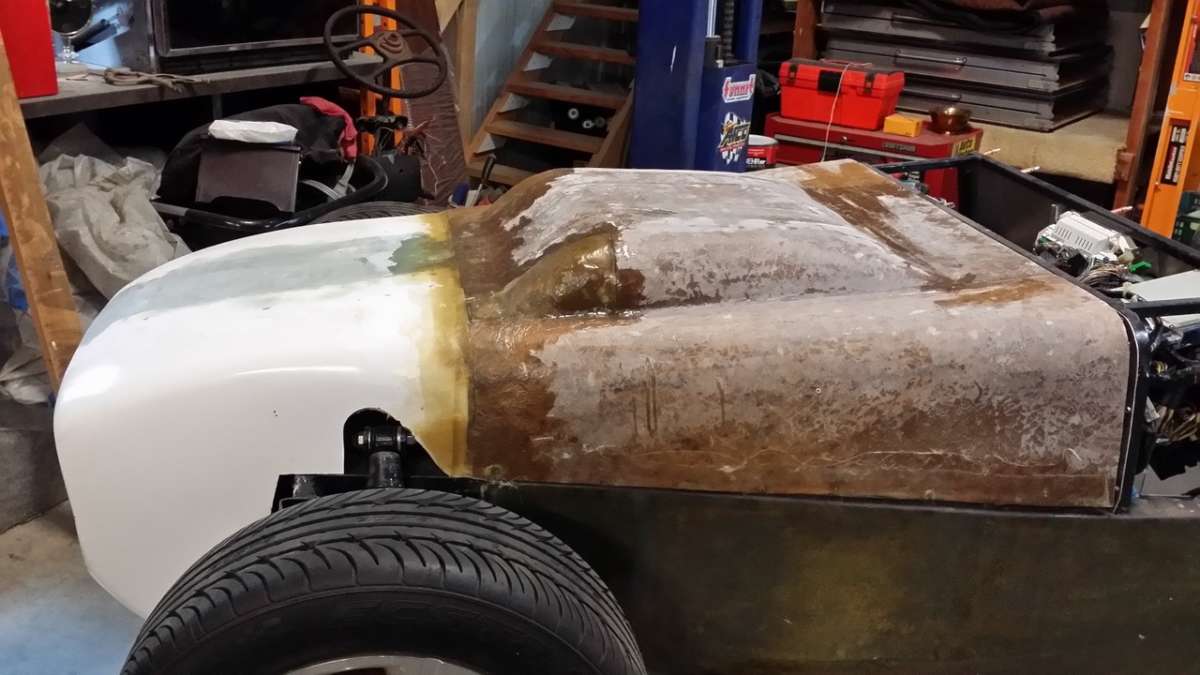


Then it was time for the final finishing of the body — the messy part. I used three different types of body filler: Duraglass, Bondo and Evercoat, depending on what was needed. After initial sanding with 80 grit and disassembling the pieces, it was time to apply a product called Duratec. This is a sprayable gelcoat that provides a good base for the next series of sandings: 150 grit with an orbital sander, then 240 grit and finally 320 grit. After that it was on to wet sanding with 500 grit.
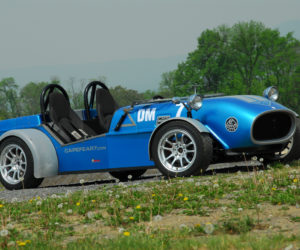
Now you have a nice smooth surface for the primer/sealer. Two coats of yellow paint and then three coats of clear followed, and then wet sanding with 1,500 and 2,000 grit to eliminate orange peel after drying. Then buff and polish with finishing compound.
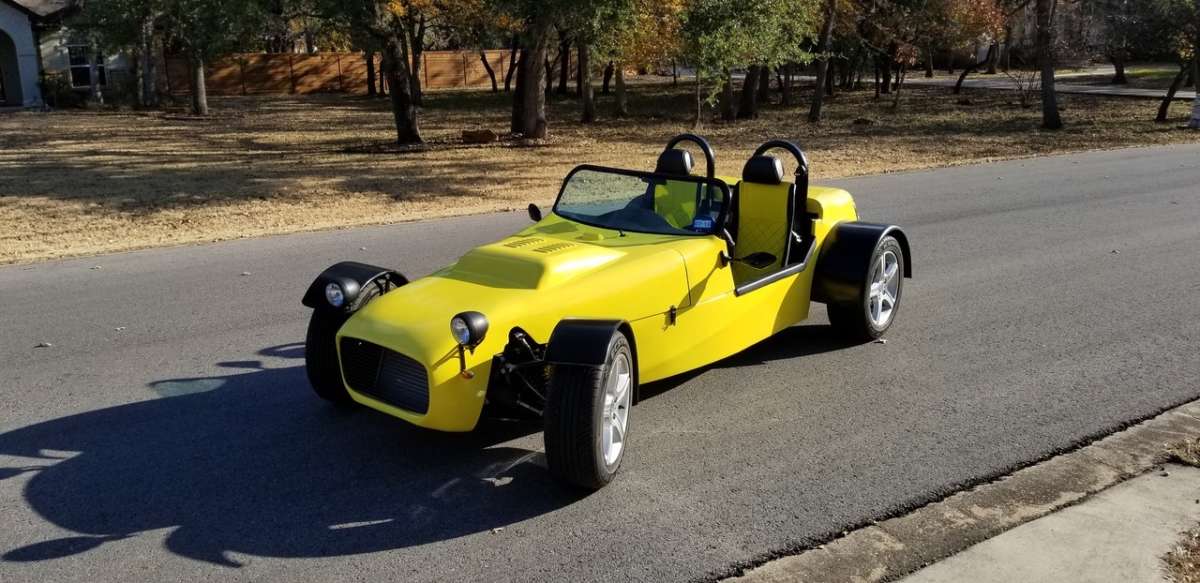
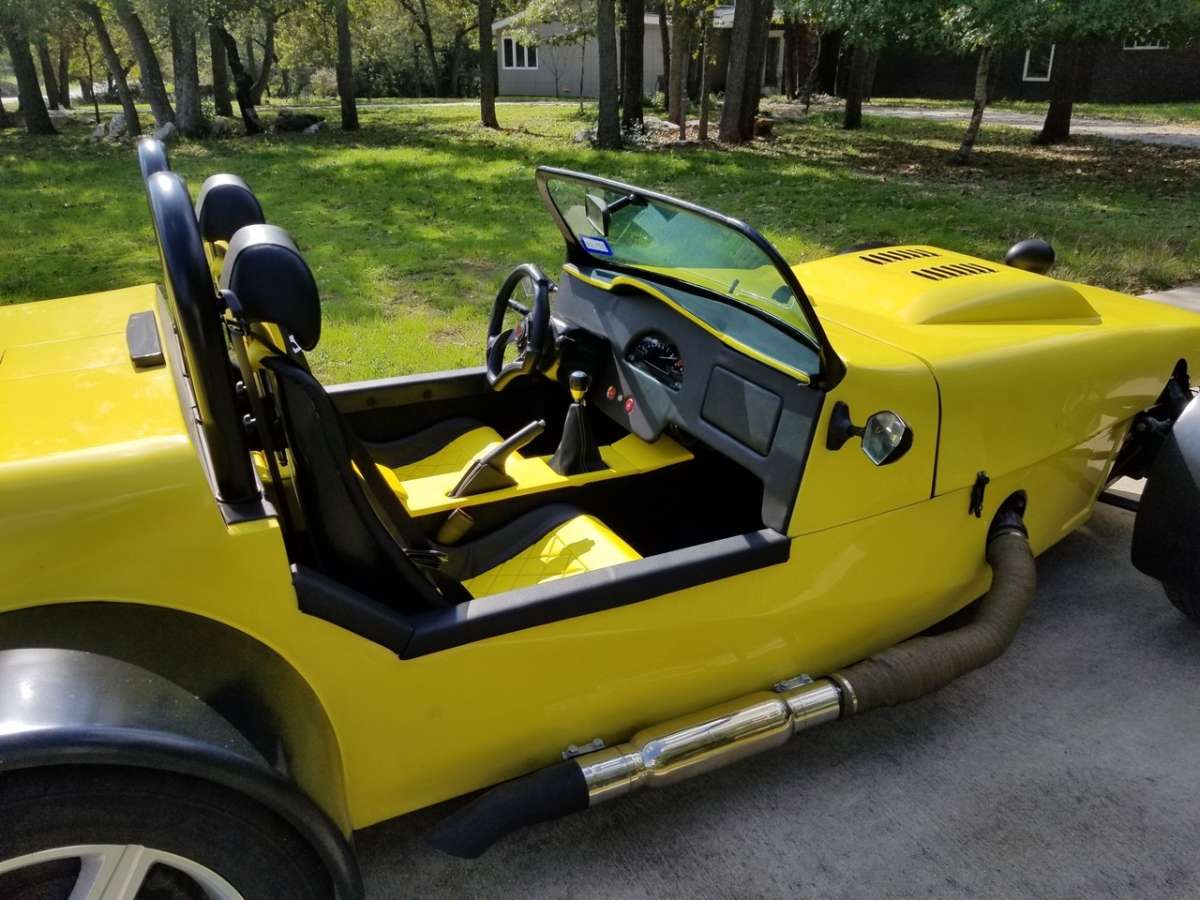
With the exterior pretty much done, I set to work on the interior. I first needed to narrow the seats slightly for them to fit. Then, a trip to the local upholstery shop provided the foam, upholstery material, thread, screws, glue, carpet and trunk liner. After watching many YouTube videos, I embarked upon upholstering my seats. Although I did not have an upholstery sewing machine, I did have an old Singer sewing machine that did the job.
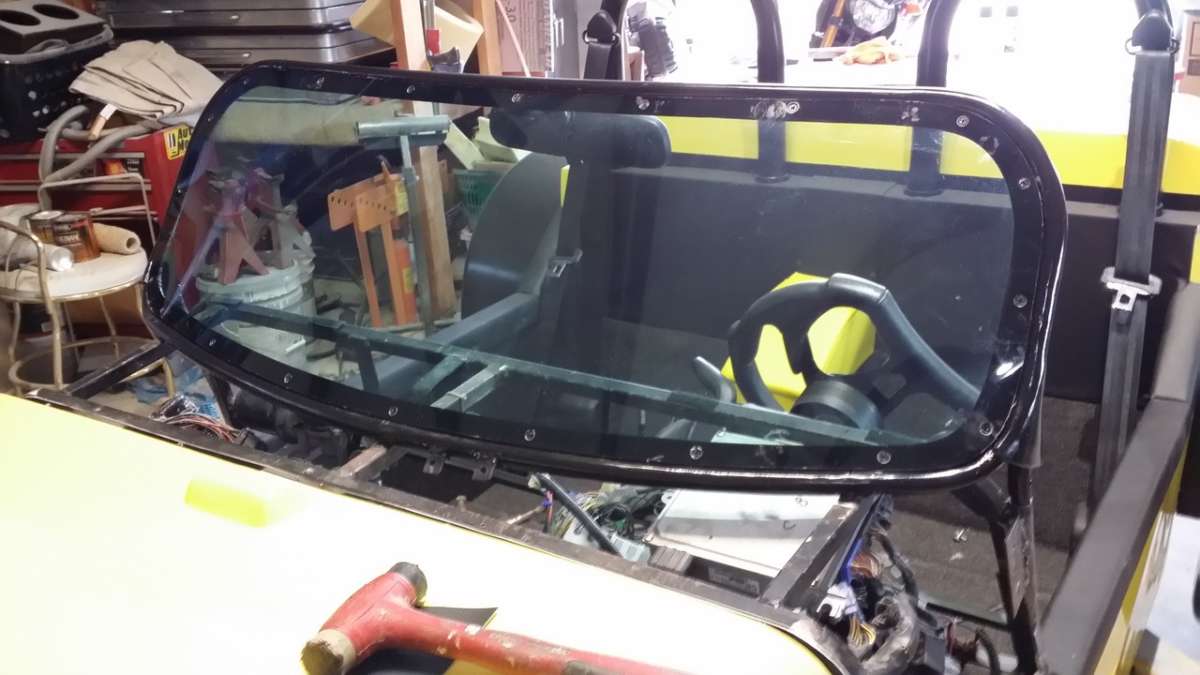
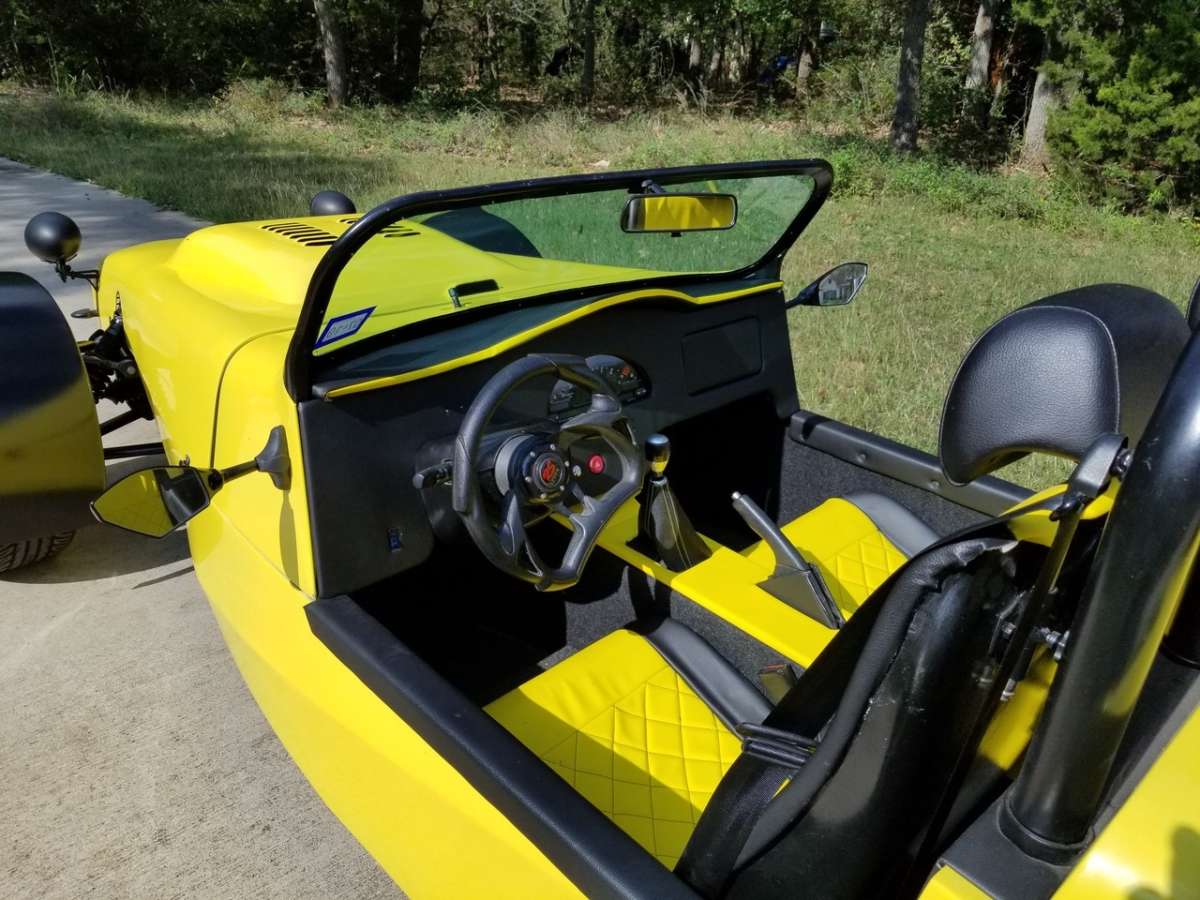
I also made a glove box and small storage compartment on the console and covered the dash and dash cap. I tried making a shifter boot but found a really nice one on eBay that was black with yellow thread. I also made padded strips to cover the frame between the outside and the interior. With the cockpit wrapped up and the installation of a curved 1/4-inch Lexan windshield, the car was ready for some test and tune miles.
All told, the takeaway is that given the desire to accomplish something, it is possible. I learned from my mistakes, and I made plenty, but the bottom line is I was able to do this with the help of many people, plenty of time and lots of patience.
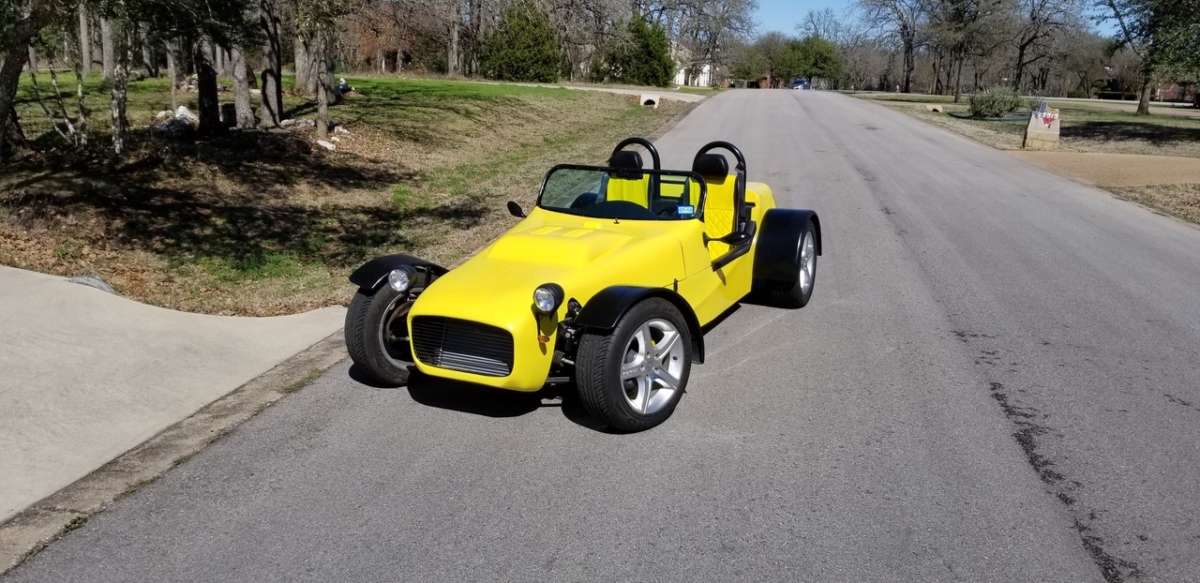
As far as the driving experience, taking the engine from a 3,385-pound car and stuffing it into a 1,830-pound car that is sitting only five inches off the ground, is a great way to get an adrenaline rush. It does keep me on my toes and I have to dial back the urge to not max out the VTEC every time I take off. The bright yellow color makes the car easier to see in traffic, but the low stance is a drawback sitting in traffic next to a lifted pickup with its exhaust pointed at my face. But I can live with that, as I don’t hang around long after the light turns green.


Comments for: Supersize Super 7
comments powered by Disqus