
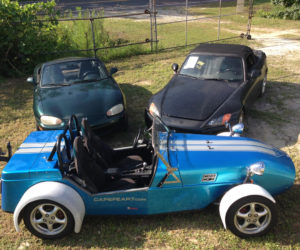
Building a CapeFear7
As Told by David Culp
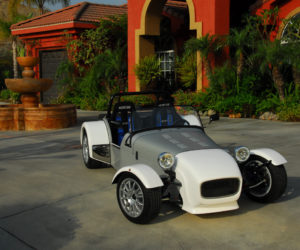
Photos by Steve Temple
My firm C.R.S. began in 1983 as a custom coach works and restoration shop. Our chief body man, Martin Rudholzner, and I have worked together (off and on) since 1969, but in opposite positions. Well, I should say that I was the chief fiberglass man, having been making surf boards and doing small boat repair since 1964 prior to getting into project cars.
We started out building Meyers Manx dune buggies, then a Kelmark Toronado GT, Fiberfab Valkyrie GT, CMC 356 Speedster and a Meyers Tow’d (mine). Martin, having a coach-building background from Germany, put many finishing touches to make these kits look more like factory cars.
In the early Eighties we were asked by a kit manufacturer to modify his buck (prototype) to make it more street-able without changing the basic look of the car. The design was beautiful but not practical, with a long, low nose that would scrape on driveway ramps. And when its gullwing doors opened water would pour onto seats, and there were no air vents inside the main cabin and the door windows were fixed with a small opening.
So we added seals and drip channels to doors and trunks, rotated the inner fender and shortened the nose, and made door windows that opened. The manufacturer was happy with our mods, as he was more of a designer, and the shape had been his main focus. It is easy to get caught up in great looks and lose practicality.
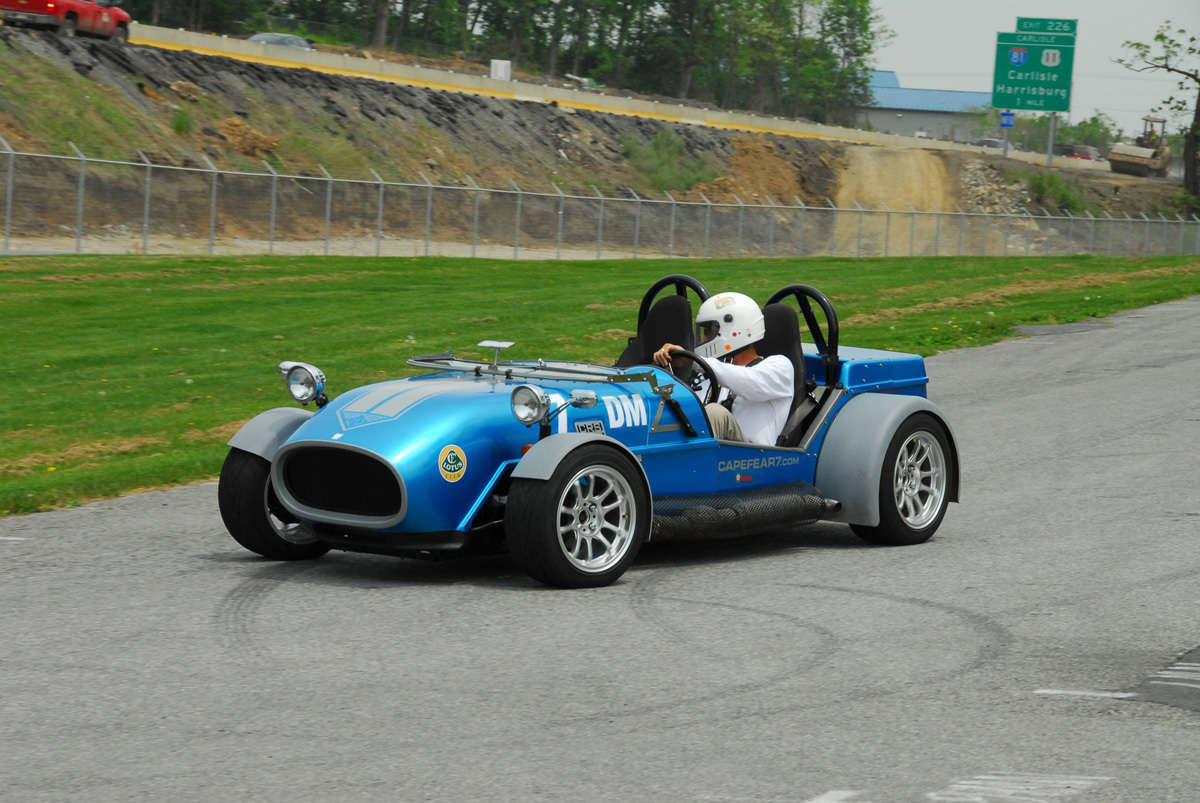
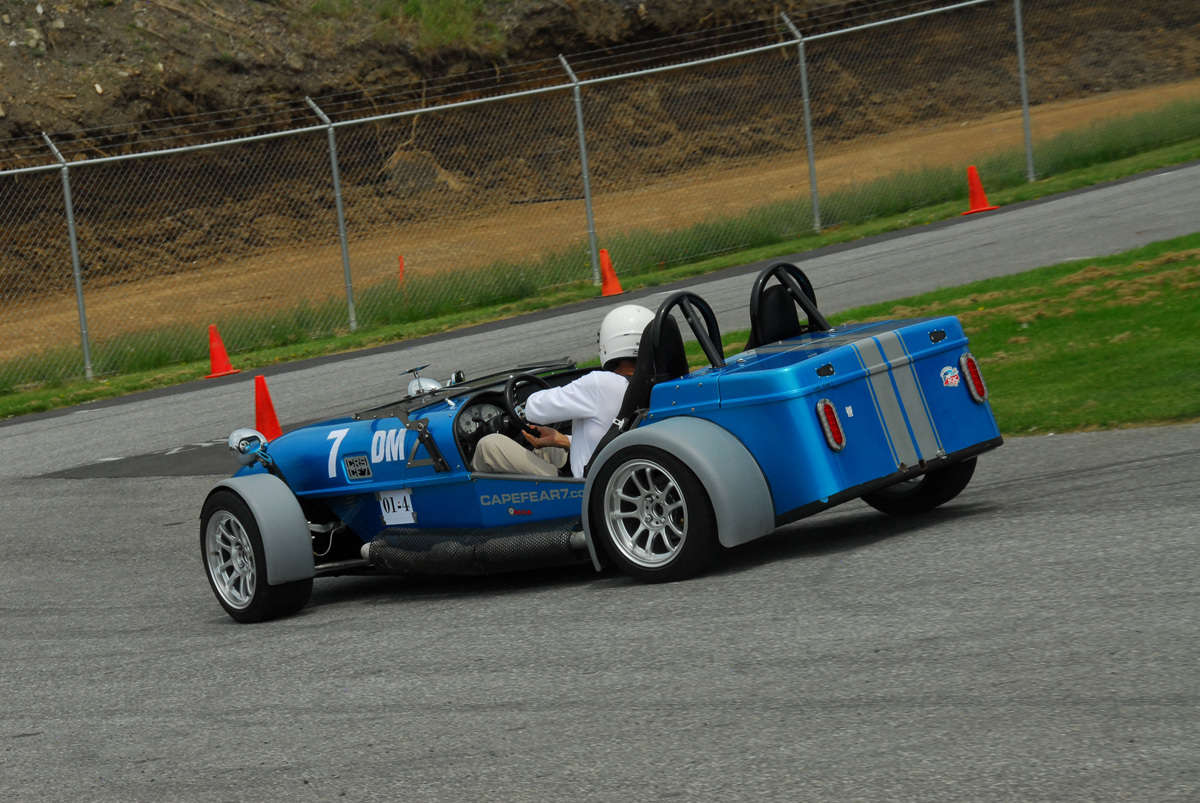
When we started to build our CapeFear7 CF7 we sat down and listed what we wanted our end product to be. We wanted a daily driver that would be fun to autocross, possibly use on track days or vintage race. Not really after a race car, but would be able to easily make it into one. Flexibility in four- and six-cylinder engines, transmission and rearend selection.
By having this list, it kept us focused, we knew that the Locost 7 area is where we wanted to be. This made the design easy, since Lotus had led the way. Parts were sourced, a prototype was built. It showed us that we needed a wider chassis, plus the suspension did not handle as well as expected with wide tires. We paused and then made the decision to source our car parts from a single vehicle.
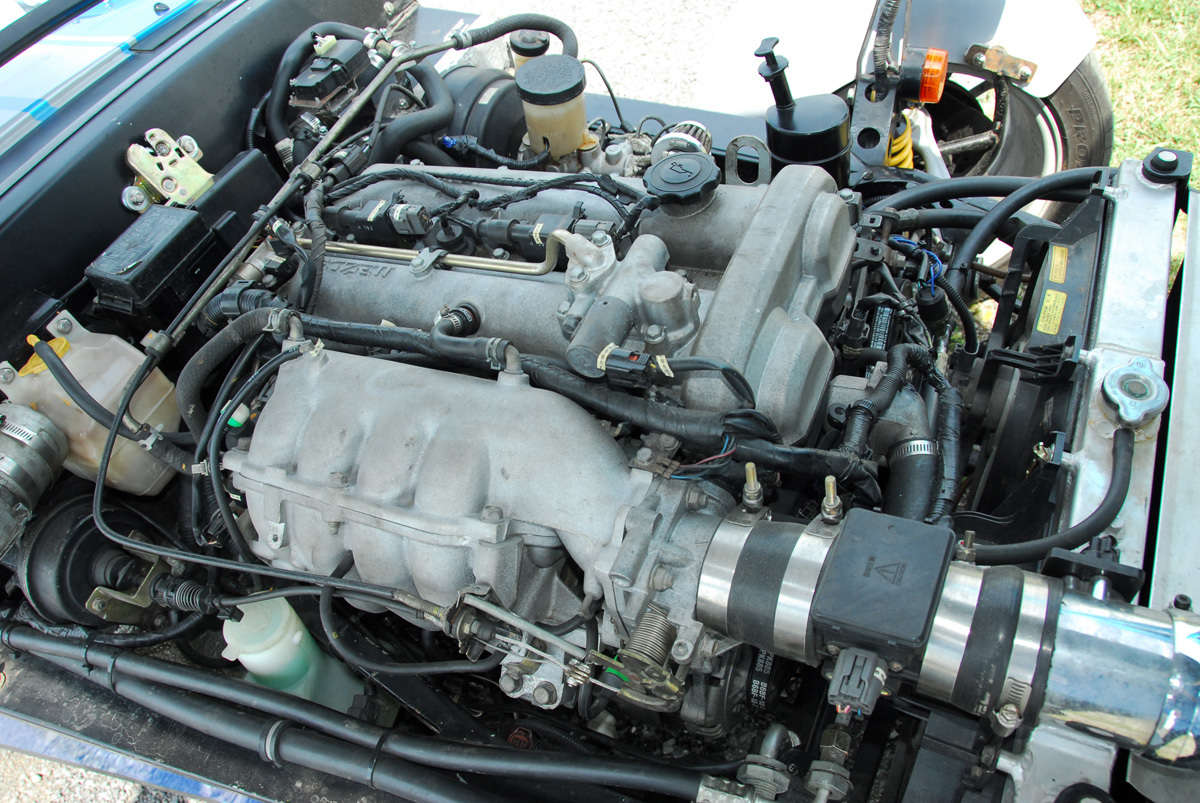
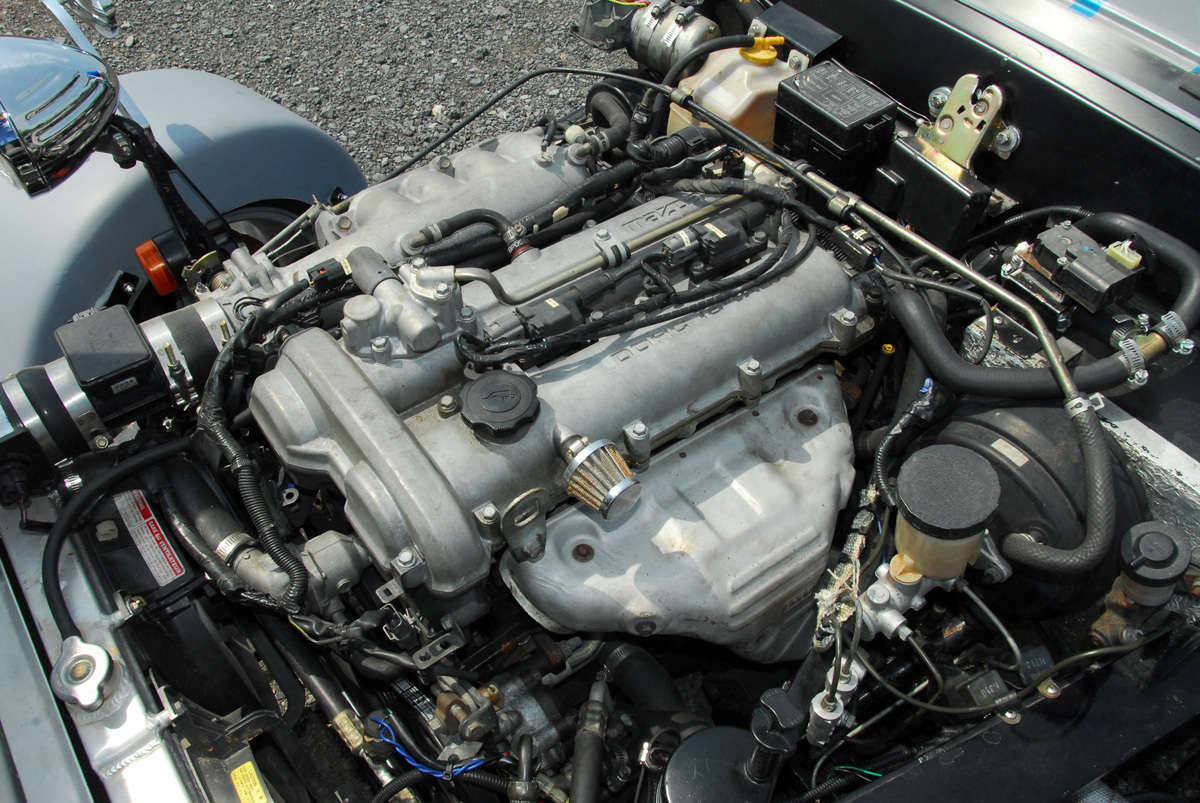
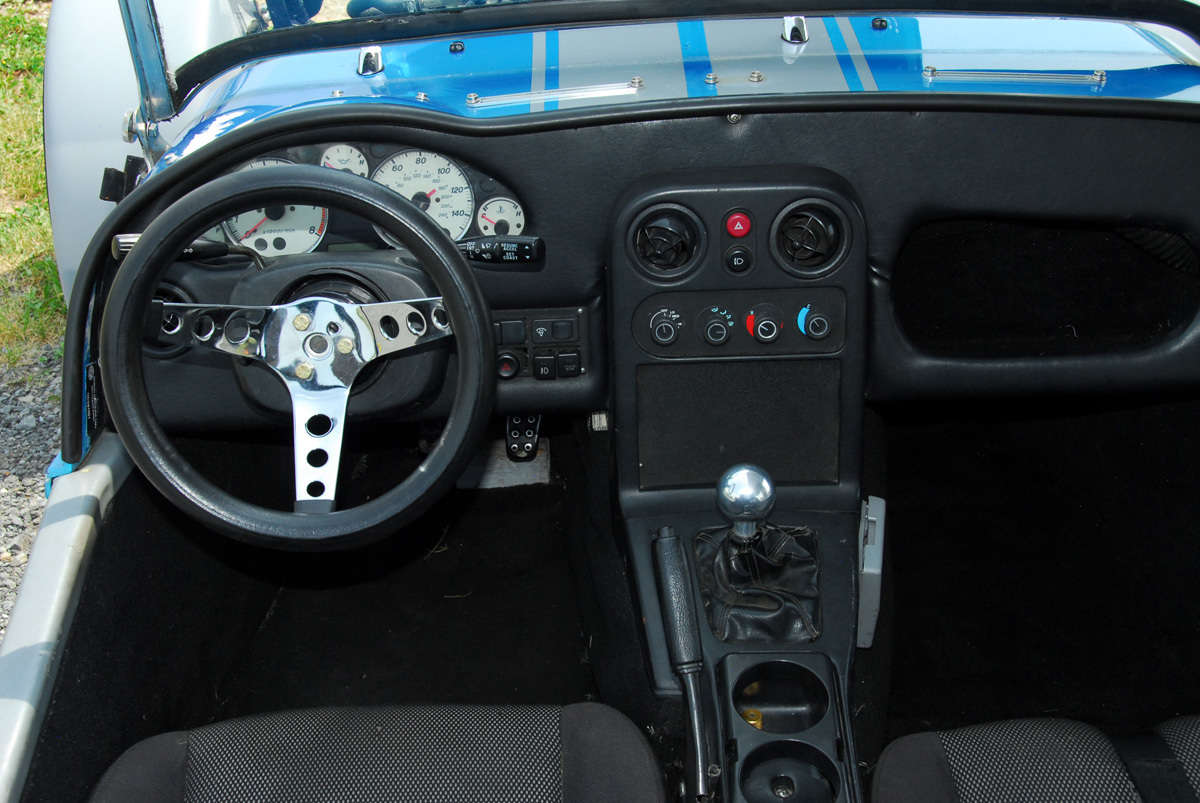
The Mazda Miata NA/NB fit the bill. A Miata Maintenance Manual is your best guide in torque settings and guiding the build. We also supply a set of instructions for areas not covered in the Miata Maintenance Manual.
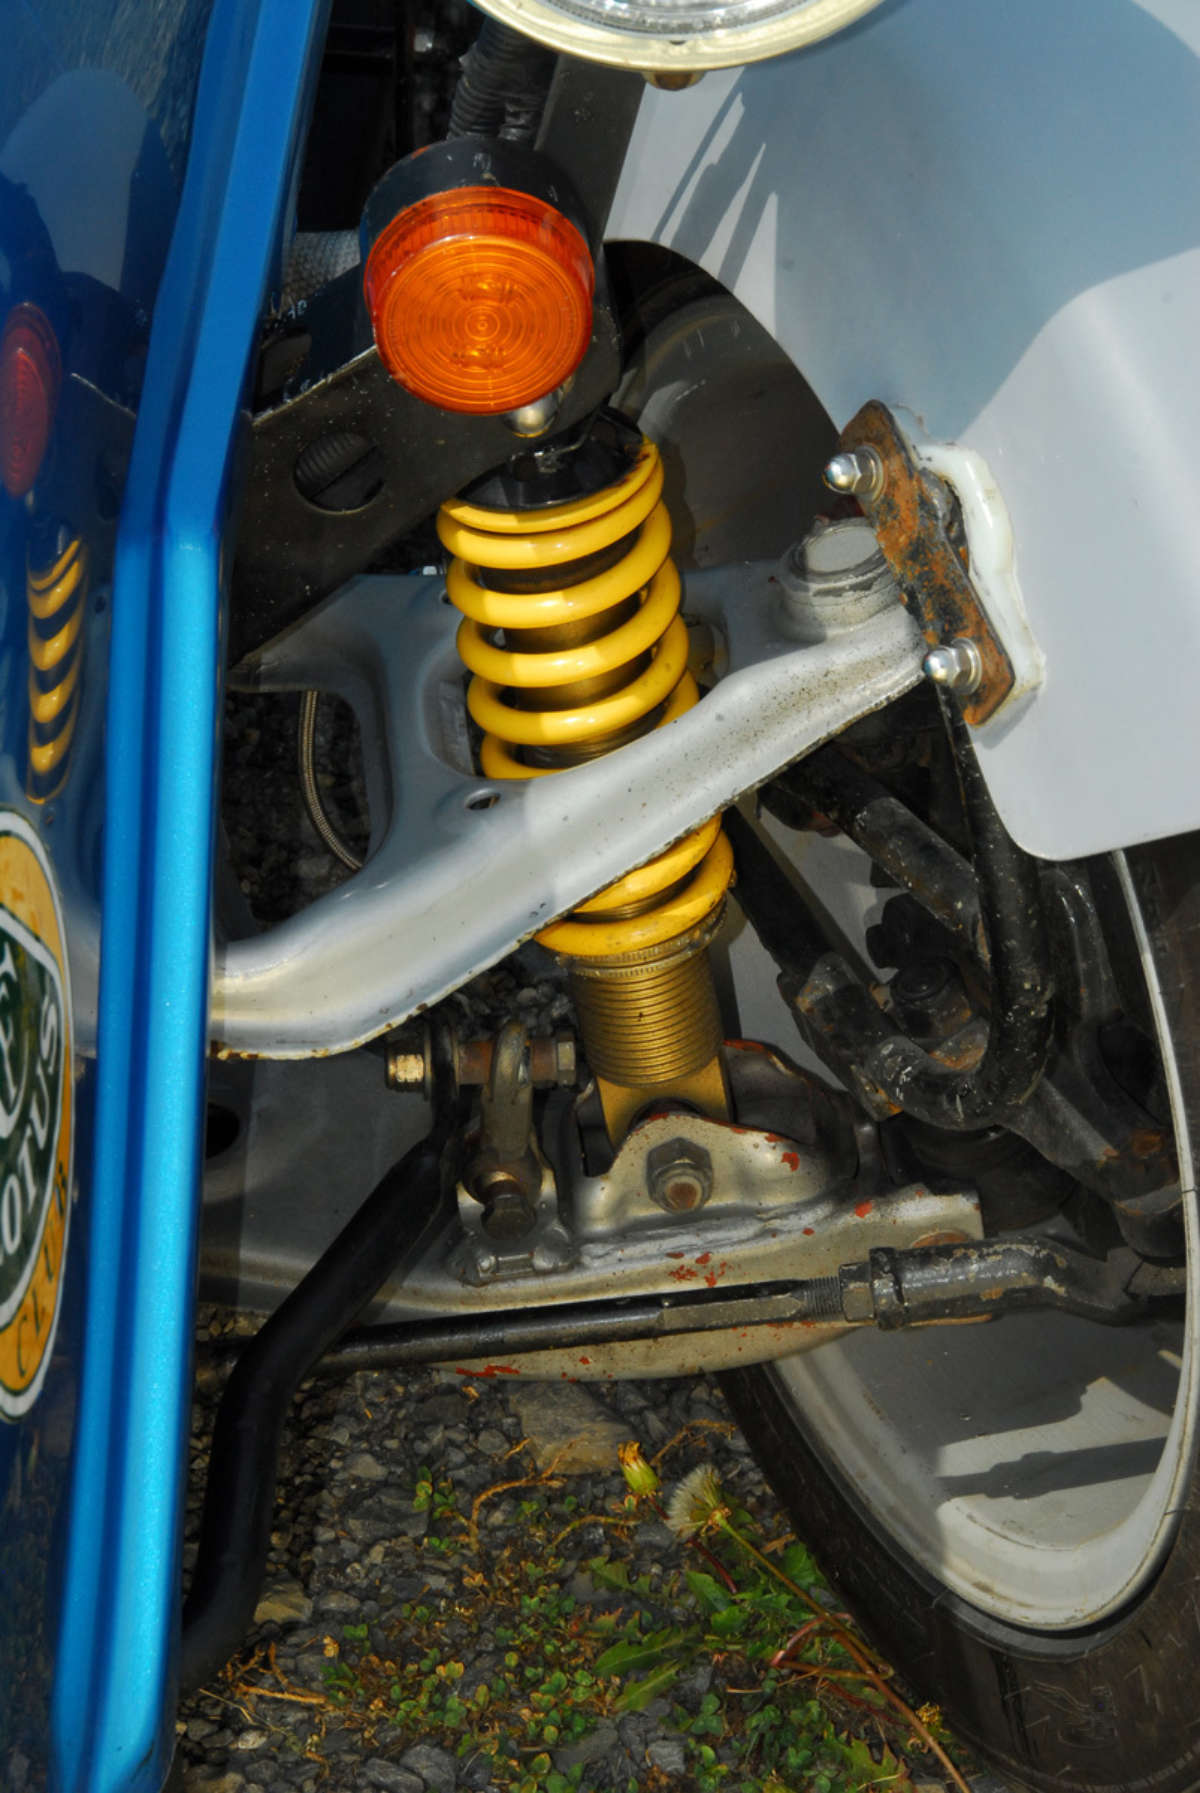
We modified our focus list somewhat, with ease of build moved up to the top, and built a new prototype. We now would use the complete rear subframe, differential, and suspension, jig the NB front suspension with one modification on the placement of the lower control arm slot and adjuster ring for more camber if needed.
As for the Miata wiring harness, we disconnect door wiring and anything else you are not going to use, but we do not recommend cutting any wires. All the extra wire is looped together under the dash area and taped together. This keeps all the factory codes for service.
The instrument panel is used either in the center of the dash or with our optional scuttle centered over the steering shaft. We lengthen the steering shaft and shorten the (new) drive shaft. Parking brake cables are crossed left to right which takes care of the difference in distance. Two holes need to be drilled in the rear subframe to locate the newly crossed wires. After adding about 21 nuts, bolts, screws, and brake lines, the rear suspension is complete.
The front suspension and steering come off the car and onto the frame mounting points just as you would replace them on the car. Again, a Miata maintenance manual is your best guide in torque settings and guiding the build.
The front fenders are attached to fender stays on the front spindle. Rear fenders mount onto the body of the CF7 with five bolts. The nose section is hinged to the front lower frame rail with hinges with removable pins. There are two stops, one on each hinge to locate the nose section when it is opened.
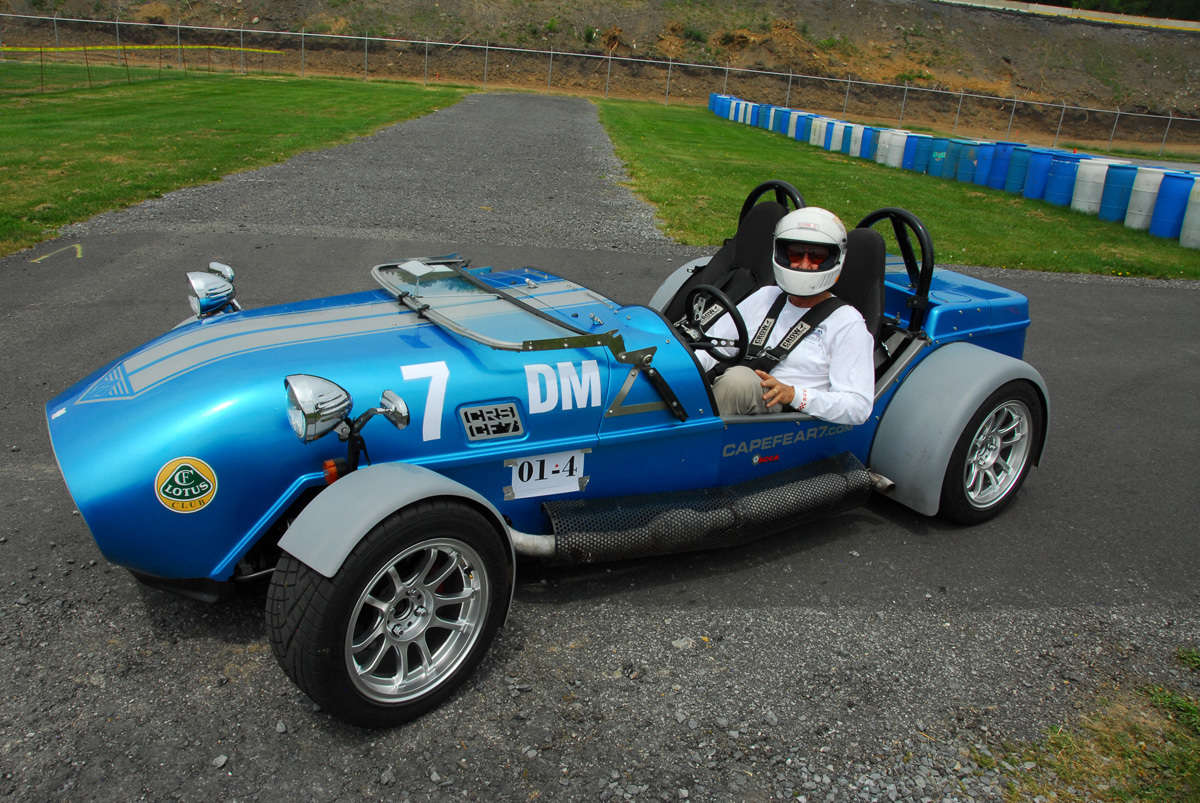
We use the seats from the Miata, right seat to the driver side, left seat to passenger side. We can put them in differently, but most Miata passenger seats have much less set to them and therefore are usually more comfortable than the driver’s seat.
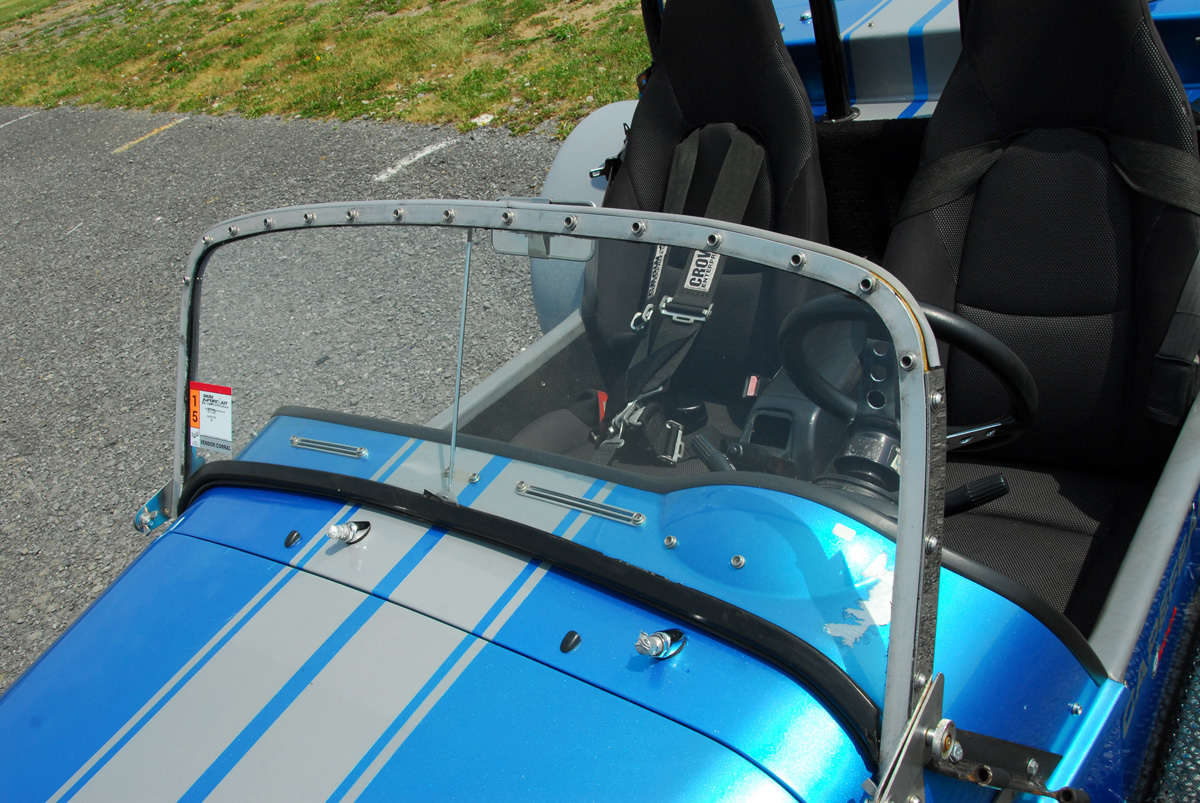
Regarding windshield stanchions, we have a fixed or a folding model at 13 inches, or 16 inches for tall drivers. Windshield glass is not furnished with the kit but a template and instructions are.
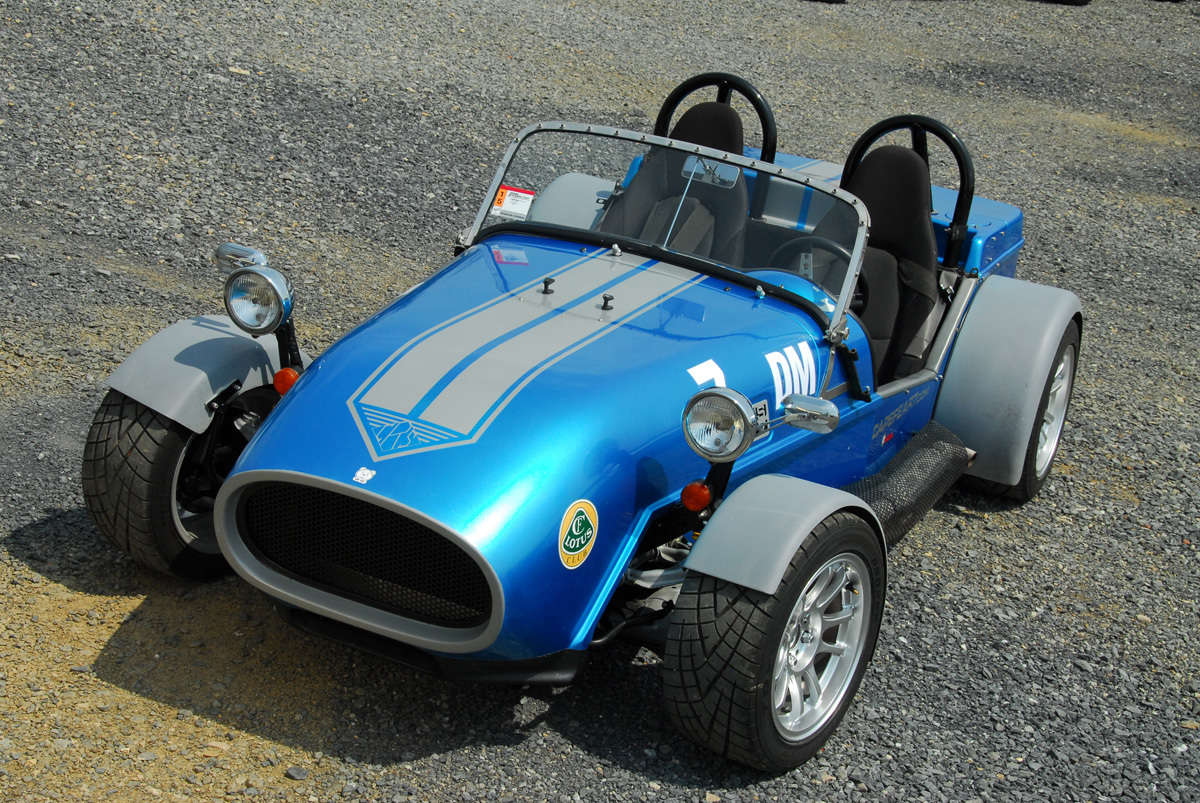
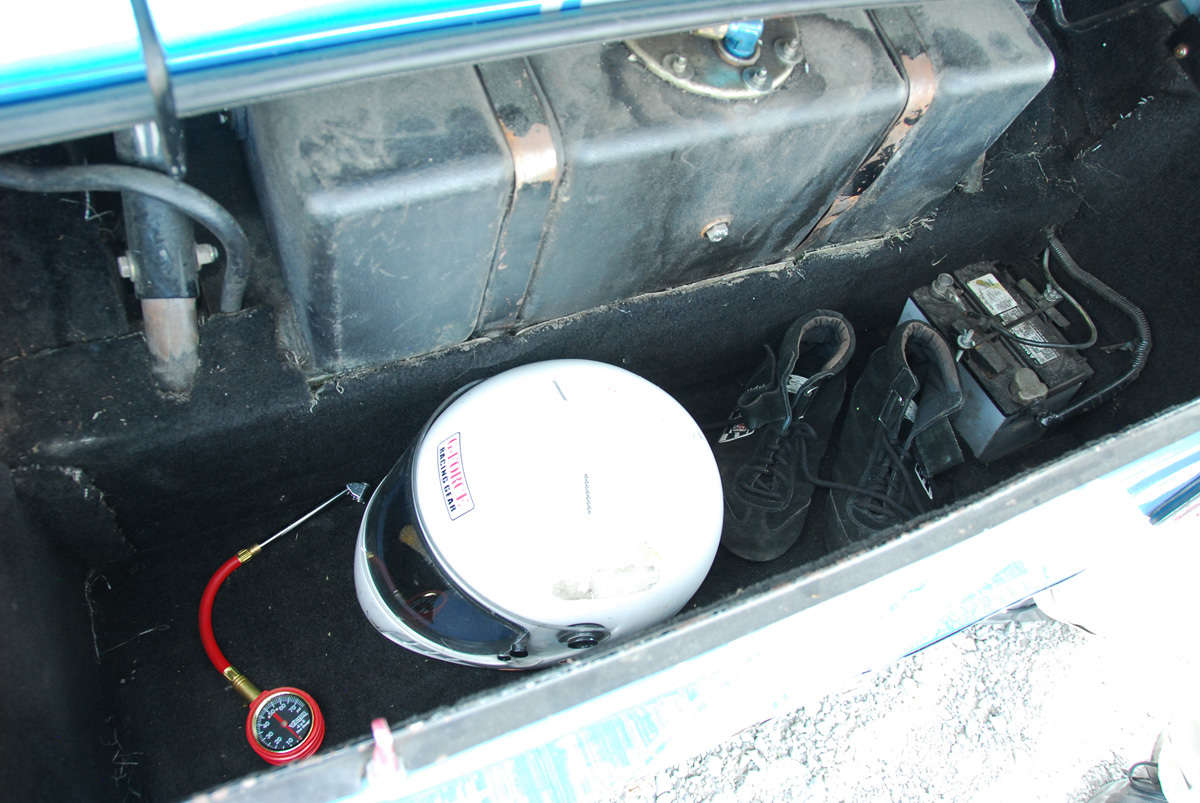
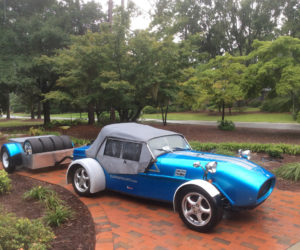
Since this was going to be my daily driver, I needed some where to carry groceries, parts, helmet, etc. I added nice inches to the rear which gave me a 12-inch opening at the top and 16 inches at the bottom.
With a frame that worked very well, it was time to design the body, and it being a replica made this step easier. We built a wireframe buck on top of the prototype frame, using 1990 Miata parts. Knowing the basic differences of NA/NB Miatas, we made allowances for the larger differential in the tunnel. Not having seen a VVT engine, we did not realize that the tallest part of the engine had move to the front. So bonnet prototype was very close to the Lotus7’s, but a little taller due to no engine part hanging below the frame bottom. While showing off our full conforming prototype, I noticed an autocross 2002 Miata with this part sticking up in front of the engine. I made a copy of the part and found it stuck through our top over an inch. That required some more designed work.
We could have made a bubble, but it’s not a look I like so we are now making bonnet prototype #2. Now we take a much closer look at all the engine types that we might use. This caused us to use a filler piece on the frame and widen the new bonnet cover for V8, V6, and taller, straight-6 and 4-cylinder engines. If the builder wants a lower look they can still lower the engine in the frame and cut the lower sides of the bonnet and scuttle.
We built the mold of our bonnet where the front nose section could be a separate piece. This allows a Locost traditional aluminum bonnet for the back section, again trying to get different looks from the same parts.
In this same theme we make our scuttle for our current CF7 from a portion of the rear full bonnet by adding a firewall piece to it. By adding a newly created full-width scuttle to the full bonnet length you move the windshield back six inches, and again have a more traditional Locost look. However, it is much harder to get into with a top that a daily driver would have with this new scuttle placement.
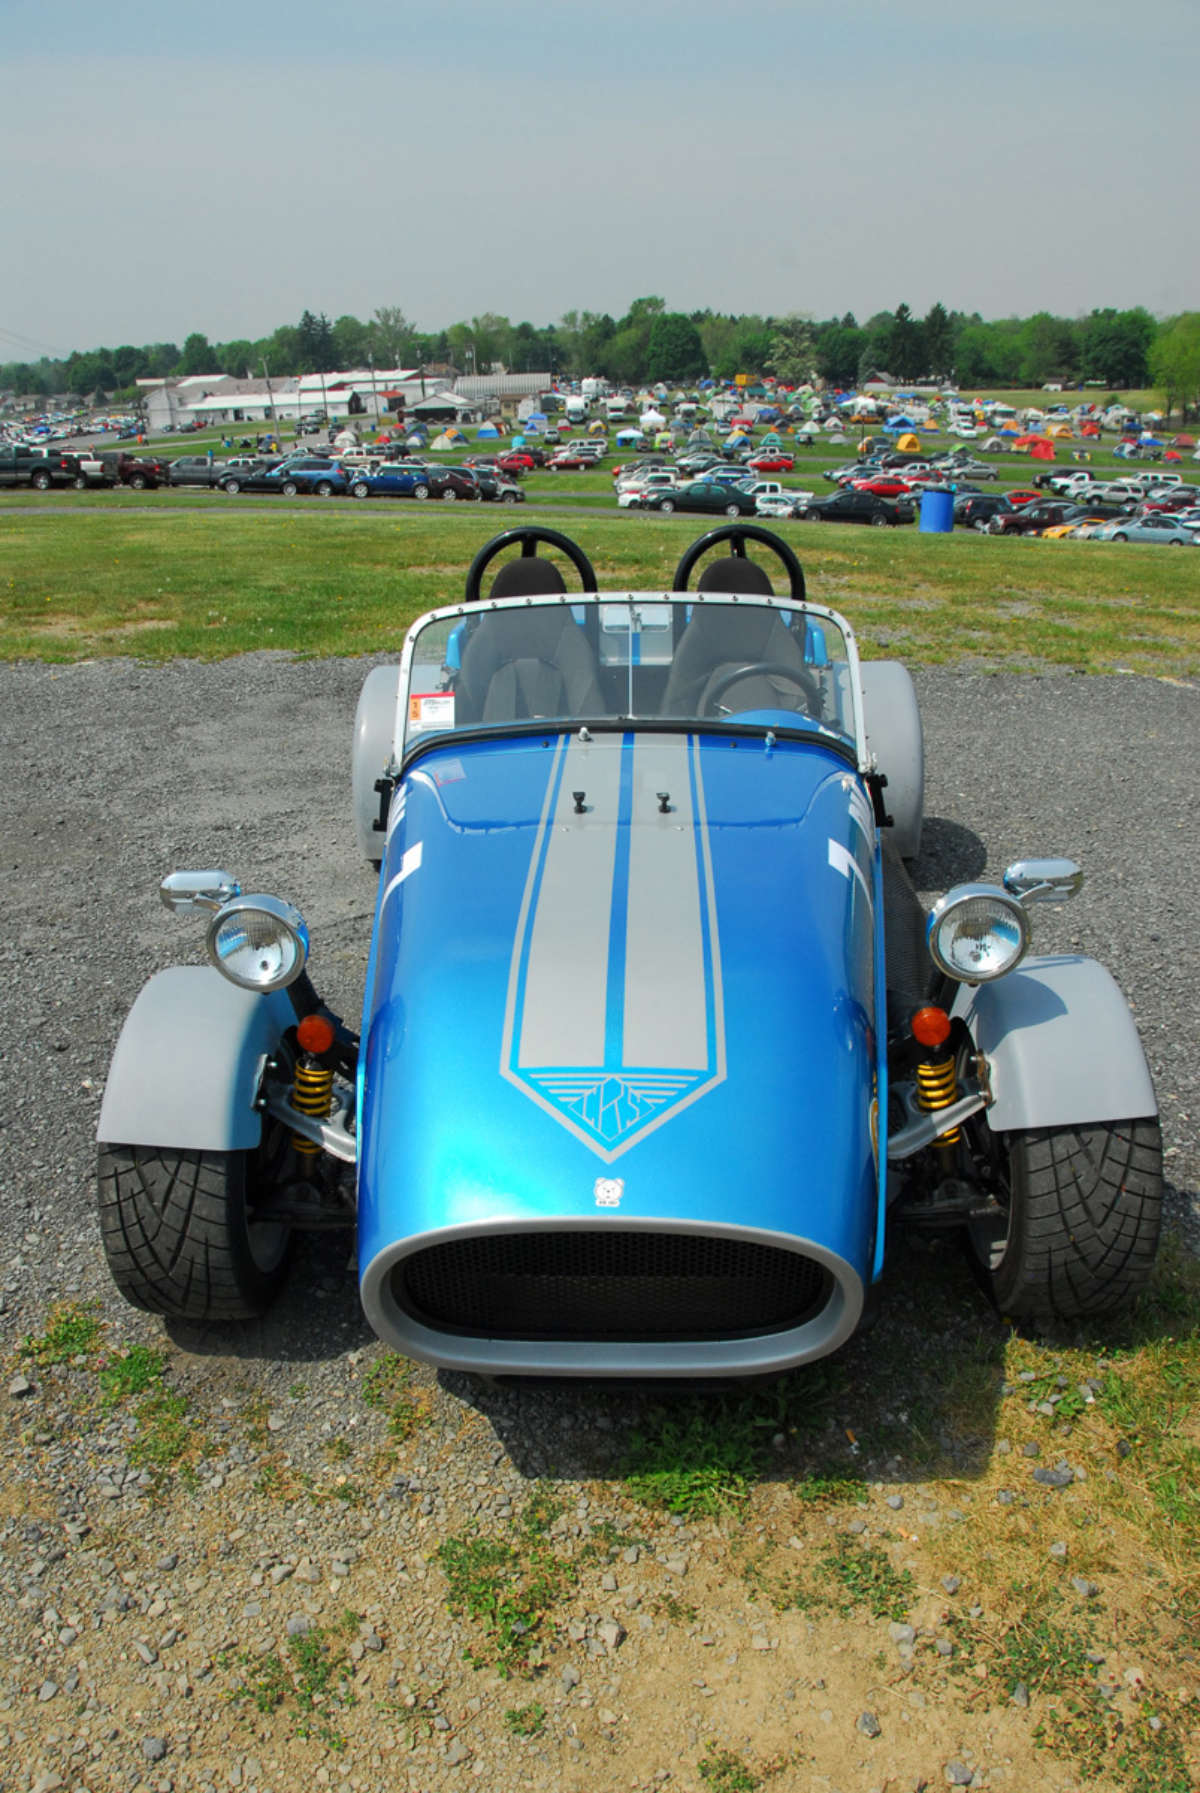
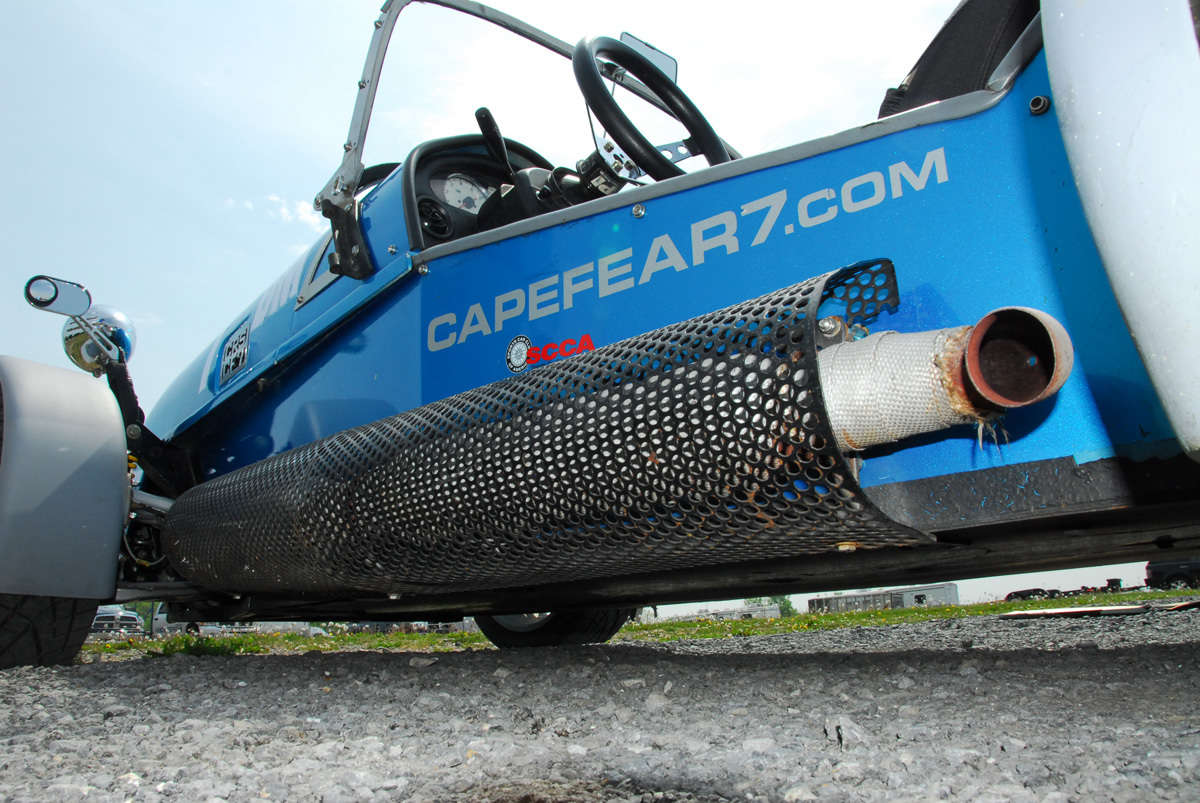
The rear of the car can be any length the customer would like, from traditional to 18 inches at the top. Our current demo car has a 12-inch trunk and will hold two carry-on suitcases. We think this size balances the car’s look, but that’s a buyers choice.
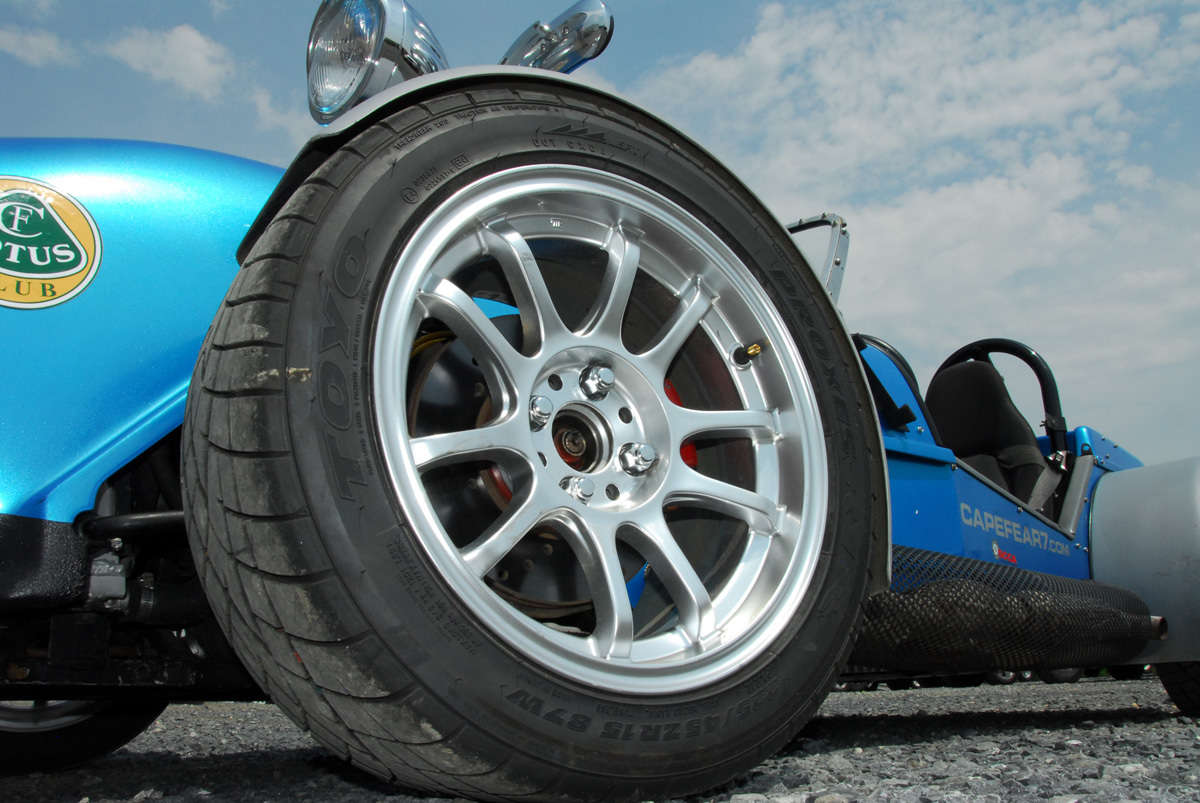
Autocrossing has helped us make a few changes to the roll bar, but a lack of choice 15-inch tire sizes has prompted us to add about 1.5 inches to the rear side height to make room for taller tires and wheels.
We also now have a second style of frame, with the rear suspension jigged onto the frame instead of using the Miata subframe. This is done mainly for people that want the lowest weight possible for their car. This frame also has a new adjustable front and rear upper control arm, these are optional on the standard frame.
In the near future our Honda S2000-powered CF7 is taking shape. The prototype should be auto crossing before the end of the year. If all goes as planned it will be a 2016 model. The design work on our removable hardtop has been completed and should be ready in the second quarter 2016

Looking farther forward, we are exploring the use of an NC Miata donor version. (Note the Editor’s commentary on this same subject in his Throttle Steering column in the July/August 2015 issue.) As the new ND Miata has just come out, the first years of the NC Miata are eight to ten years old now, which price wise makes a case for their use as a donor. Even though we are making optional-power chassis configurations and some different suspension parts, we still feel that for most people the single donor is the best way to go. It is easy to maintain, repair, and service.
We recently helped a new owner of a replica dial in his car at an autocross at ZMax Drag way parking lot and had our choice of the single-donor project car solidified. We compete against European Lotus replicas and hear their owners talk of the challenges in getting replacement parts. Even consumables such as brake pads front to rear are from different car manufacturers. And some of these parts are not imported to the USA.
When asked about our components, we tell them they are just an NA or NB Miata part and usually get a blank stare, then more questions about our A/C, hood (top), doors and boot (trunk). Then we tell them of driving our CF7 as a daily driver. Total mileage on the mechanicals is approximately 175K, and approximately 65K since the car was built. During this same time period we auto-crossed over 650 laps. We dyno’d last year and saw 120 hp at the rear wheels, and we have had a great time. Myself and a friend have driven the car for the last two years and have been competitive and had a lot of fun for not much money. So there’s nothing to fear here!


Comments for: NO FEAR
comments powered by Disqus