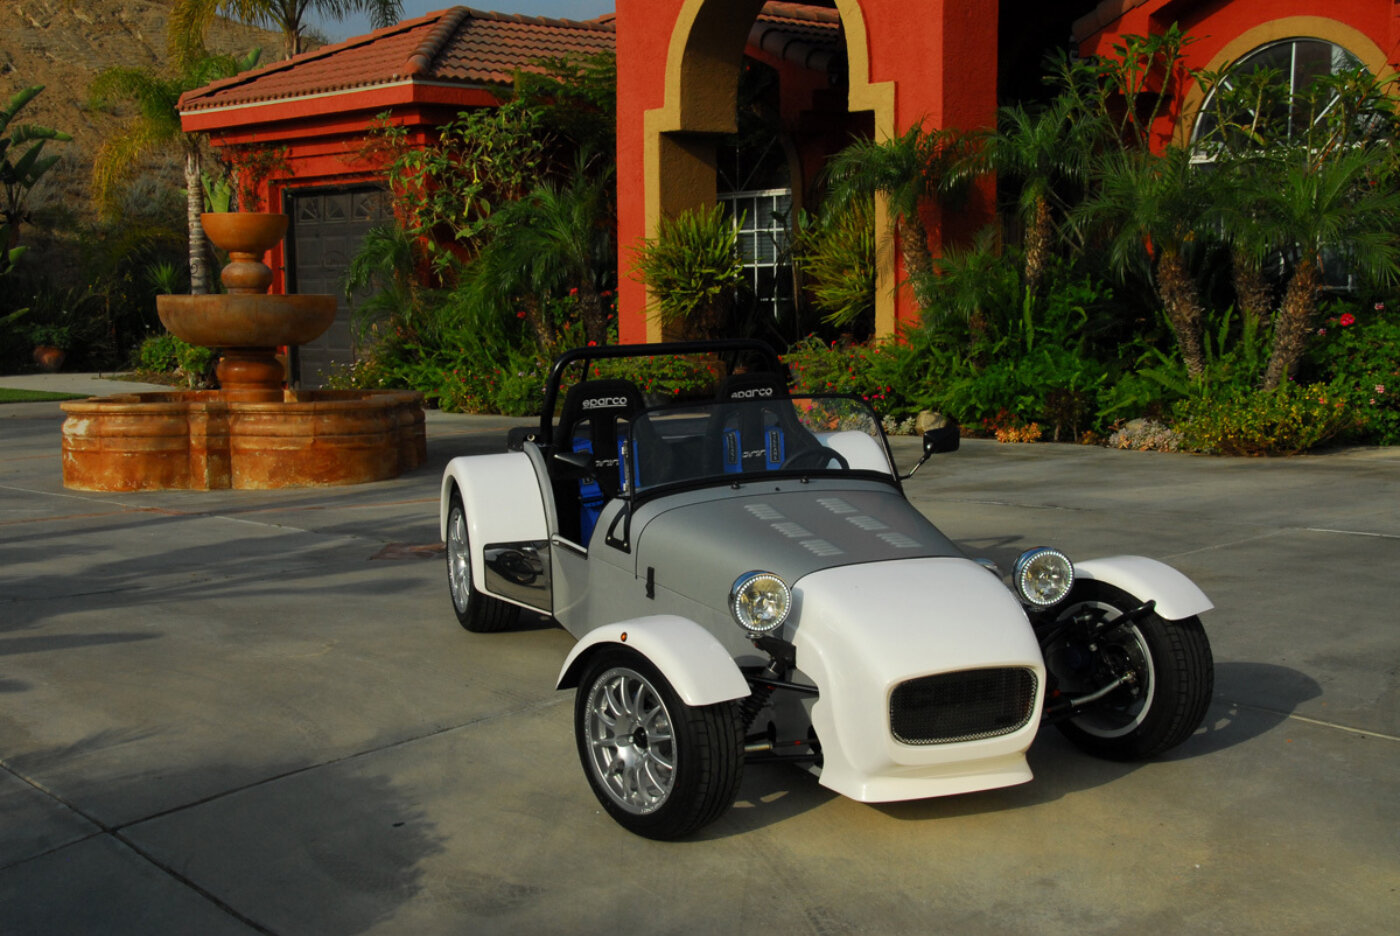
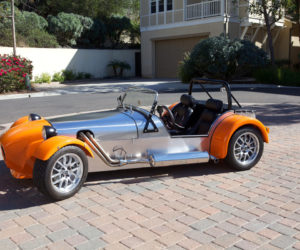
Miata-Based, Lotus 7-Style Replica
As Told by Paul Barnes
I first became aware of the Lotus 7 the TV show The Prisoner, starring Patrick McGoohan, who drove one in the opening title sequence. I lost track of this car type for many years until after building a 34-foot sail boat, motorcycle and parts of a kit airplane. I went in search of my next form of vehicle to build.
Through my adventures with aircraft building I met a now close friend who worked for the Lotus Formula 1 team in the 1970s. Knowing my search for a car to build, he pointed me in the direction of Robin Hood sports cars which at the time was producing a 7-style kit. But again another event overtook my car building ambitions, until a few years ago when I went in search of Robin Hood sports cars again. An internet search resulted in me finding out that Robin Hood Sports cars, through a change in ownership, had been transformed into Great British Sports Cars which is now offering an all new 7-style car.
On a trip to the UK I visited the factory, took a test drive and was hooked. I asked my friend who had originally turned me onto the Robin Hood to visit the factory, and also give me his impressions. With his nod of approval of the car, I took the plunge and ordered the kit through the then newly appointed US dealer Brian Ball Motorsports.
Brian had not yet established an inventory of parts in the US, so I waited a little longer until all the parts I had ordered were assembled for shipment from the UK. Brian now stocks starter kits and a selection of parts in Golden Colorado, to enable finishing the car.
While I was waiting for my kit to be shipped form the UK, I purchased a wrecked 2000 Mazda Miata MX5 from Craigslist and stripped it of the parts needed to complete the car: engine, gearbox, rear differential, front and rear uprights, brakes and steering column. I was able to sell most of the remaining parts from the Miata again on Craiglist so that my total investment in donor car parts was around $400.
I took delivery of my crate of parts from the UK January 3, 2014. Opening up the crate and laying all the parts out for inventory, I found the kit complete and work started later that day and continued nights and weekends for the next year. I had a goal to have the car compete for registration January1, 2015 and be first in line at the DMV January 2, 2015 for my Special Construction Number of Sequence. Then I’d be able to drive the car to the 2015 Long Beach Grand Prix where my sailboat is kept.
The car went together very smoothly. The factory in the UK, Brian in the States, and an ever increasing network of builders provided great support (there are a multitude of Blogs and YouTube videos that previous builders have produced).
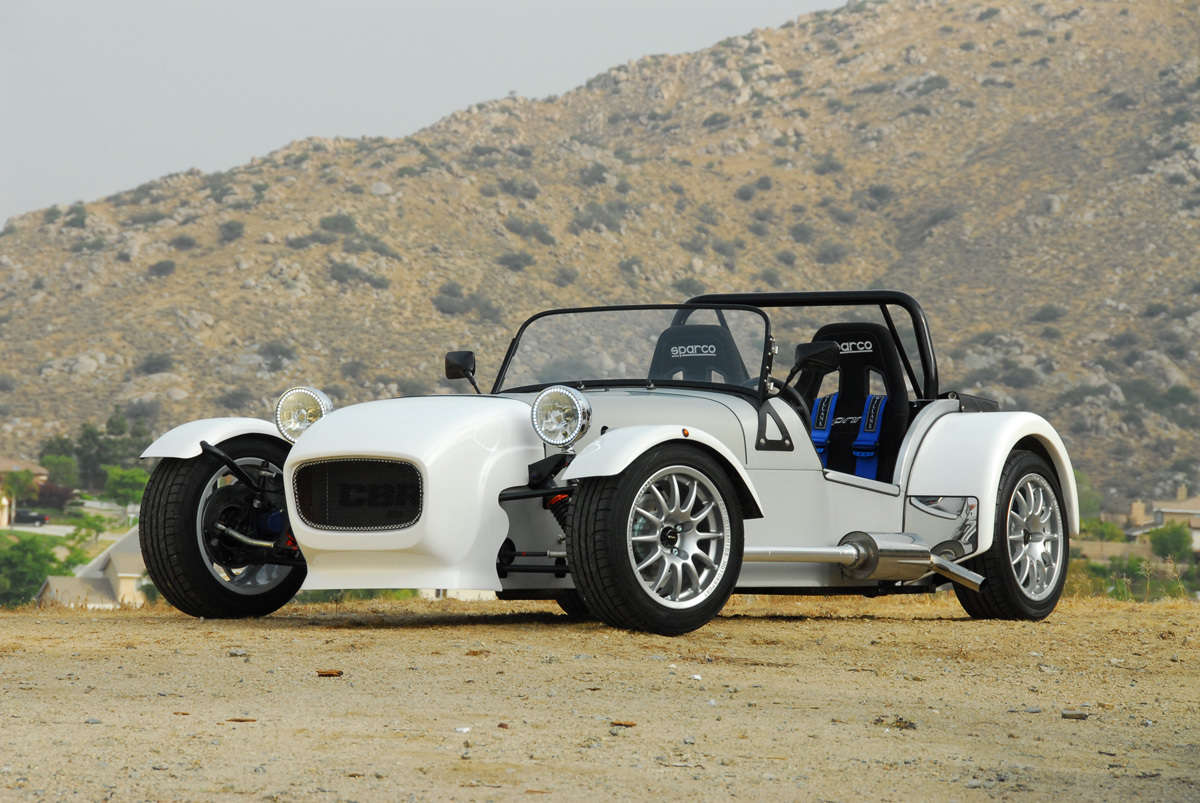
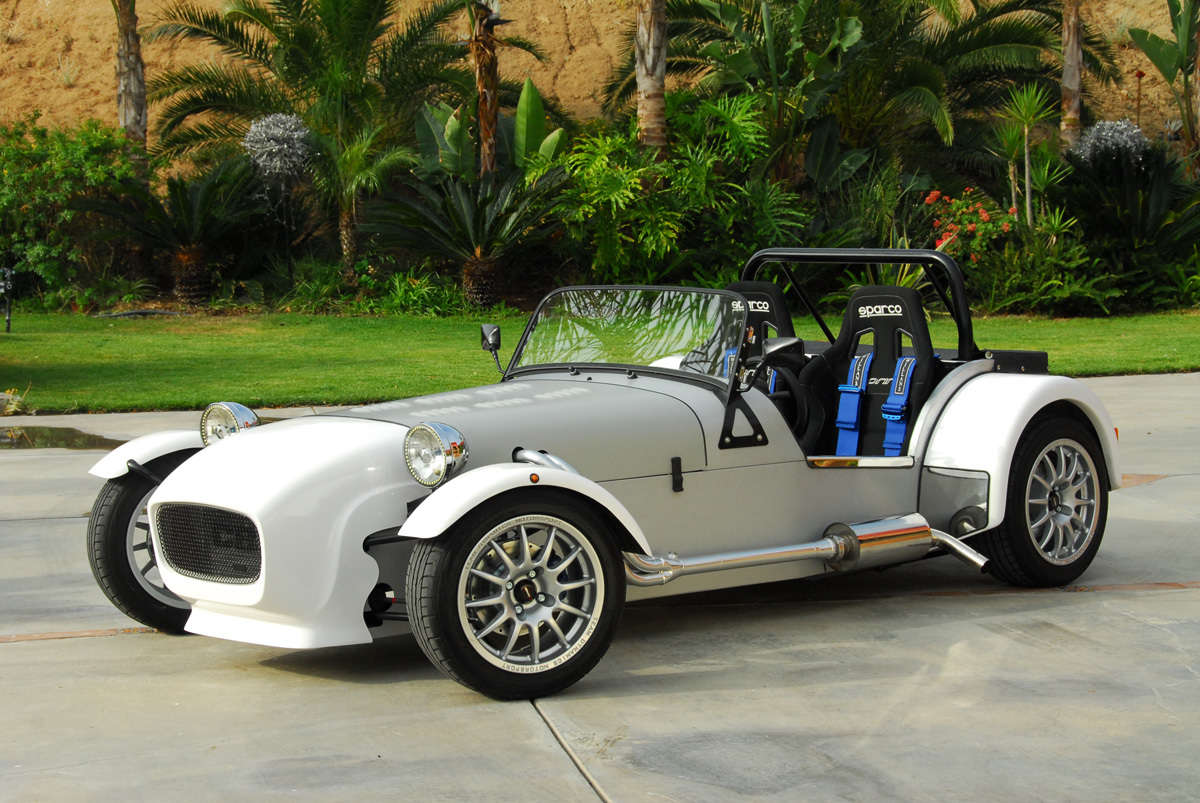
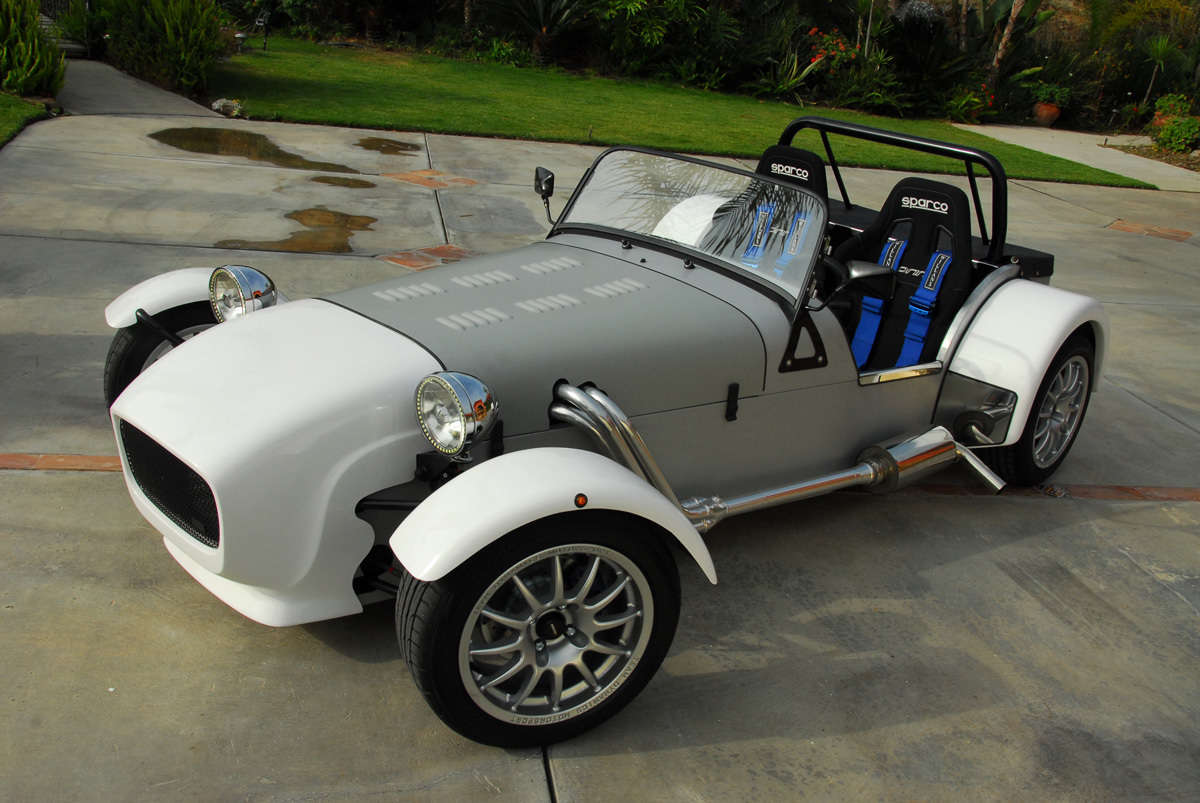
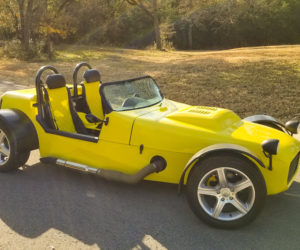
The chassis consists predominantly of one-inch square steel tubing with a stressed steel floor in the cockpit. I opted for the factory powder-coated GT model which is a little wider in the cockpit and the lowered floor to provide even more room.
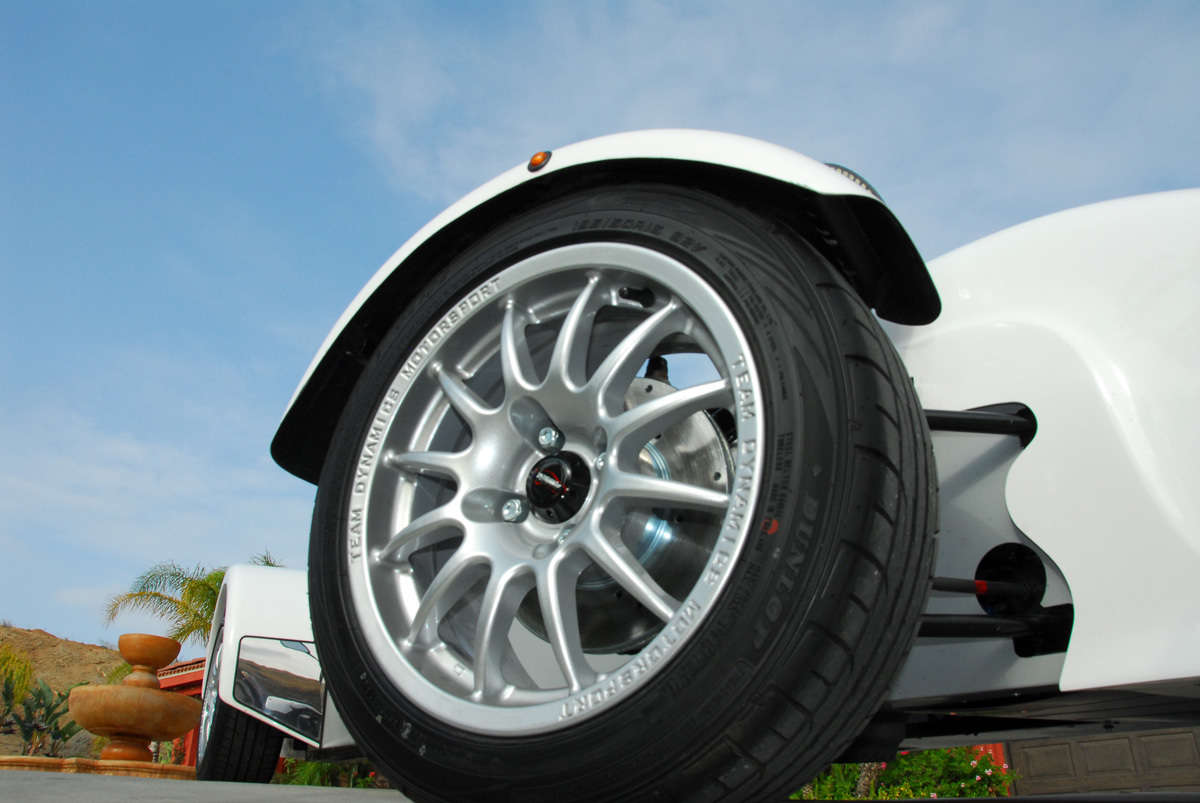
The suspension components are round-steel tubing, and one of my first, out of the box jobs was to press the nylon bushings into them. The front and rear “wings” (fenders), the nose cone, dashboard and optional rear diffuser can all be ordered in one or a combination of nine colors or carbon fiber.
The rest of the parts needed to complete the car can be found on the company’s component website www.kitspares.co.uk and ordered through Brian Ball Motorsports, many of which are now in stock in the USA. The chassis and body of the car is a fairly standard build.
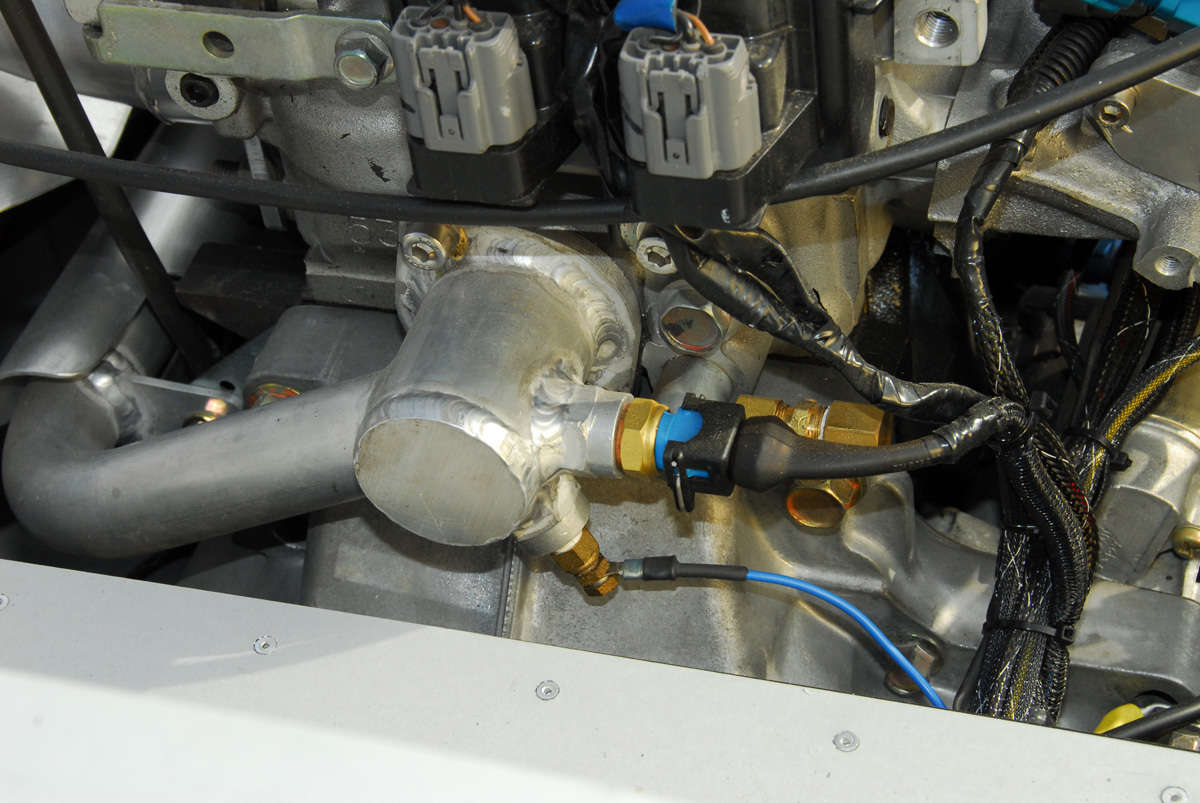
I did have a few areas of concern, however. Living in sunny Southern California, I wanted to make sure there was ample cooling for the engine. As a result, I installed a 13-row Setrab oil cooler and fully baffled the radiator to the nose cowling to ensure all the air coming through the front grille passed through the radiator. I also had the hood louvered at a local hot rod shop. But there was a bit more involved in improving the cooling system. The Mazda 1.6 and 1.8L engines from the Miata were originally used in a front-wheel drive Mazda before being used in the rear-wheel drive Miata. To line up with a radiator the cooling system on the front-wheel drive car had the coolant entering the block low on one side and exiting high on the head on the other side. When the same engine was used, though, in the rear-wheel drive Miata, the coolant entered the engine at the front, with the majority of it exiting from the head at the front. Only a small portion passed all the way through the head to exit at the rear for the heater core.
So I modified the cooling system to provide better flow through the engine by going back to the front-wheel drive coolant route, with the intake at the front of the engine and the thermostat housing and exit at the rear of the engine. This change required fabrication of a custom coolant re-route tube down the left hand side of the engine which incorporated the system fill and pressure cap.
The fabrication of this bypass, as well as many other modified parts, was done with the help of Lenord’s Custom Fabrication in Fullerton, California. It is difficult to tell how many of my cooling system modifications were required, but I have had no cooling issues, even on the hottest days in stop-and-go traffic or up mountain roads at sustained high power settings.
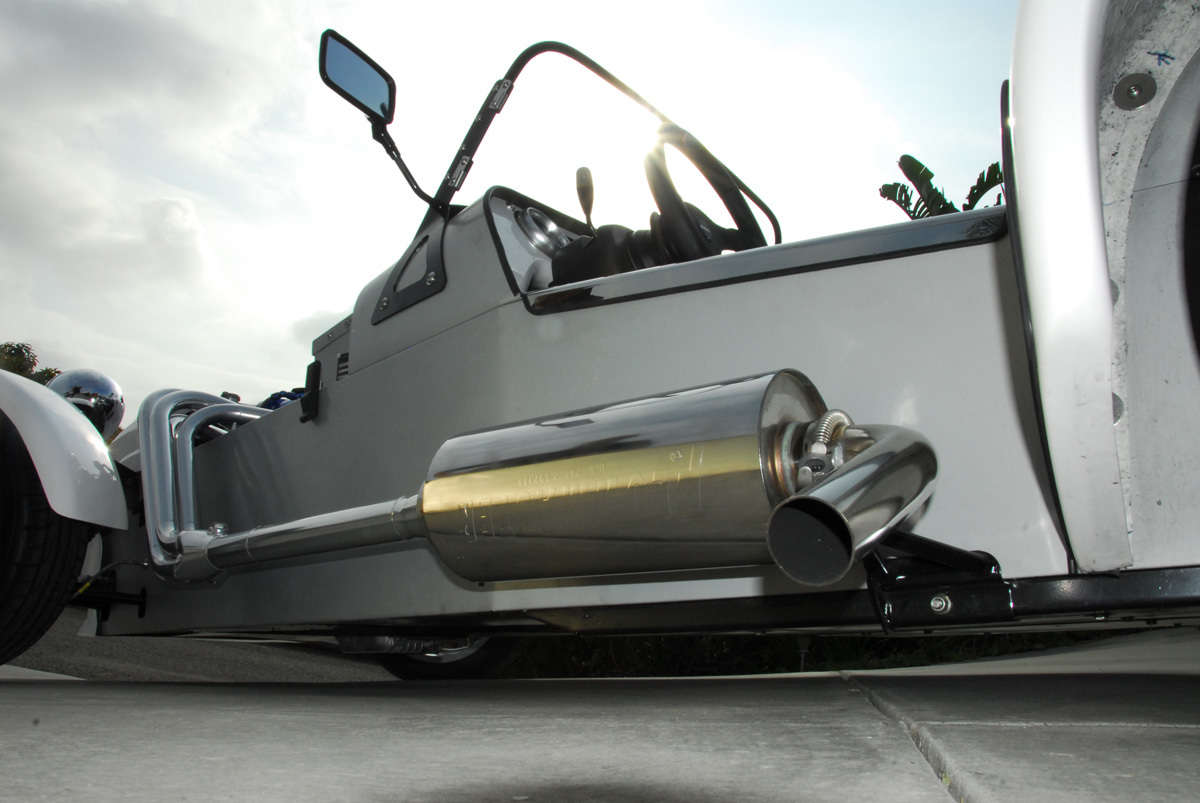
Taking a page out of my aircraft building book, I fabricated stainless steel hard lines and braided hose for the entire fuel system, definitely overkill but I like the look and wanted to apply some aircraft features into the car.
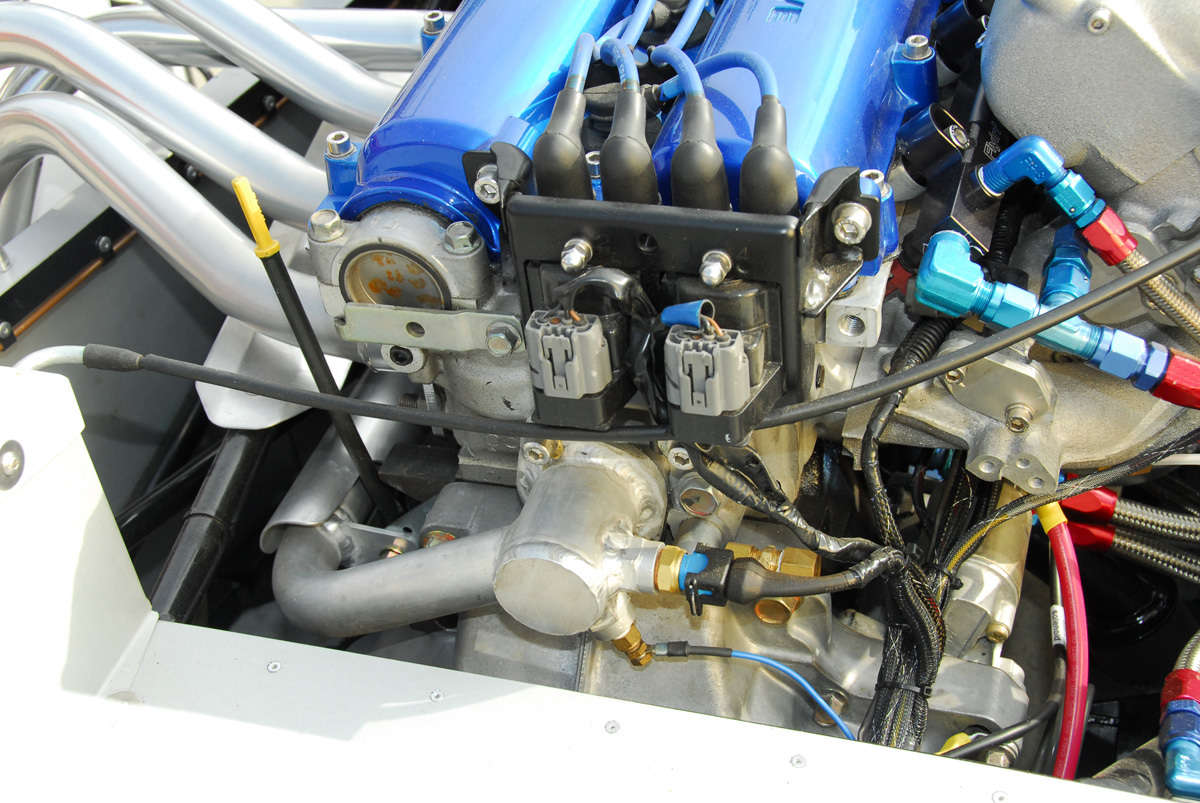
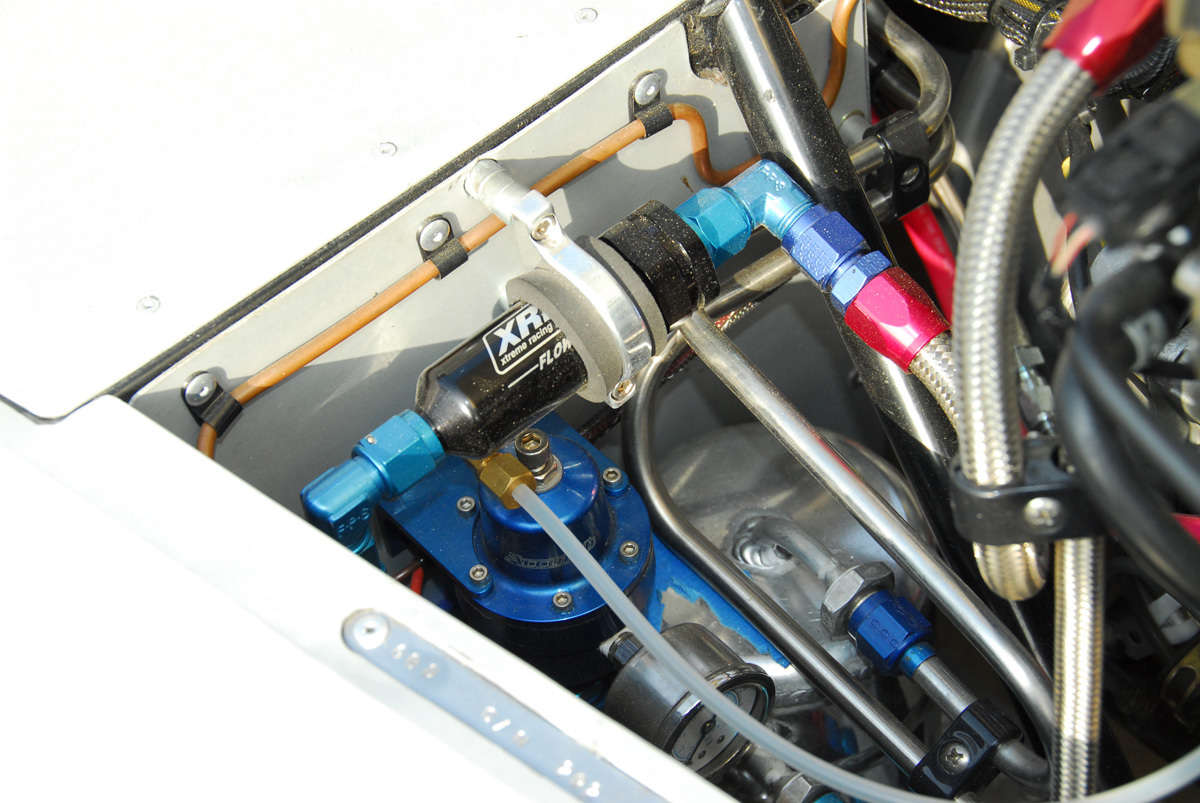
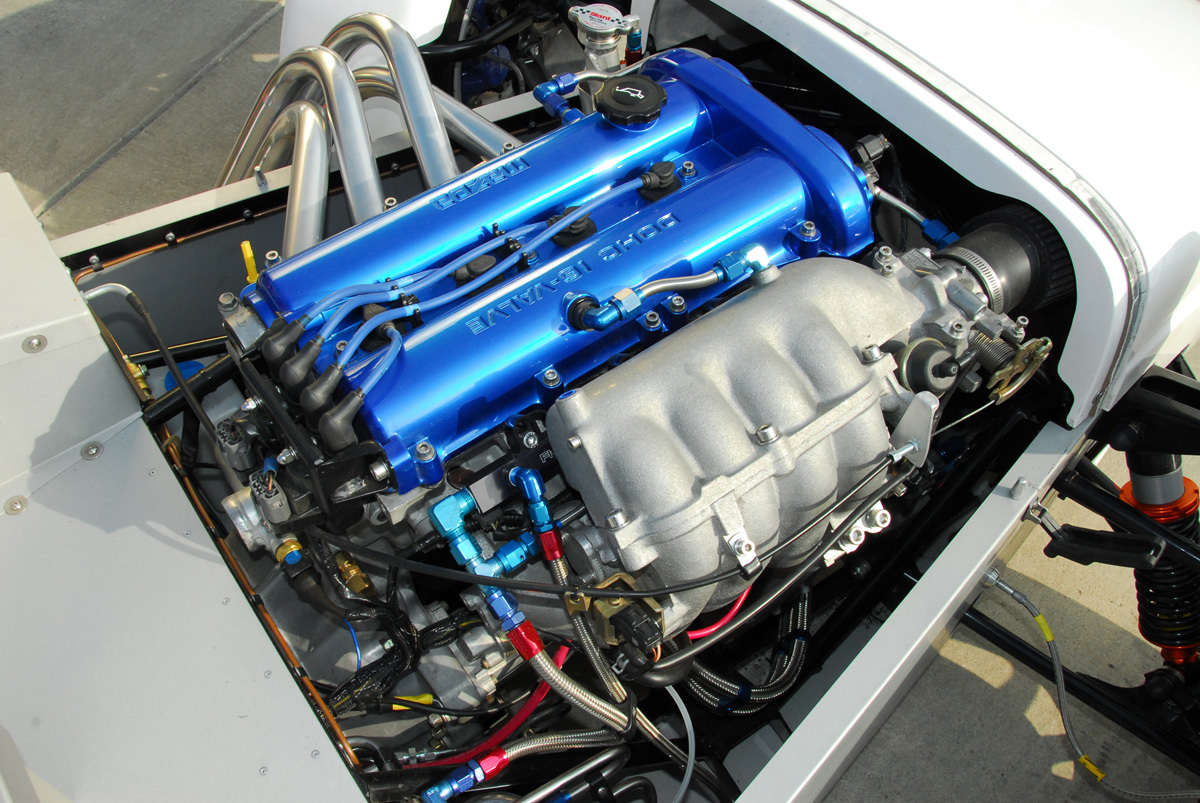
Other examples include aircraft engine baffle material around the radiator to seal it to the nose cone in the same way an aircraft engine is baffled to direct airflow and to ensure that no cooling air is wasted. I used an aircraft low-pressure fuel pump at the rear of the car to pump the fuel from the main tank car to the front header tank which feeds the high-pressure fuel pump. I also anodized every piece of aluminum, including all the body panels. I used an aircraft structural adhesive to attach a lot of the body panels, that's why you see no rivets externally on the car. And I used countersunk aircraft solid rivets wherever possible rather than "pop" blind rivets.
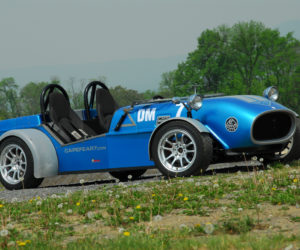
The stainless steel exhaust system was bright ceramic coated to further help control heat in the engine bay. Even though generic, fully adjustable coil-over shocks could be used on the car, I opted for the ATR shocks produced by Great British Sports Cars.
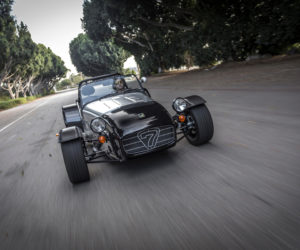
Having never driven a 7-style car before, I didn’t know what to expect as far as performance and handling. On my first few drives, when I started to open up the performance envelope, I was surprised by the car’s responsiveness and handling. After talking to several other 7-style car owners I came to realize that this was normal for this type of car (since I had learned to accept the mushy unresponsiveness of today’s modern product cars).
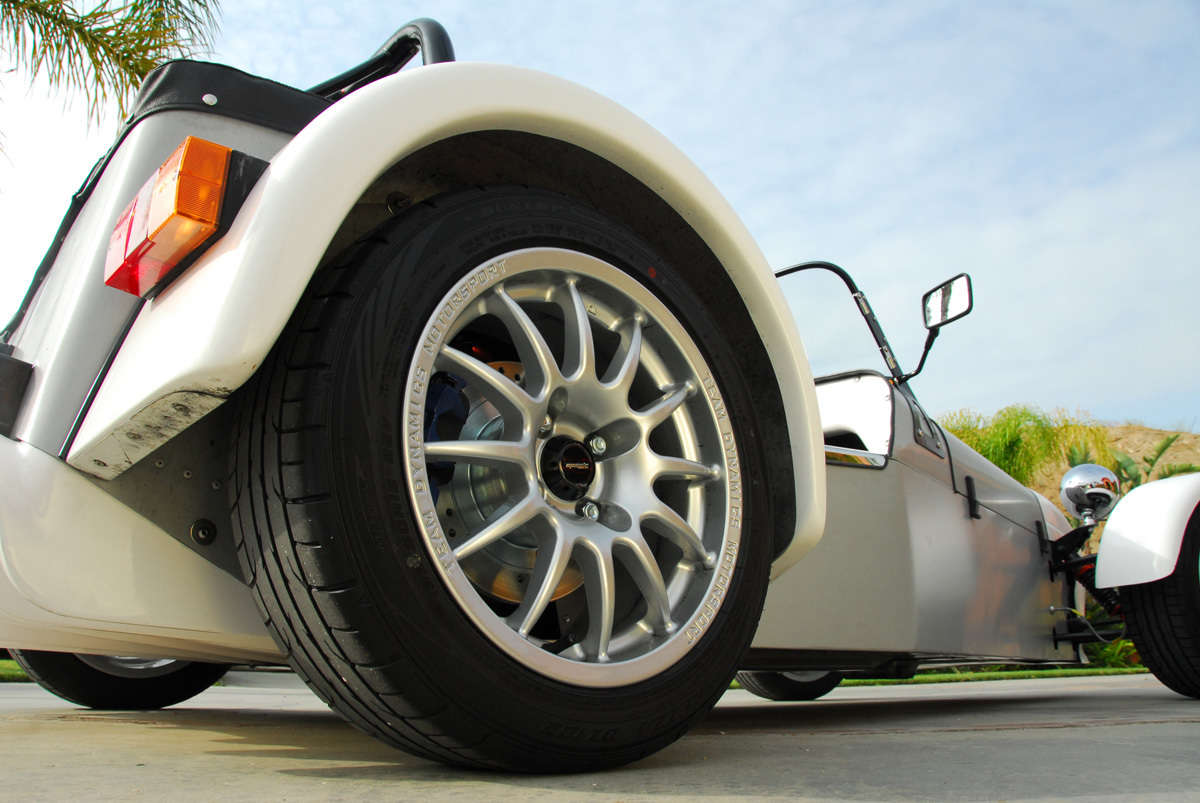
The car uses the stock Miata brakes which, given its 1200-pound dry weight (about half of what a Miata weighs) is plenty of brake for the car. The engine produces around 140 bhp which puts it power-to-weight ratio at a respectable 12 lbs/hp.
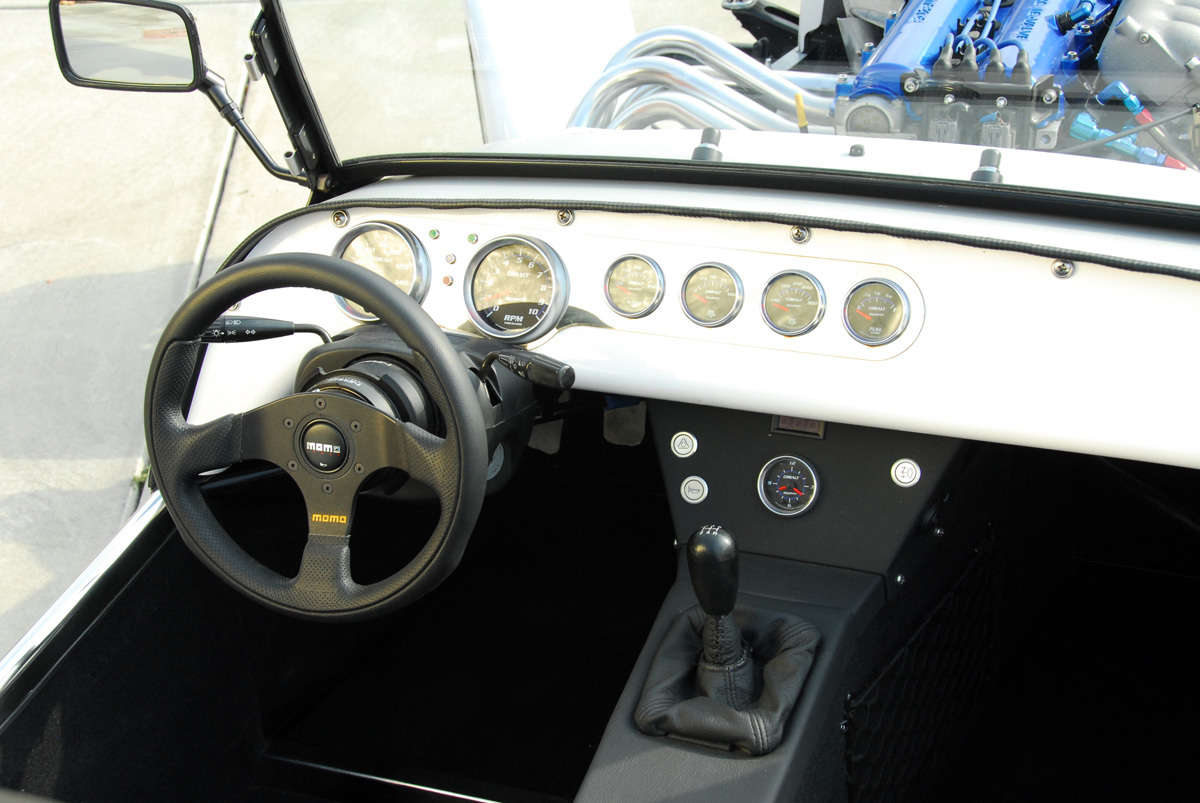
The dash was fabricated using USA sourced Autometer Cobalt gauges with an electronic speedometer, using the stock Miata transmission sensor, water temp, oil temp, oil pressure and fuel level gauge and a clock in the lower dash. Also in the lower dash is a digital voltmeter that, when the power is off, blends in well with the black leather upholstered center console.
Part of the enjoyment of building a car is all the different skills which you have the opportunity to somewhat master, sometimes through trial and error. For instance, the center console required research on upholstery techniques and material in order to get the desired result.

Even on partially complete cars, installation of any subsystem or complete running cars are both available from Great British Sports Car. I opted for the lowest level of factory preassembly, as I enjoy the process of the build, researching the assembly details and locally sourcing some parts, whereas I understand others might opt for the factory to perform some of the more complicated and involved system installations. Either way the pride associated with rolling down the road in a car constructed by your own hands brings a great deal of satisfaction. And at freeways speeds it makes you really think about double-checking the torque on all critical bolts after the car had been run for a few hundred miles.
On one of my early test runs I found a particularly bumpy road. While on this road, with nowhere to pull over, I started to notice the passenger side front wing was rotating while the wheel it covered remained in its normal position. Not able to immediately pull over, I slowed down and hoped it would not start to rub on the front tire. Eventually I found a pull-off point, jumped out and broke out my “flight test” tool kit and tightened the top control arm bolt to the correct torque. Since then I have only had to re-torque a couple of other bolts as the car seated in.
Lenord at Lenord’s Custom Fabrication, who has modified or built several cars, told me that in his experience, if a problem is going to show, it it will usually be within the first 500 miles. After that you should be okay, an experience which appears to be holding true for my car.
The engine is controlled by a UK built, Emerald ECU which is available from Great British Sports Cars. I purchased the ECU with the flying leads, prewired connector which required that I fabricate the engine wiring harness. There is a factory Mazda wiring harness now available from Great British Sports Cars which provides a plug-and-play engine system.
With the goal of having the car ready to register January 1, 2015 I started to research the registration process in California well ahead of the time. I first discussed the process with the California Highway Patrol a year before when I had them run the VIN numbers on the Miata donor car before I purchased it. The California Department of Motor Vehicles takes appointments approximately three months in advance.

So after regularly monitoring their web site, I was able to make my first registration appointment for 8:00 a.m. on January 2nd 2015, when I needlessly showed up at 6:30 a.m. with the car on a trailer. I would have been okay showing up at 7:45 a.m. with the appointment I had, but excitement got the better of me.
I presented the car to them and was given a referral to the CHP for inspection and VIN number assignment. I visited the same CHP office and officer I had talked to a year prior, and after reviewing the minimum vehicle equipment requirements, received a new VIN number for the chassis. I then went back to the DMV for my special construction number of sequence, one of 500 that the state of California issues each year for vehicle which have been built be their owner. This number is mailed in the form of a certificate which is then presented to a California Bureau of Automotive Repair smog referee for verification that the car meets the emission requirements that govern it. These requirements very depending upon year, make, model and type of engine and what type of permanent registration that is being applied for.
Then it was off for a brake and light inspection at an approved repair facility. The last step in the process was then to return to the DMV with all the signed-off paperwork and certificates where the car is then titled and registered. This process, even though from the outside is well documented and appears daunting, went very smoothly due to the pre-visits, complete documentation, and familiarity with the process from blogs, etc. on the subject. It is valuable to be familiar with the process as the people especially at the DMV may not have been through the process before, so having all the forms ready and filled out will help when they ask for them.
So four weeks after starting the registration process, the car was fully registered, licensed and insured. By the time the Long Beach Grand Prix came around I had over 500 miles on the car and confidently drove it to and from the race. Most people who see the car ask “What is it?” my normal answer is, “A lot of fun!”, both to build and drive.


Comments for: INTERNATIONAL FLAVORS
comments powered by Disqus