A Manta Mirage 40 years in the making
As told by Walter Nowak
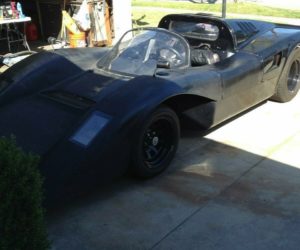
Photos courtesy of Walter Nowak
It’s difficult to describe a project that has spanned a period of forty years. One that has seen me transform from an ambitious young guy with a full head of hair, to an old bald guy who, fortunately, retains his love for the car hobby, and remains eager to experience new projects. I think it’s best to explain the long journey in a series of phases as follows.
PHASE 1. What is a Manta?
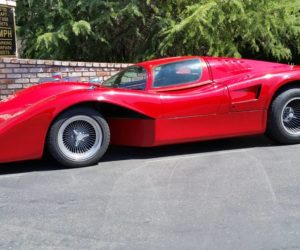
My first exposure to the Manta Mirage kit was in a comprehensive article in an automotive publication. I still have the article, but I cannot tell for sure which magazine printed it. I believe it may have been Road and Track or Car & Driver. The article got the juices going since it was written when Can-Am Group 7 racing was still active and the McLaren cars were dominant. The Manta styling had a lot in common with the race cars.
I had been looking at Cobra kits when they were just being introduced, but they were priced beyond my limited budget. I ordered a Manta sales publication and found their pricing to be more attractive. Also, the Cobra kits of the time were using Jaguar components, while the Manta used mostly low cost, readily available parts. Before fully committing to a purchase, I inspected a Manta kit that was started by a builder within a reasonable driving distance from my home. The problem was that the kit was not very far along and I already had my rose-colored glasses in place. I discussed my potential purchase with Tim Lovette, who had developed the car with his brother Brad, and placed an order for my kit. I chose Manta red gelcoat for the finish with a tan interior, and ordered several of the available accessories. The header kit would prove essential for the final build many years later.
Phase 2. Build by the book.
It took Manta about eight weeks to build the kit before they notified me that it was ready to ship from California to Pennsylvania. To reduce delivery charges, it was necessary to wait for a moving trailer that was going to the East coast with room to spare. This delayed the delivery further. Finally I received a notification of a delivery date and the kit was delivered. My brother and I had just started to move into our new shop, which took us two years to build, and the Manta was the very first project in the empty building.
I was very eager to start the project. When I inspected the kit as received and the limited instructions in the builder’s manual, I knew that the car would not be finished within the advertised 100-hour build time. However, I started to procure the necessary items to get the build started. The project had an inauspicious beginning when a friend and I went to remove a Karmann Ghia front suspension, which I chose in lieu of the VW unit since it had disc brakes. Despite assurances from the junkyard owner that his watch dogs were friendly in the daytime, we spent several hours in the emergency room while my friend got stitches to patch up bites in his leg. Not a good start for the project, but I did get a substantial discount on the front axle.
The next items I needed were the Corvair transaxle and rear suspension parts. I found a guy that had a lot of Corvair parts and knowledge and he sold me the four-speed transaxle and other parts I needed. When cleaning the transaxle and shifting the gear selector, we were unable to find four distinct gears and reverse. With limited knowledge of the transaxle design, I sheepishly took the part back to the much older and respected Corvair expert and told him that I thought he sold me a three-speed instead of the four-speed that I needed. After some reluctance on his part and removal of the transmission cover, he agreed that it was not a four-speed. He replaced the transmission with a correct one from his stash of parts. Since I knew that the transaxle was the critical link for the whole project, I kept checking the various sources for a spare. I soon found a 1969 unit with a Corvair engine mounted in a VW van. I had to buy all the Corvair parts the guy had to get the transaxle, but it turned out to be in perfect condition. As a windfall one of the parts I bought was a complete Corvair air-conditioning system, which is very rare, and I was able to sell it to offset some of the cost of the transaxle.
I assembled as much of the chassis as possible, but I needed wheels and tires to make it a rolling chassis. As car guys know, the selection of these components is critical to the overall look of the finished car. After some soul searching to justify the high cost, I decided to order Gotti modular wheels, which were pretty exotic at the time. Add in some BFGoodrich Radial T/A tires, and I had a rolling chassis. At this point, the project was put on hold, mainly because all my money was going towards our racing efforts in dirt track, stock cars and sprint cars. During this time, I made the mistake of storing some of the fiberglass parts in the attic storage area of our new shop.

PHASE 3. Project Low Point
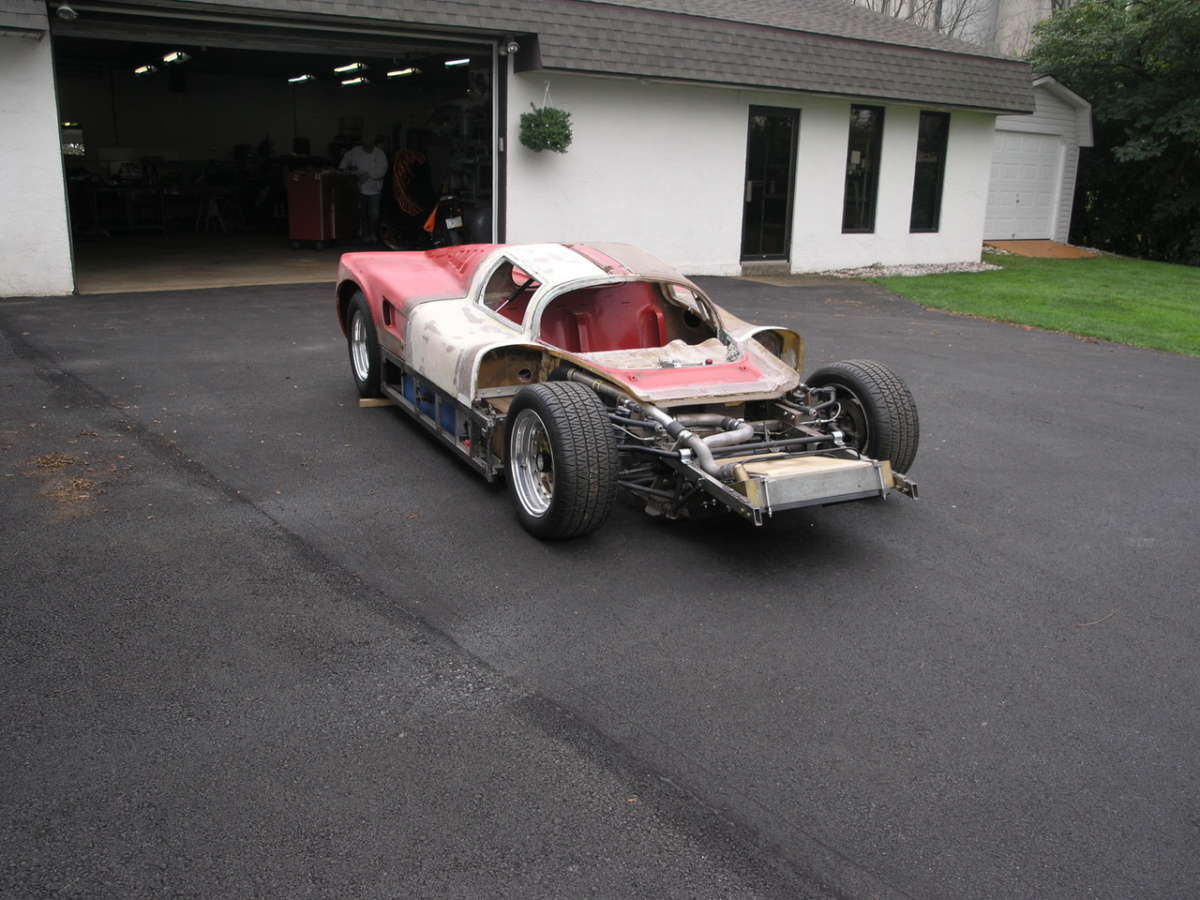
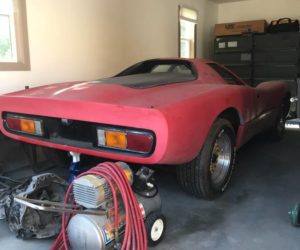
After a few years of racing, we realized that we could no longer afford to participate, so all the racing stuff was sold off. I dabbled with the Manta as much as possible, and was able to build the first 350 ci Chevy V8 to drop into the chassis. When I began to tackle the body parts, I was shocked to find that they were very distorted and warped from the heat exposure in the attic. This was a low point for me in the completion of the project.
Fortunately in March of 1981, Popular Mechanics magazine conducted a road test of 15 exotic sports cars and one home-built Manta. Shockingly, the Manta scored ninth overall. The other amazing part was that two of the test drivers were Phil Hill and Sterling Moss, among the most respected racing drivers of the day. Reading this article rekindled my enthusiasm to continue working on the project.
During this phase, the parts being used were gathered from the junkyard. I gathered a Toyota Tercel dash, steering column, and heating and air conditioning. The door handles were from a Fiat Strada and the door latches were taken from a Renault Fuego (remember those?). The headlight doors and retractors were from a Mazda RX7, the parking lights and turn signals were VW Rabbit, and the front marker-lights were Pontiac Grand Prix. It was a hodgepodge of junkyard parts.
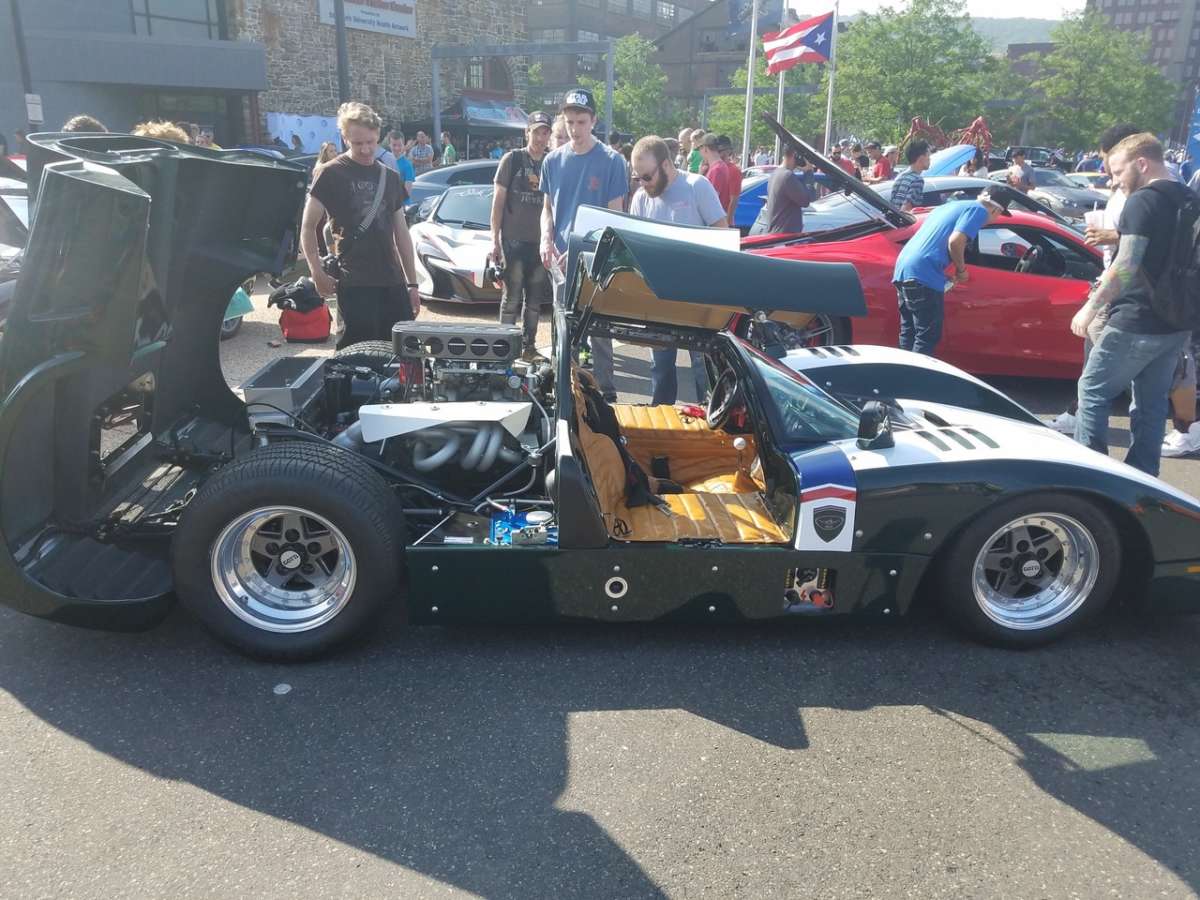
I then fabricated a front bumper for the car, which was mandated by Pennsylvania inspection law at that time. The bumper was fitted to the truncated fiberglass front end, which was shortened about fourteen inches; I felt that the ramp angle of the original-length front end was not practical for a street-driven car. In addition I separated the nose section from the cockpit section and the dash board area. It was apparent to me that mounting the steering column to the one-piece nose and dash section was not a good idea, especially it the car would get hit in the front end. I also made sure all the important mechanical components were mounted to the frame structure and not the fiberglass body. I was not very pleased with the state of the project at this time, so the car was again put on hold while I fiddled with less frustrating projects.
PHASE 4. Rebirth
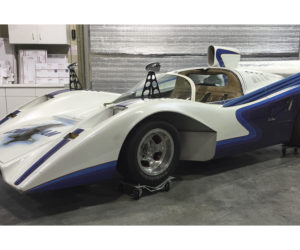
In 1984 while on a business trip to California, I had a chance to visit the Manta factory with the hope of seeing a finished car and perhaps getting a chance to drive one. It was not to be as they had no running cars available, but they were building a very trick Manta with a twin-turbocharged engine and a ZF transaxle with coilover suspension. It was a very highly engineered project. But at that time, they were devoting most of their efforts into their Manta Montage kit, which was much more builder-friendly than the Mirage. Also, they were developing their 1955 Corvette kit, which from what I’m told, resulted in the closing of the business.
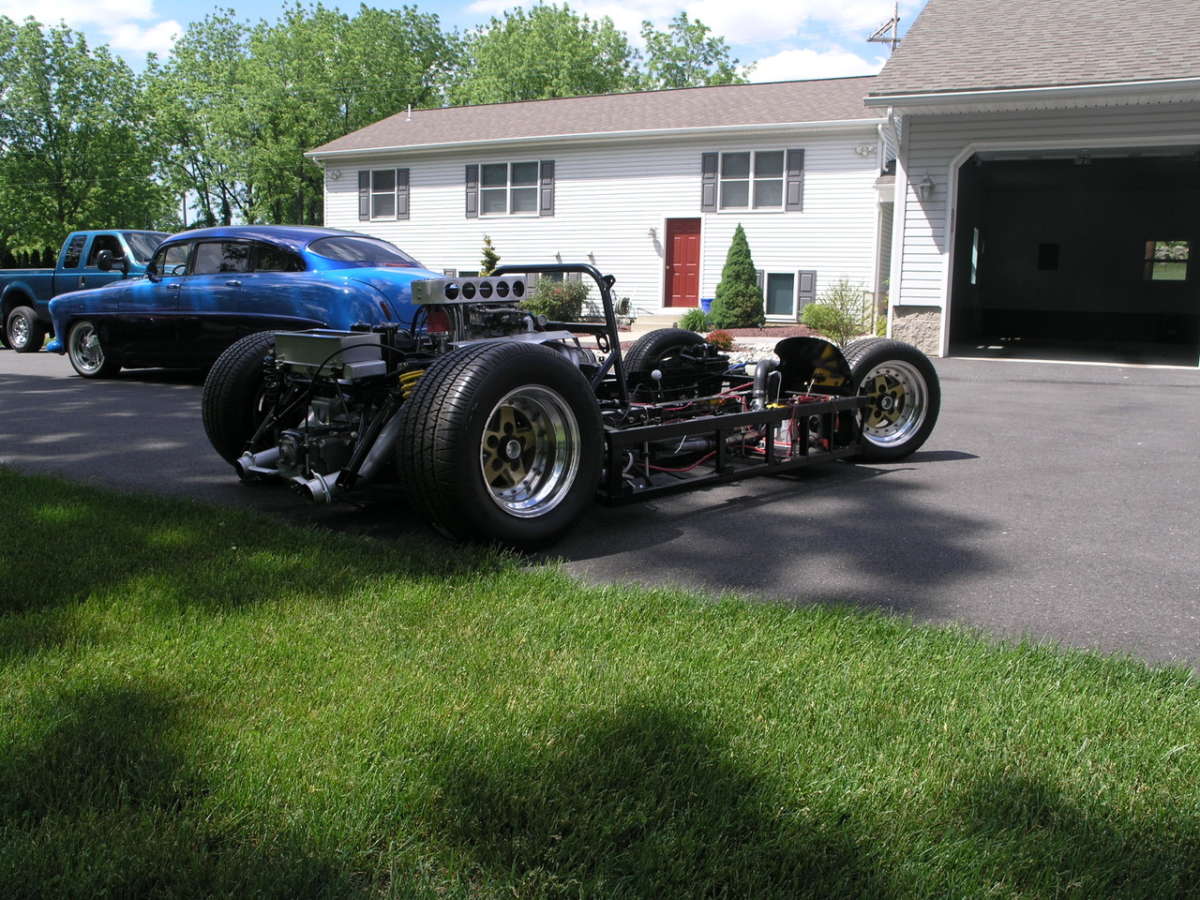
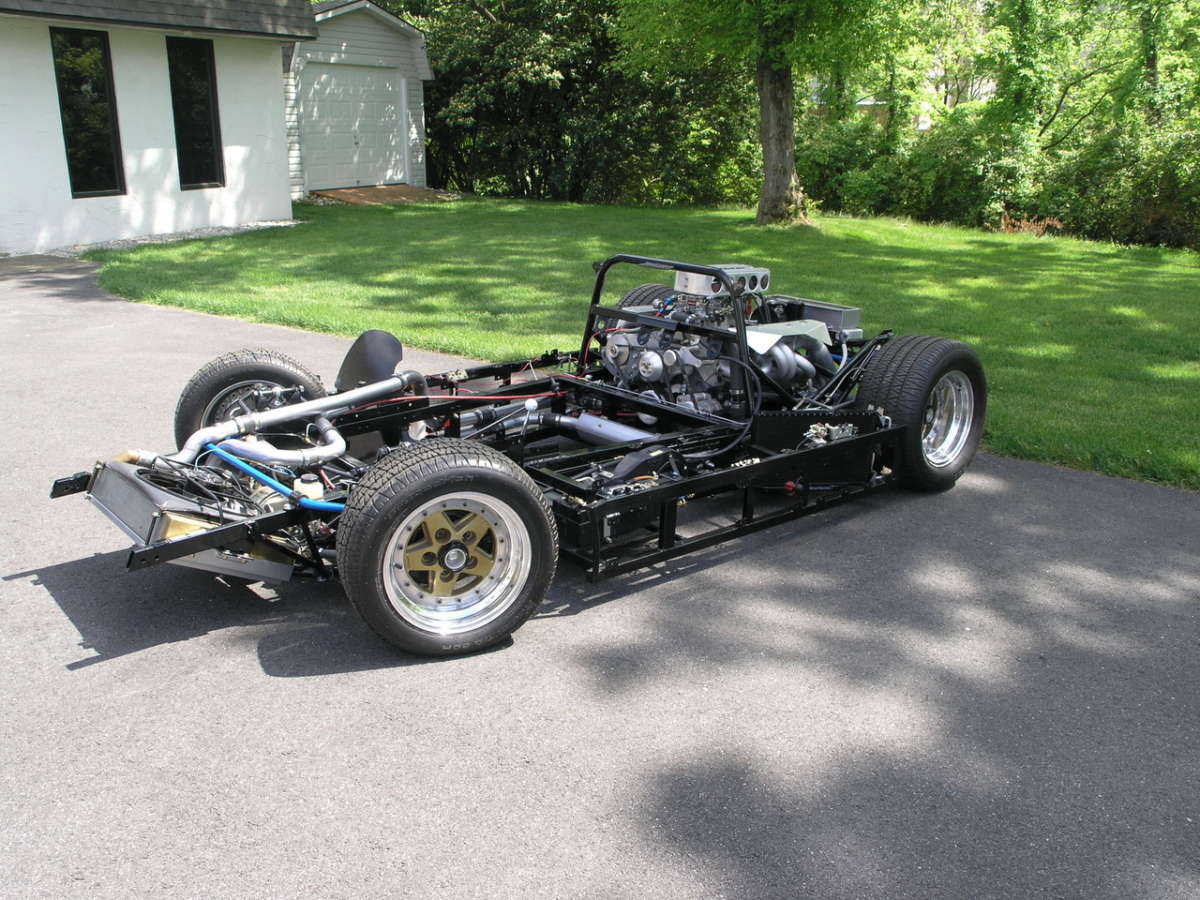
After visiting Manta, I decided to start over with my project. The aftermarket was starting to offer more parts for street rods, restorations and muscle cars. We completely disassembled my car, replacing the VW front suspension with the latest Mustang-style tubular A-arm design with coilover shocks and rack and pinion steering. The original Corvair rear suspension parts were scrapped, and the rear frame-section was redesigned. The new rear suspension was designed to the same parameters as the Guldstrand racing Corvettes. The rear hub carriers had to be fabricated to mount the for-aft and transverse locating links, which was a major design challenge. Carrerra coilover shocks were used.
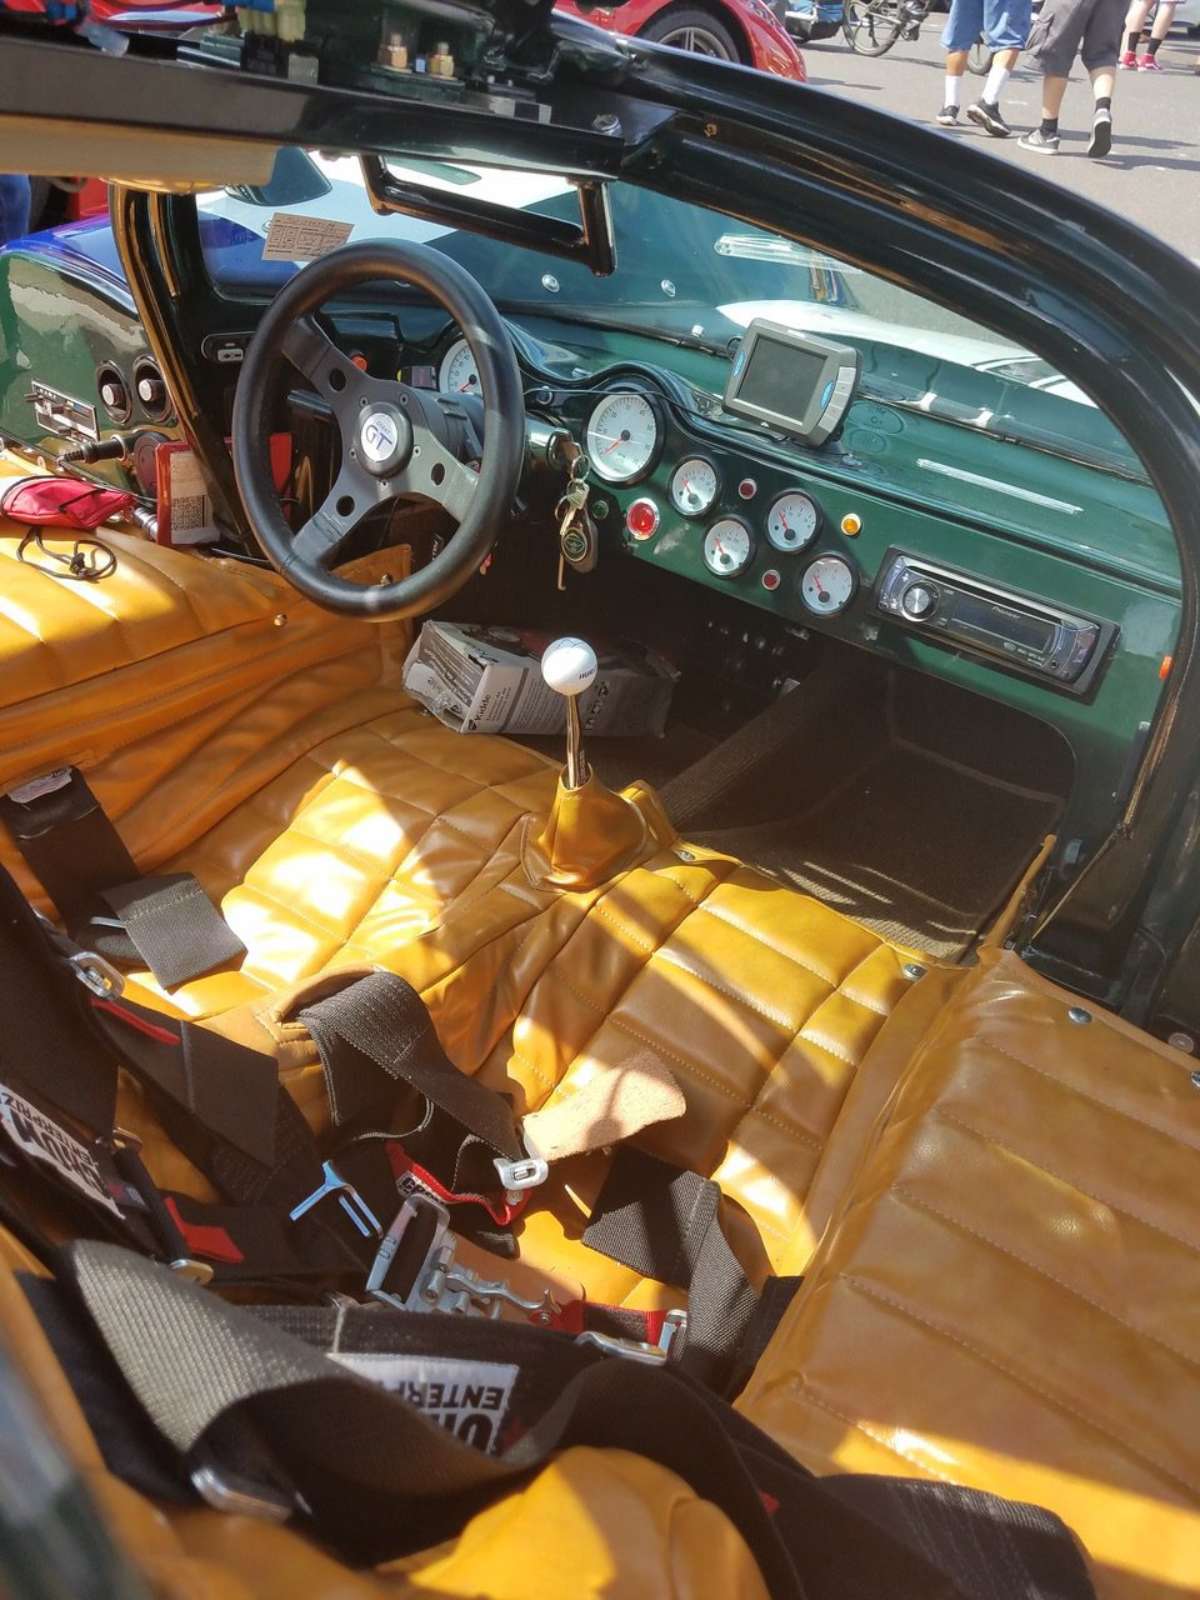
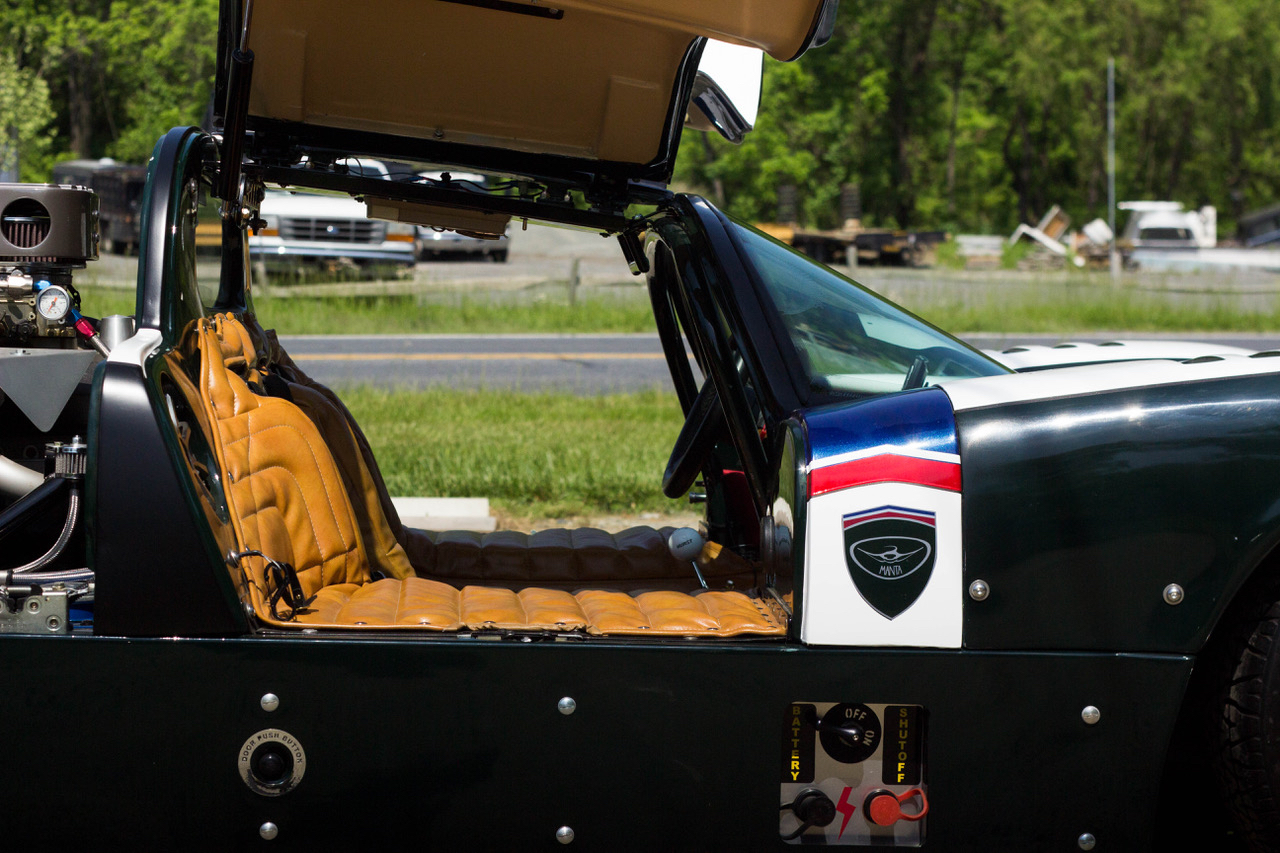
The rear brakes were Cadillac Seville, which were the only rear disc-brake calipers with an integral parking brake system that we could find. All the other junkyard parts were scrapped and modern aftermarket parts were designed into the car. Items such as Vintage Air heat and A/C, bear-claw latches and VDO instruments were major improvements in the functionality and quality of the project.
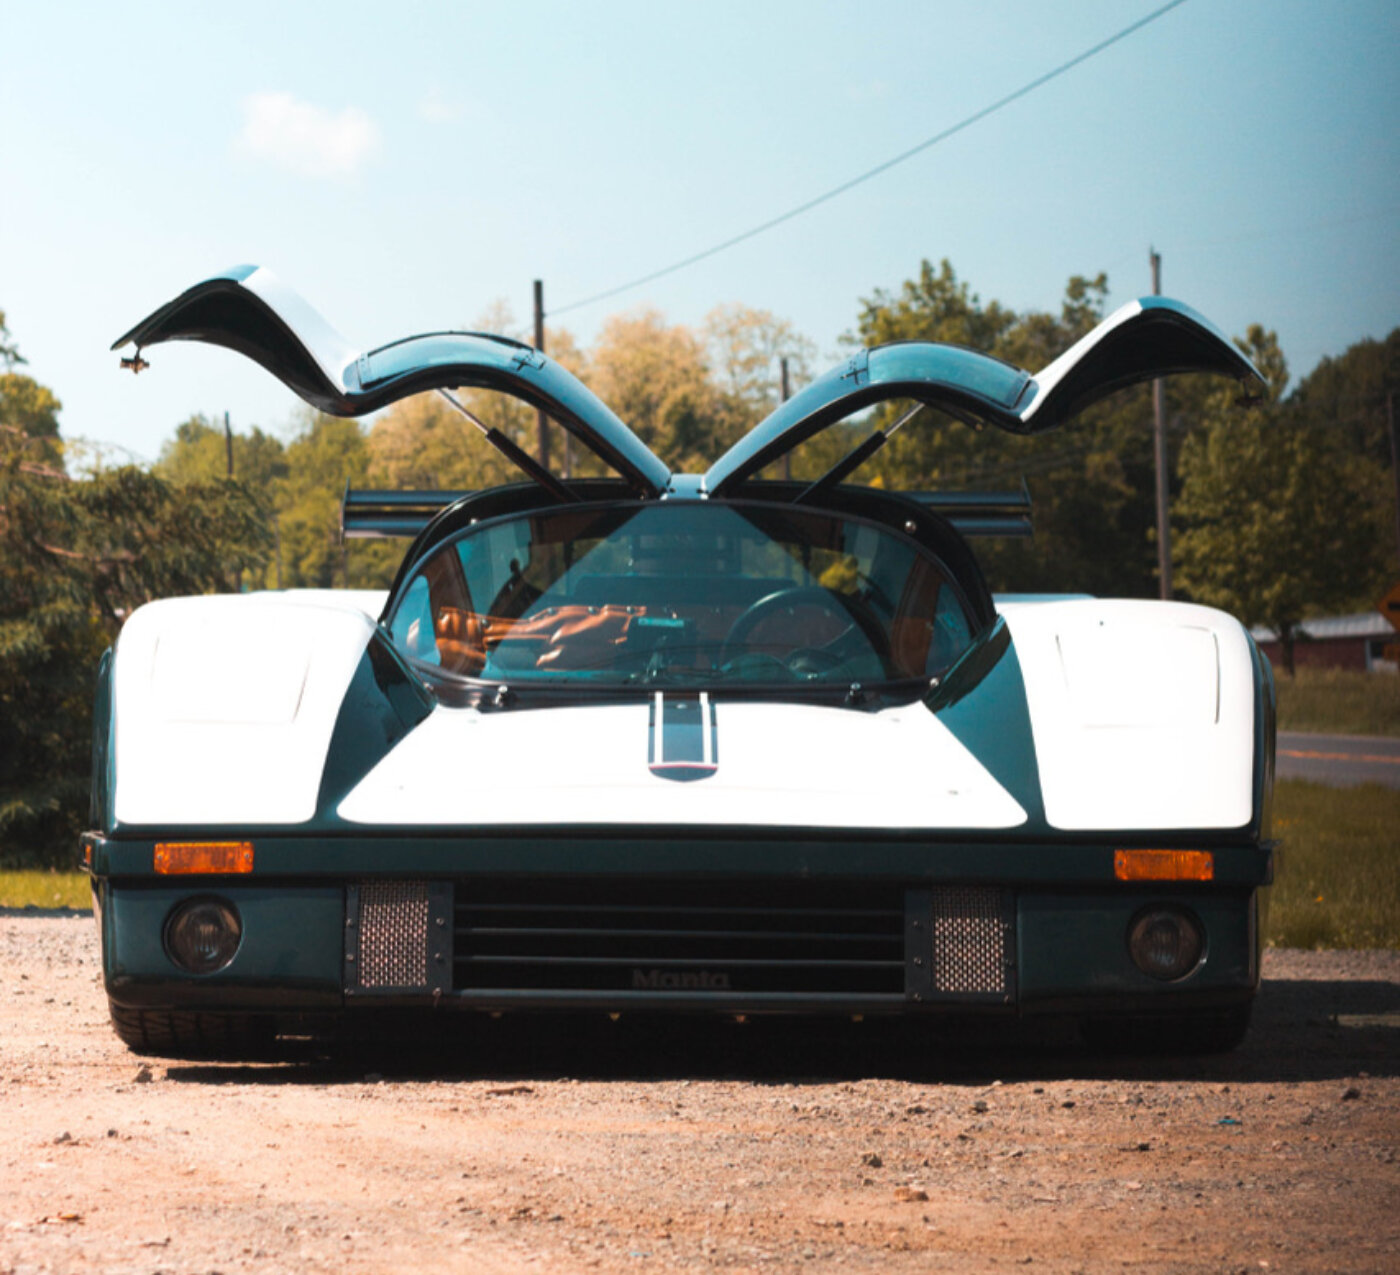
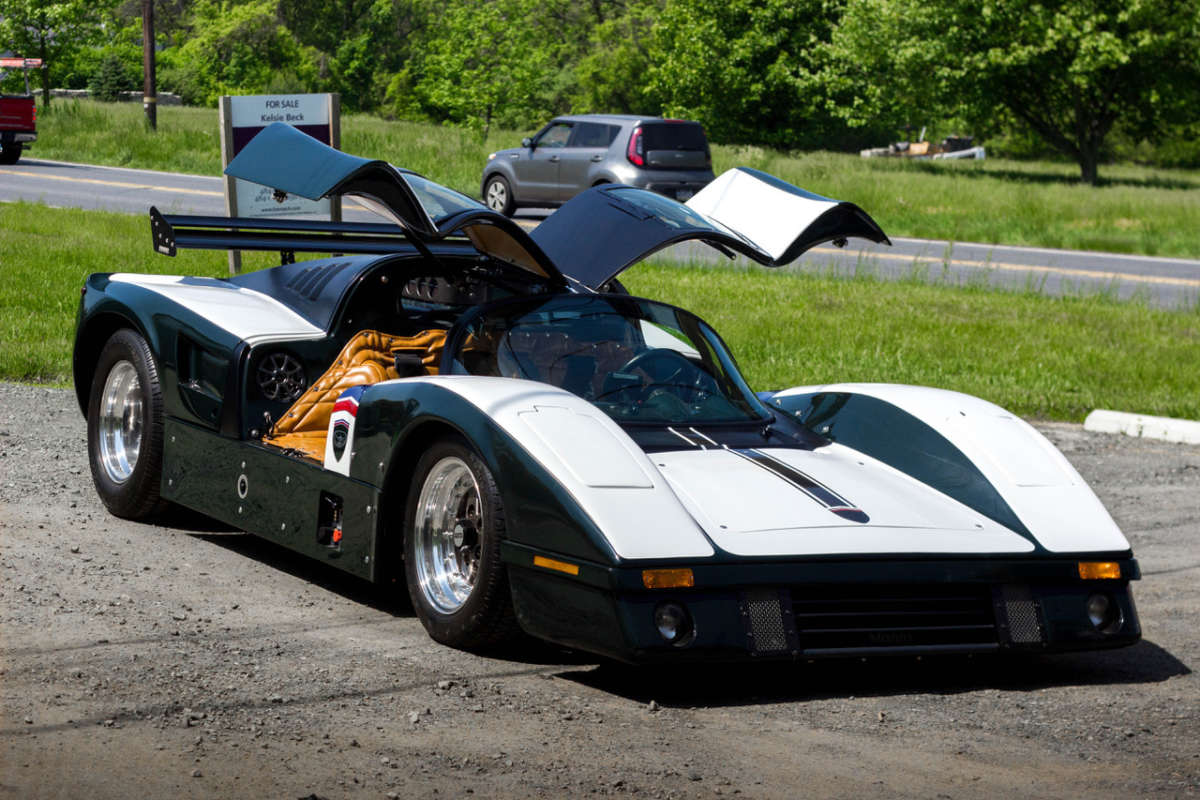
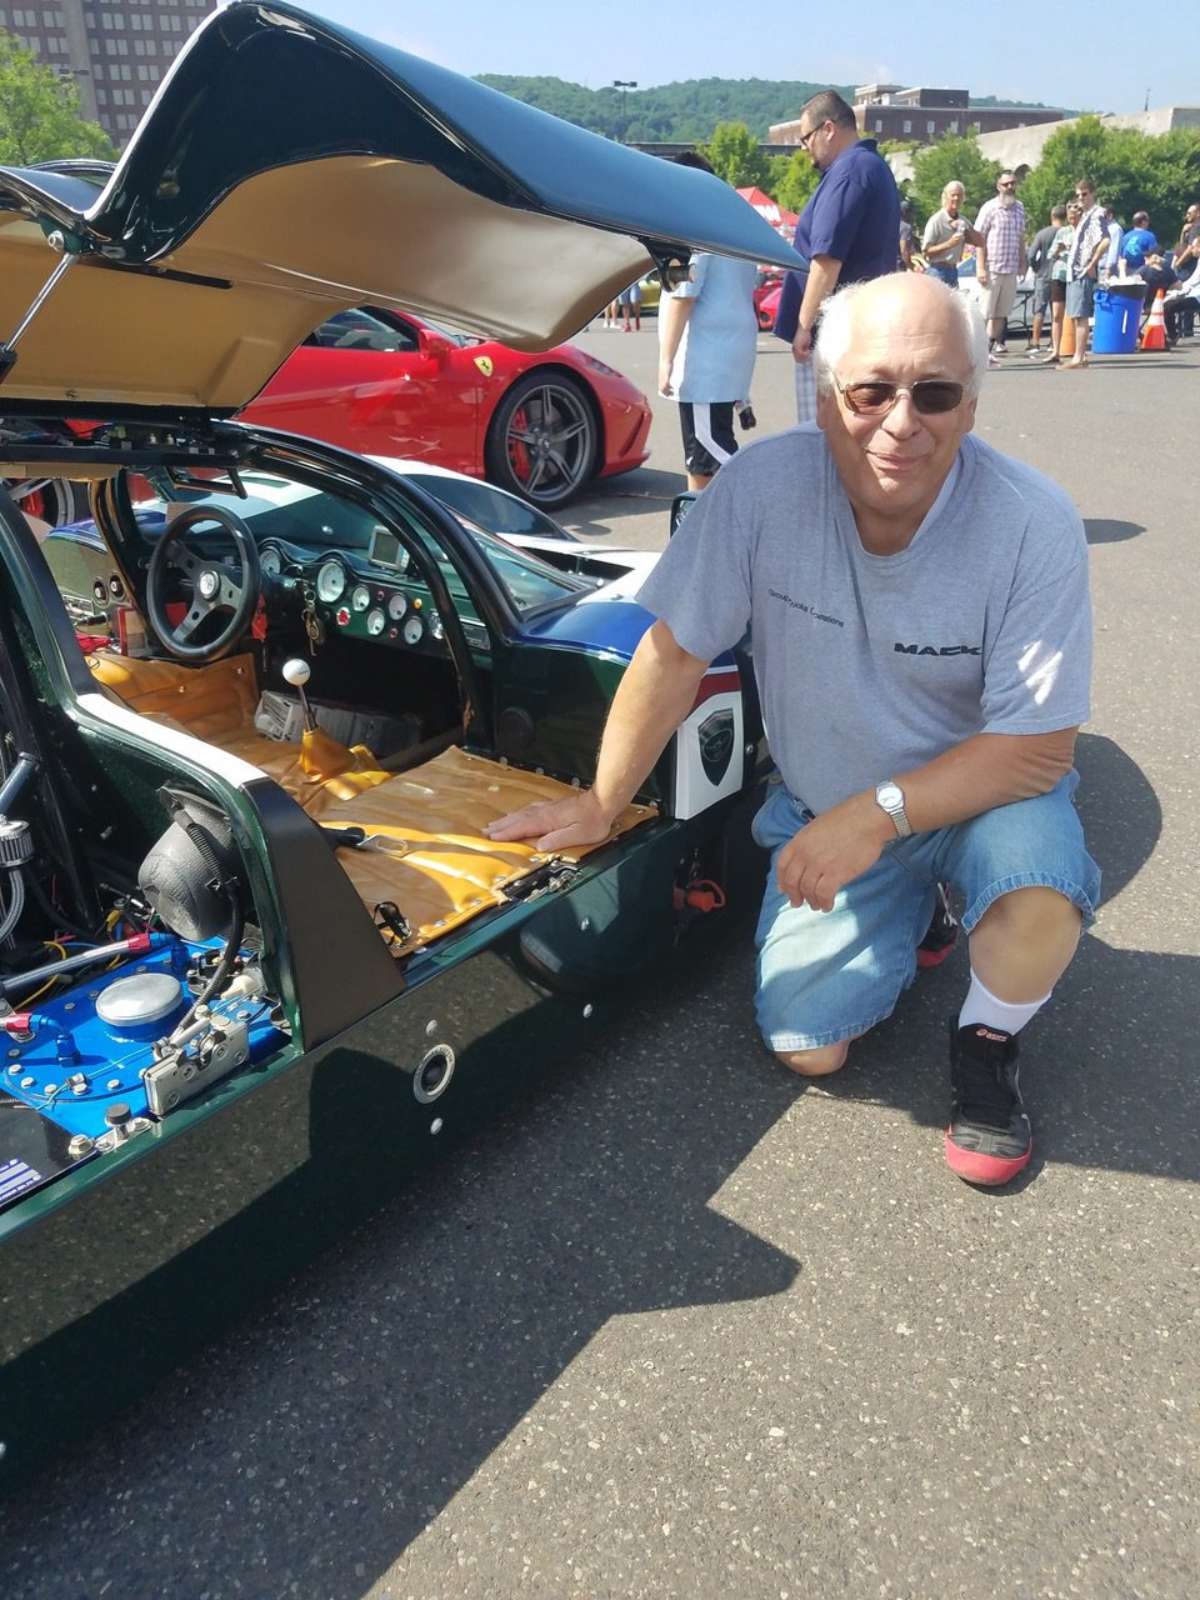
The design of the Manta body incorporated a two-piece door arrangement where the upper half of the door was removable so the car could be driven as an open-top car. That was fine for an area with a favorable climate, but I wanted my car to be usable in the four-season climate of Pennsylvania, so the top would be closed. We fabricated a metal inner-door frame to make the doors structural and functional. I also needed custom-designed gas spring cylinders to lift the doors, and was lucky to find a wonderful company, Suspa, that made the cylinders I needed. After installing them, I found that a few more pounds of lifting force was required, and the company reworked my cylinders without any added charges. At this point the basics of the car were established, but the work to finish the car beyond the mock-up stage remained.

PHASE 5. Six-year hold
In addition to the Manta project, I had a hot rod/classic car that was on the road, but needed a lot of work. When the motor in the hot rod blew, I made the tough decision to fix the car properly, which would require a total reconstruction and restoration. The silver lining to this setback was that I learned how to finish a project in an organized method. This gave me the confidence to finally finish the Manta.
As time allowed, the car was completely assembled with all the required systems. The body was mounted and all the panels were aligned before the tedious work of finishing the surfaces could be completed. Before disassembling the car for final finishing I took many pictures in order to facilitate final assembly.
PHASE 6. Final assembly
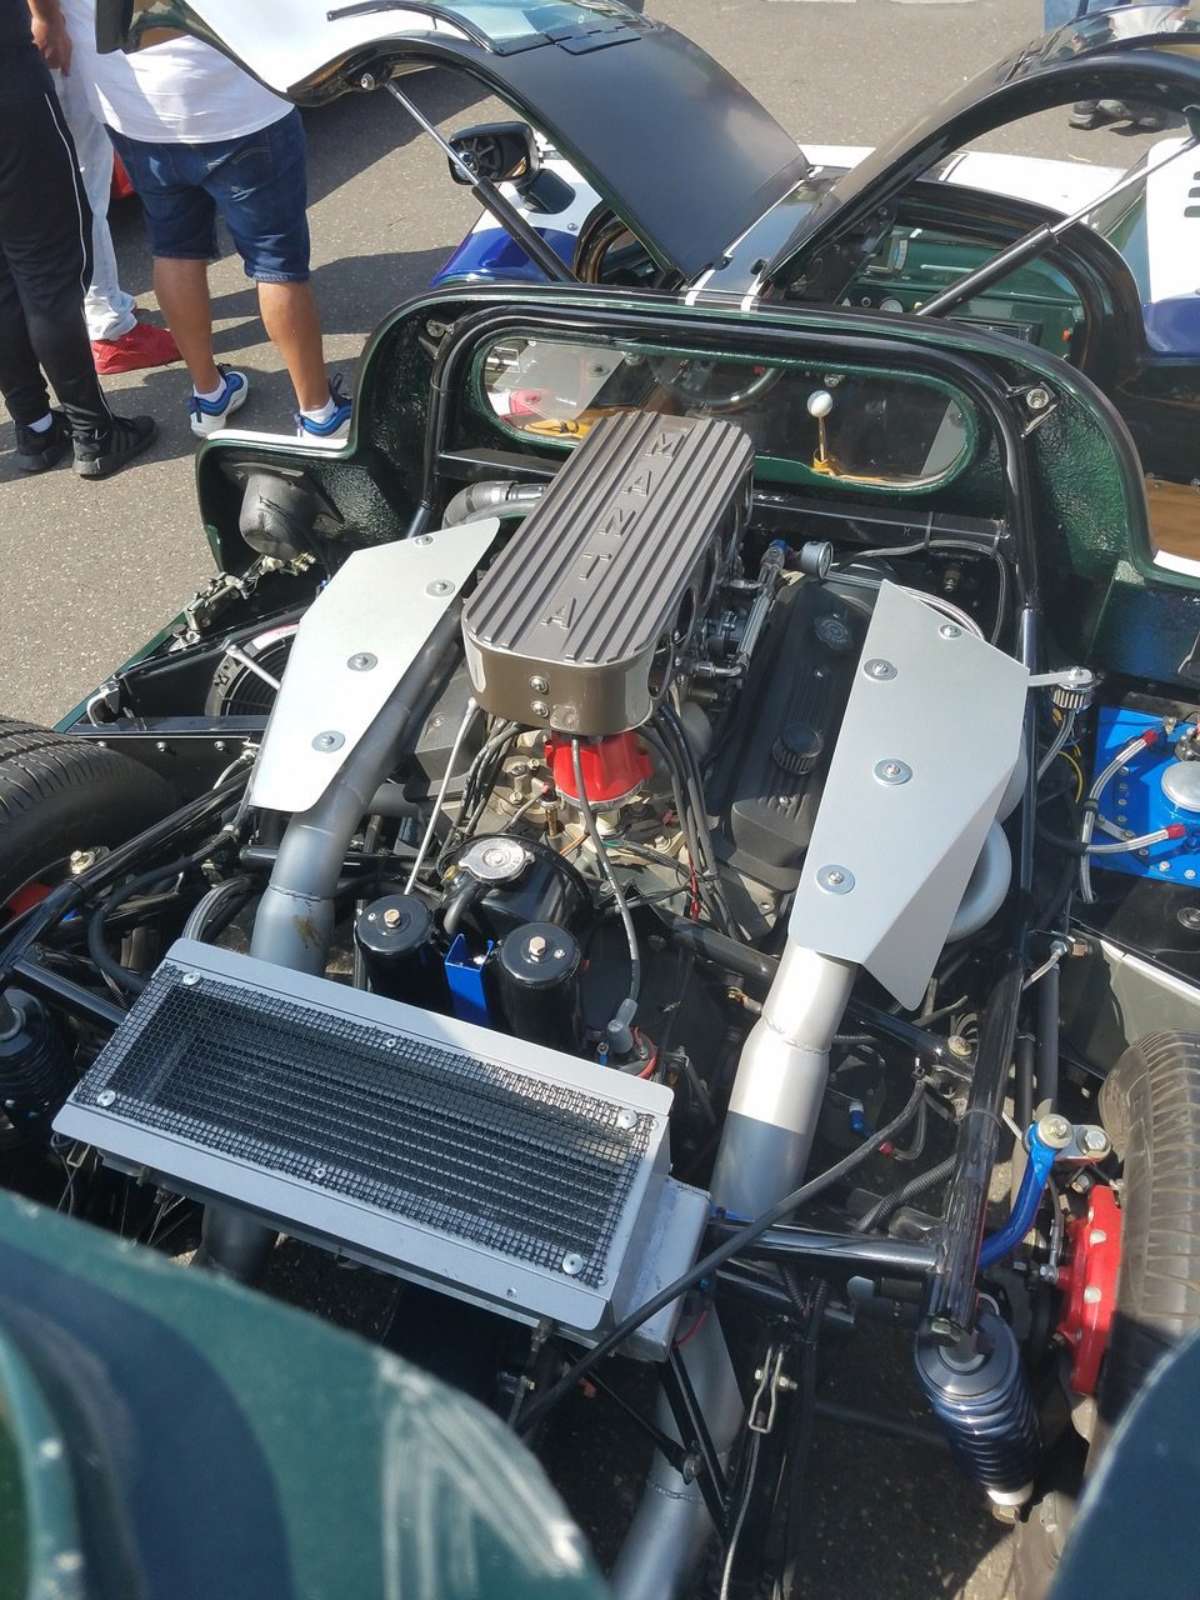
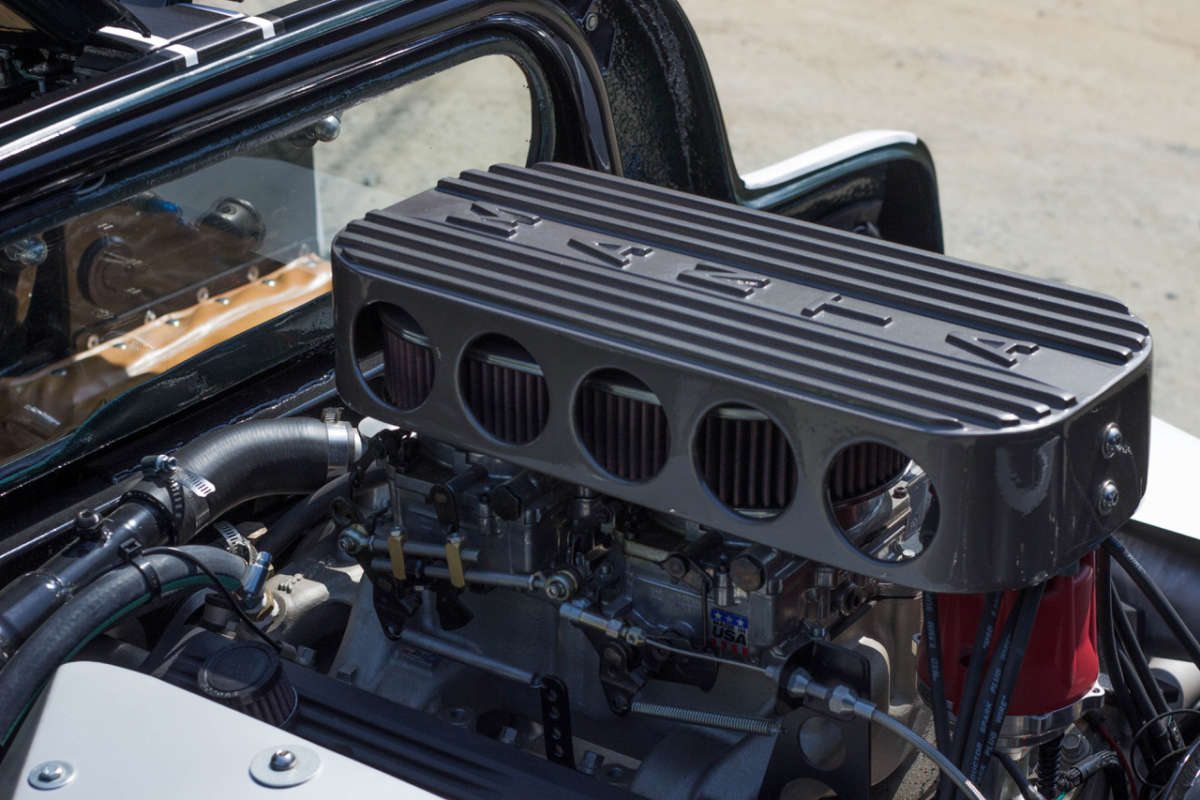
After disassembly, I had as many parts as possible powder coated in lieu of painting, which I felt was more durable and saved me many hours of labor painting parts. Since my original Manta motor found a home in one of my brother’s projects, I built a new motor for the car. It was a mild build, to assure the life of the transaxle, based on a low-mileage 350 ci short-block and a set of Corvette aluminum heads. The cam is a COMP CAMS Thumpr-series hydraulic-roller that has a lumpy idle, but maintains vacuum for the brake booster.
Although I wanted to use an electronic stack-type injection system to keep the look of the old Can-Am cars, the cost was too high. So I decided to use two four-barrel carburetors, which fit the vintage theme of the car and allowed me to incorporate the Manta air box. The engine was tested on a run-in stand to dial it in and make sure there would be no leaks, since accessibility in the chassis is difficult. I estimate the horsepower to be about 375 to 400.
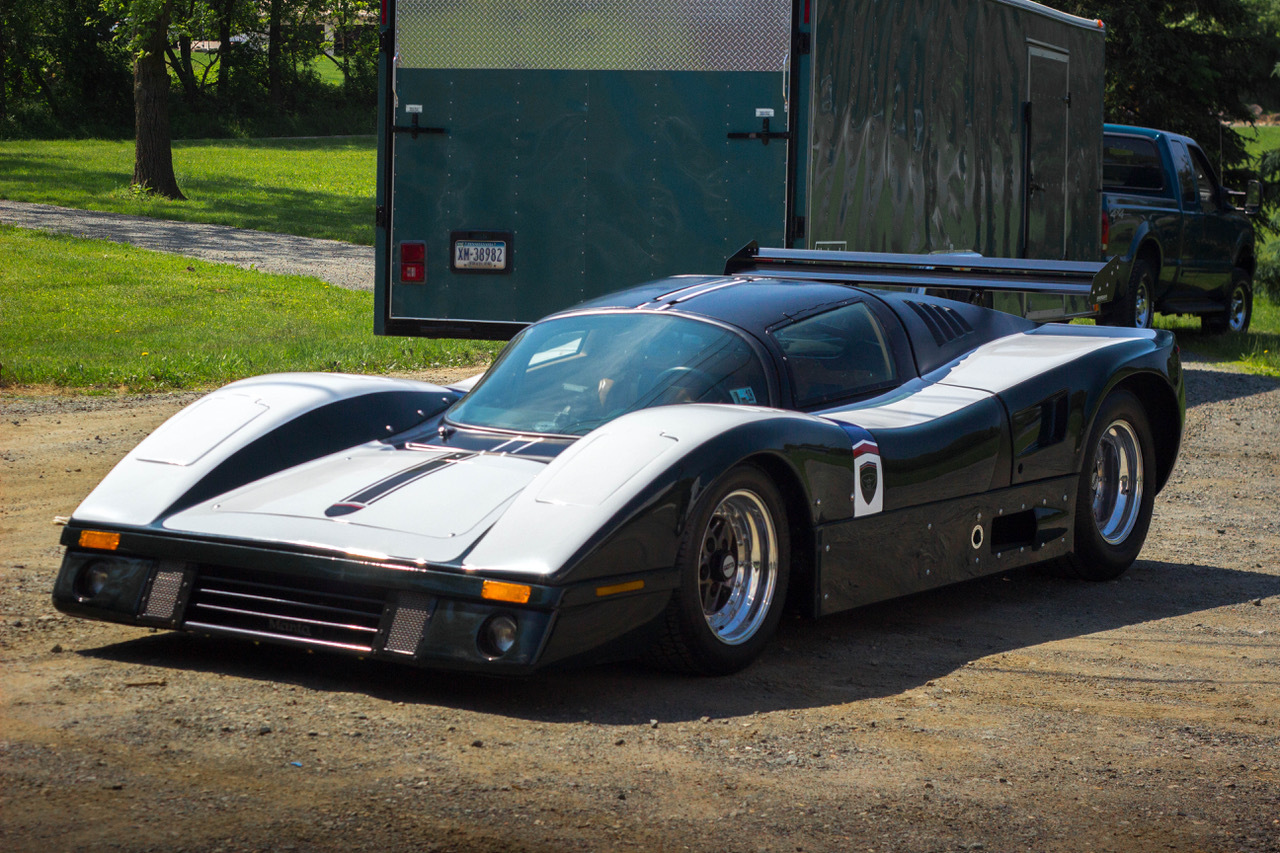
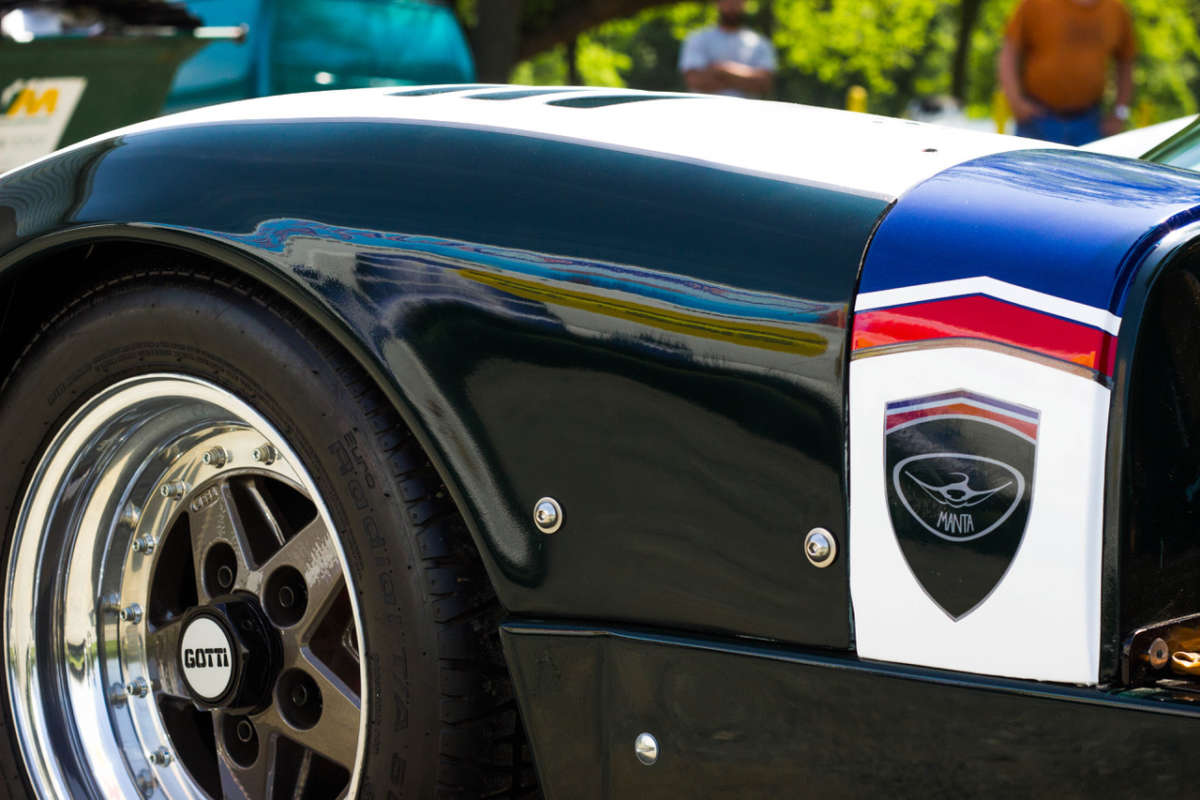
It took about one year to reassemble the car, with the wiring and testing of electrical systems taking the most time to complete. The body was painted in British racing green, really a generic name for many different variants of green, but I choose a darker shade that appealed to me. I did not finish the paint at this time in case any changes were required during final assembly. This turned out to be a wise decision.
PHASE 7. Start up and testing
The first time I turned the key on, waited to hear the fuel pump fill the fuel bowls, and hit the starter button, the engine became a living thing — an unbelievable thrill that no words can describe. Guys that do these types of projects know what I mean.
My first testing was done in my driveway to check the basic functions, throttle, braking, shifting etc. These tests were done without the nose, doors and side panels mounted, which allowed access to components as necessary. Once I knew that the car was operational, I finished the assembly of the body panels. Before I could do any road testing, I needed to have insurance and a license plate, which required the state of Pennsylvania to provide me with a chassis vehicle identification number plate. After submitting many forms and photos to the state department of transportation for their review, I finally received the HOLY GRAIL, a VIN tag, four months later. I was now legal to drive the car on the road.


PHASE 8. On the road
With the car legal to drive on the road, I took my first test drive close to home. When I was able to step on the gas and feel the acceleration, I was so nervous that I cut the trip short and headed home to calm down. I started to venture a little bit further on every test ride as I gained confidence in the car and felt more comfortable driving it in traffic.
During the test rides, I was constantly listening for and feeling everything that the car was doing, which made the rides less than relaxing. On one of these rides, I was evaluating my LED headlights and realized a car was pacing me in the passing lane. It was a new Ferrari and the passenger was taking pictures of the Manta. I’m sure he was trying to figure out what kind of car he was looking at.
As I started to go on longer test drives, the coolant temperature would climb out of the normal range up to 190-200 degrees. I checked the thermostat operation, made sure that there was no air in the system and checked the electric fan. I did not know how to resolve the issue, so I walked away for a few days before trying another test ride on a hot 90-plus degree day.
I had the same problem occur, however, this time Heaven smiled down on me and gave me a break. I was driving the car in shorts and open shoes, and felt the hot air hitting my legs when I walked past the front of the car. The fan was running in the wrong direction, which explained why the temperature was fine until it reached the fan setting. The fan would start, and then the temperature would climb since no air was able to go through the radiator. After fixing the wiring mistake I took the car for another ride and the temperature problem was resolved. I now had a truly drivable car.
There were a few other problems that testing uncovered. The lack of rear visibility was something I did not like even though the mirrors were okay. I corrected the issue with a rear back-up camera so I could see directly to the rear of the car. One of the ancient Seville rear brake calipers eventually leaked, despite having all new parts and no matter how much I fiddled with it I could not get it to stop seeping brake fluid. I drove the car about 200 test miles to try to get any issues resolved.
PHASE 9. Final phase (I hope)
Based on the testing I decided to make a more changes and upgrades to the car. I replaced all of the old Carerra coilover shocks and springs with single-adjustable Ride Tech units. The front spring rates were increased to help improve the ride height and clearance, and the rear spring rates were reduced to lessen the ride harshness. I also replaced all the brakes with components from Wilwood. To improve access to the mechanical components in the front of the car, I made a section of the front nose removable. The car was then finish painted.
I expect that there will be more tweaks necessary to continue fine tuning the finished product. Technology of today has made it possible to greatly improve the car. One example is that the Corvair transaxle, which had no provisions for a speedometer. A simple and modern solution I found was to run my speedometer using a GPS signal. How cool is that!
As a final summary to a 40-year project, I found that my completed car is so very small inside that it is an exercise for an old guy to get in and out of the car. Most of my buddies are too rotund, too tall or have too many joint replacements to get in the car. The car will likely have very little monetary value when it comes time to sell due to the munchkin-size cockpit. I guess I should have built a Cobra.
WAS IT WORTH IT? YOU BETTER BELIEVE IT!
SPECIFICATIONS
Body: Manta cars
Chassis: Manta cars with extensive modifications
Engine: 350 ci Chevrolet
Transmission/Rear Differential: 1969 Corvair four-speed with heavy-duty spider gears and case girdle reinforcement
Axle Ratio: 3.23:1
Horsepower: 375-400 estimated
Chassis weight: 2500 pounds. 45 percent front, 55 percent rear (Porky, I know, but I spent my career as a design engineer for Mack Trucks i.e. BUILT LIKE A MACK)
Radiator: Manta cars copper/ brass.
Cooling System: Custom fabricated system, no coolant running in the frame rails as Manta designed
Engine adaptor: Mid-engineering
Clutch: Ram single disc
Clutch actuation: Wilwood hydraulic with external slave cylinder
Oil cooler: special fabrication, unknown manufacturer
Oil pan: Kevco road racing pan and pump pickup
Cylinder Heads: GM aluminum with ports matched
Compression Ratio: 10.0:1
Camshaft: COMP CAMS Thumpr Series hydraulic roller
Intake: Edelbrock air-gap with two four-barrel carburetors
Ignition: MSD with programmable advance
Timing chain: Double roller
Exhaust headers: Manta cars
Instruments: VDO electric white face
Air/ Heat: Vintage air
Interior: Manta cars with custom rugs
Pedals: Custom fabricated
Shifter: Modified Fiero with custom cables
Steering column: Fiero with Grant steering wheel and quick-release adaptor
Wiring: Ron Francis
Door hardware: Bear claw with electric actuation
Headlights: LED with linear actuators
Mirrors: Ford Escort electric
Wipers: Special Power Windows cable style
Brakes: Wilwood calipers, 11-inch front rotors, 12-inch rear rotors


Comments for: My Manta Story
comments powered by Disqus