Spraying powder coat at home with Eastwood DIY kit
Story and Photos by Jim Youngs
One aspect that gives many DIY car builders heartburn is painting. Usually left to the professionals, painting requires lots of arduous, skilled prep work, and even then, it’s hard to get excellent results. But with the advent of home powder-coating systems, getting good-quality, durable finishes on metal parts is easier than ever.
Basically, powder coating is the electrostatic application of a dry powder to a part that is then baked in an oven to flow out and cure. The powder sort of melts and flows out evenly on the part, and forms a comparatively thick, tough skin. Once cooled, it provides a cured finish barrier that is resistant to most chemicals, fuels, acids, thinners, and even brake fluid and UV light, so it’s much more durable than liquid finishes.
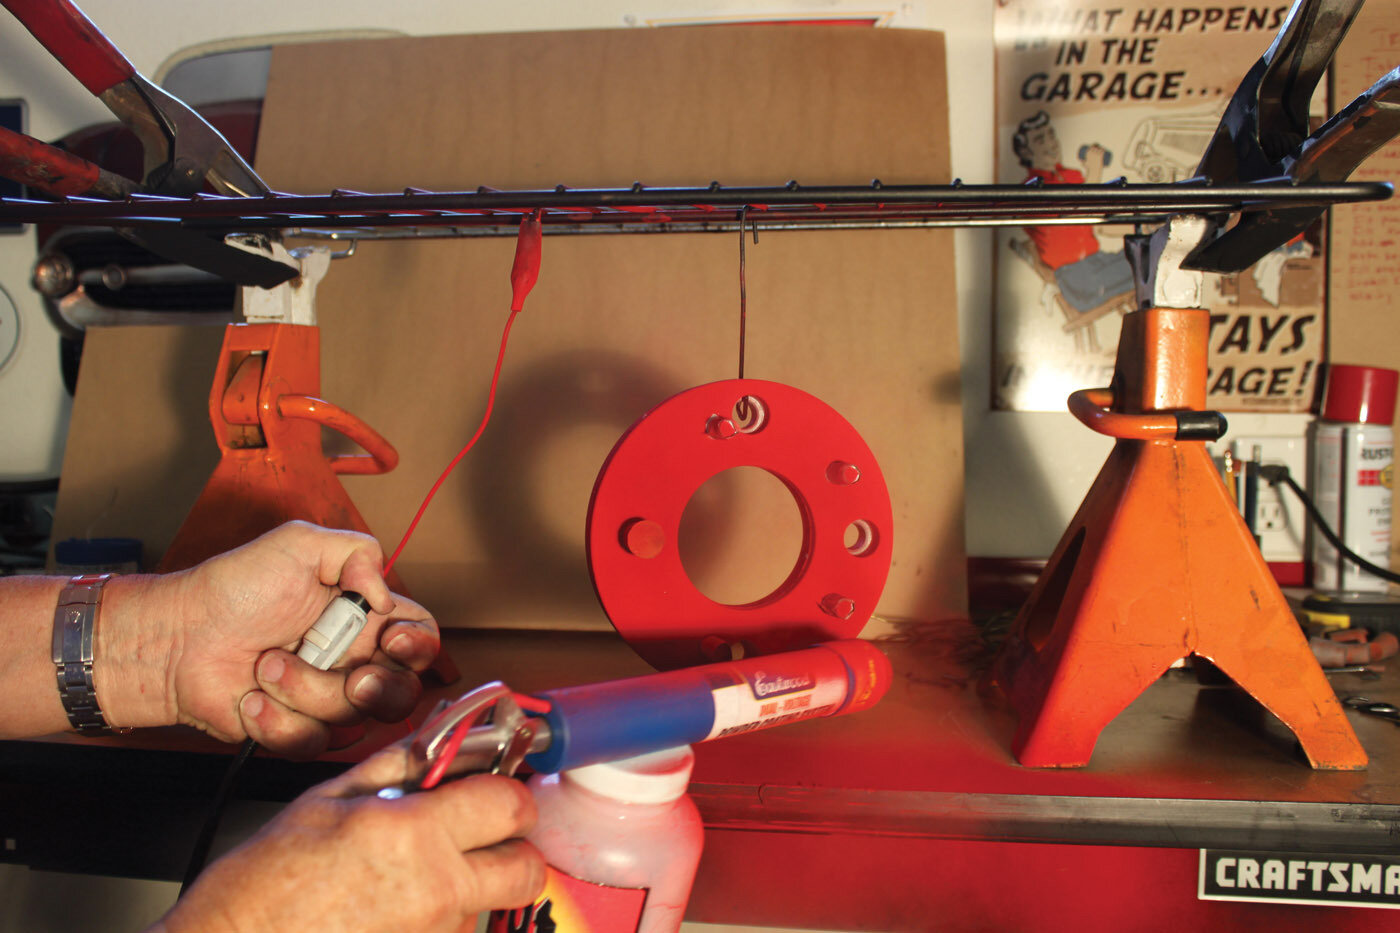
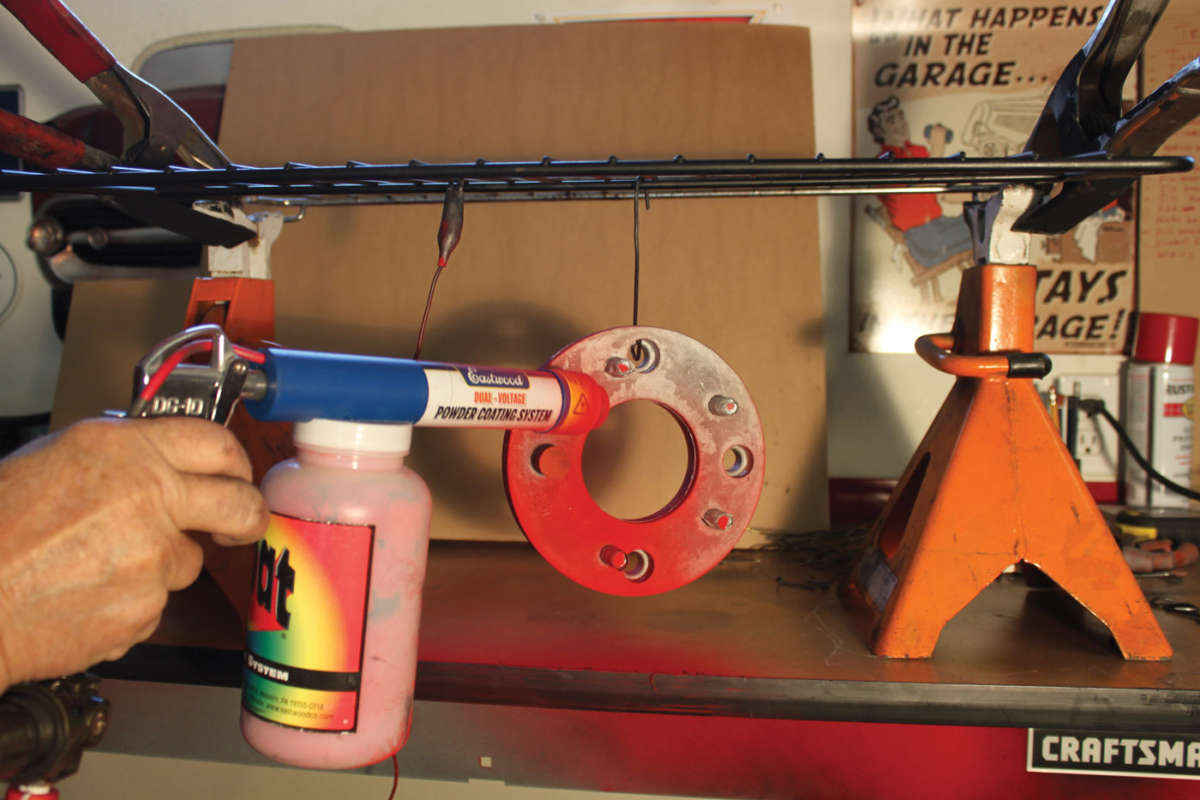
What exactly is “electrostatic” application of this powder? In most powder-coating applications, like the Eastwood powder-coating system shown here, a positive electrical charge is applied to the powder as it comes out of the nozzle of the gun (known as a corona gun in this case). A negatively charged ground wire is attached to the part to be coated, so the positively charged powder is drawn and adhered to the part electrostatically.
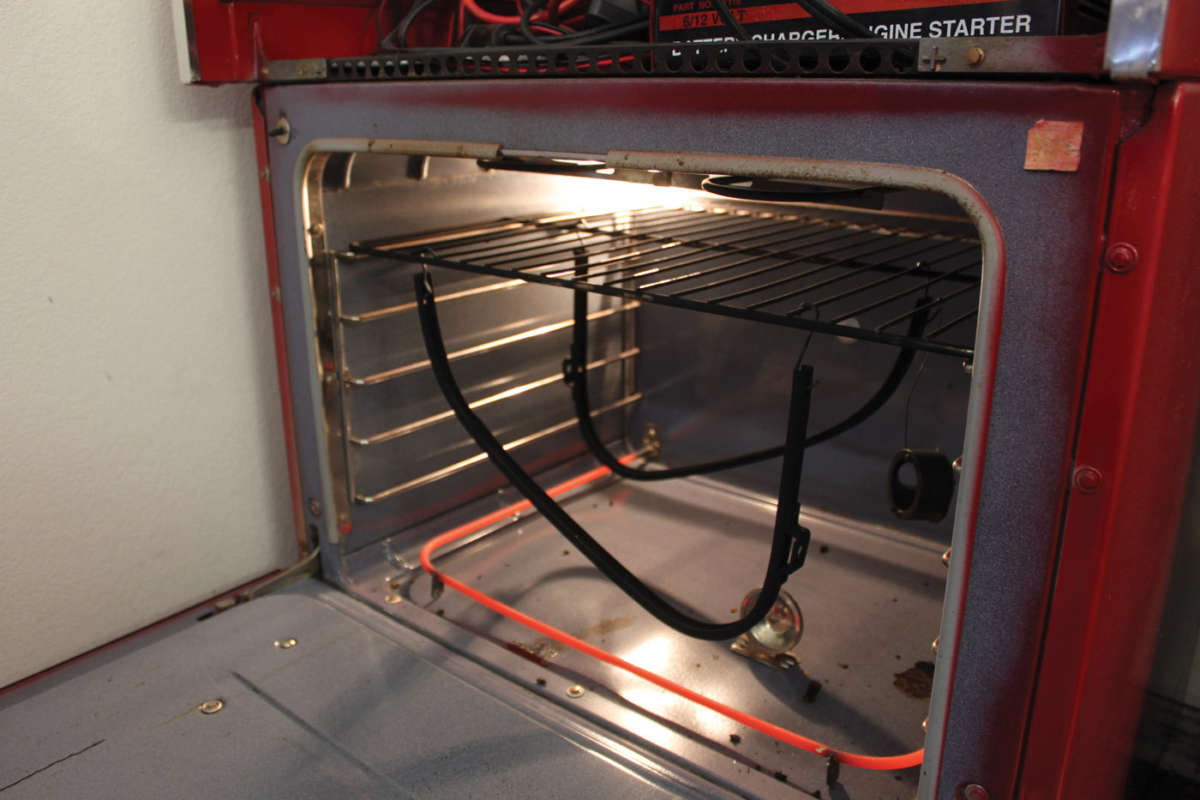
Once the part is sufficiently coated with the powder, it can be moved to an electric oven (never use a gas oven), where in the case of the Eastwood system, is baked at 450 degrees F. It’s important to check on the part every five minutes until the entire piece has flowed out. Then lower the temp to 400 degrees (350 degrees for gloss clear powders) and set a timer for 20 minutes. After the 20-minute bake, remove the part and allow it to cool. Parts can then be coated a second time if necessary or go ahead and install it.
A word of caution is appropriate here to keep peace in the family: don’t use your spouse’s or mom’s oven in the kitchen, as they will surely frown on powder-coated racks and cookie sheets. That’s why your author scored a cast-off 220 volt, avocado-green double oven from a friend and painted it red to match his Craftsman garage cabinets. It works perfectly in a corner of the shop without regard for meticulous cleanup. You can even powder coat small components in a toaster oven too, but again, don’t go to your kitchen to source one.
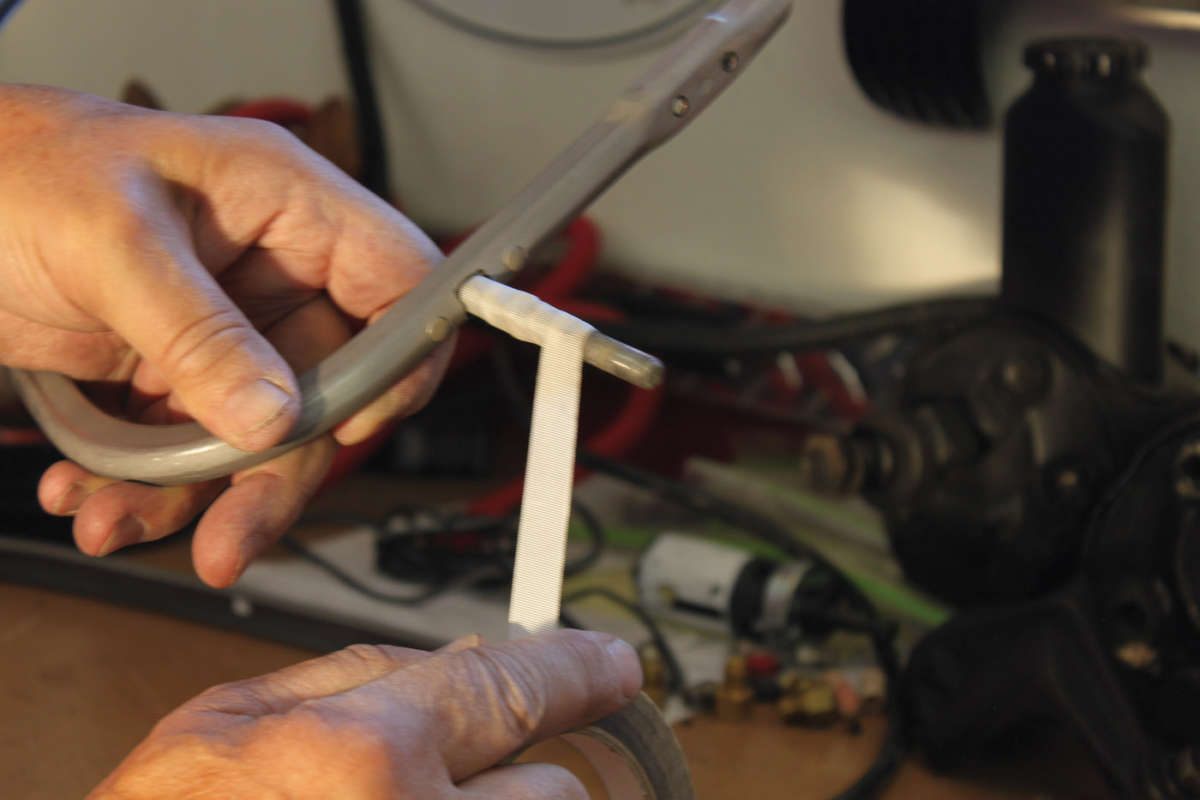
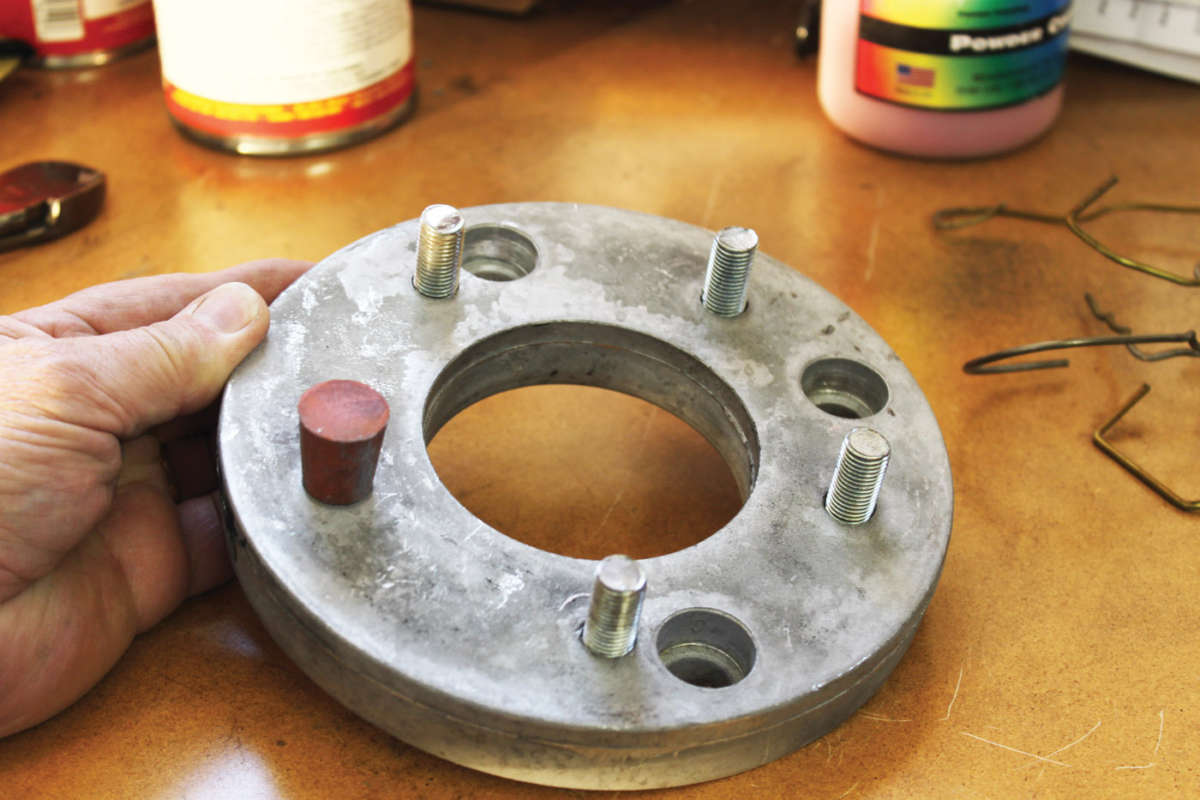
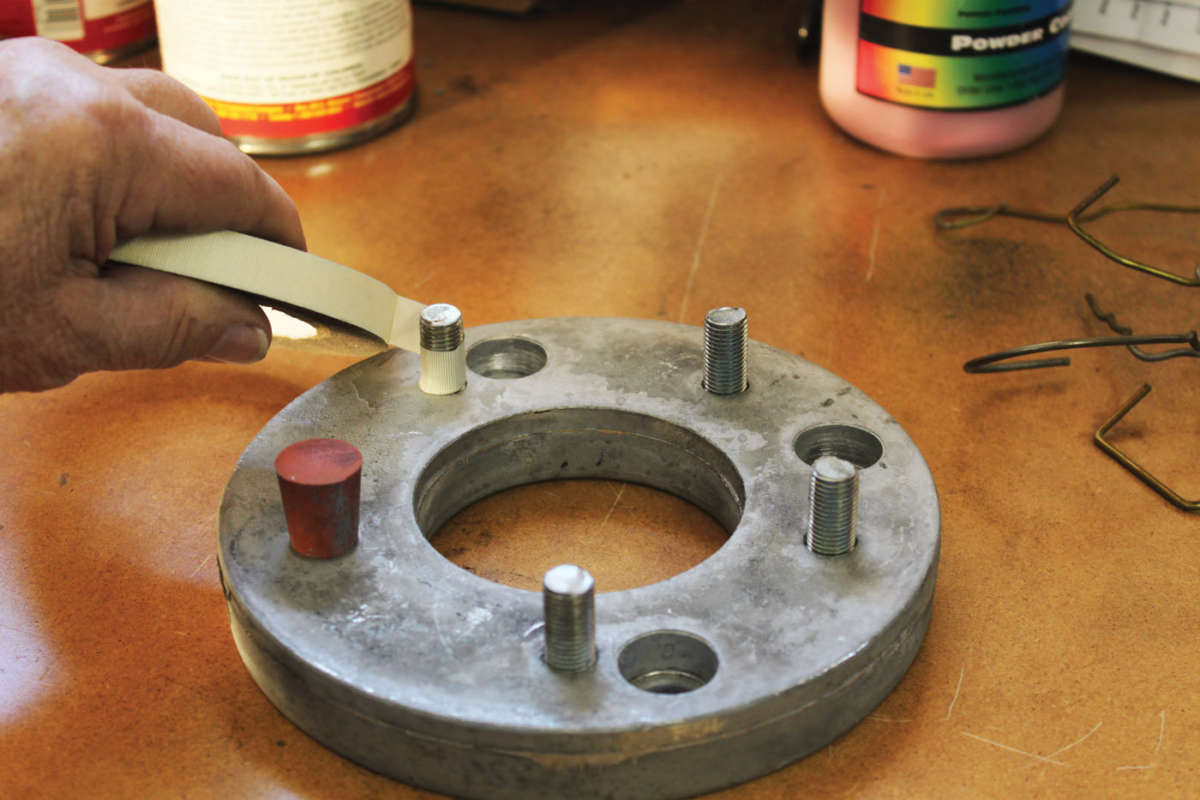
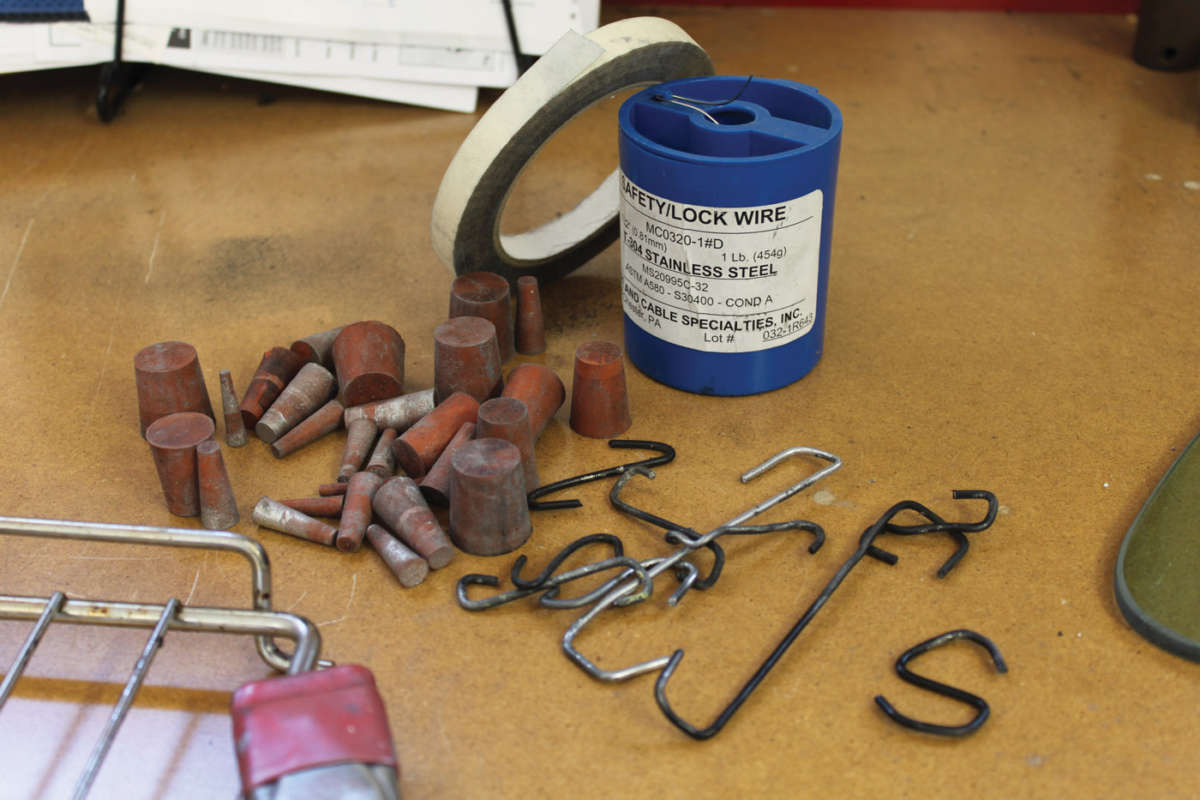
Just like with painting, powder coating requires some masking of areas that you don’t want coated. But since there’s high heat involved, it’s necessary to use high-temp silicone plugs to seal threaded holes and close tolerance openings so they don’t get coated. Also, high-temperature masking tape is used to cover areas that shouldn’t get powder coated.
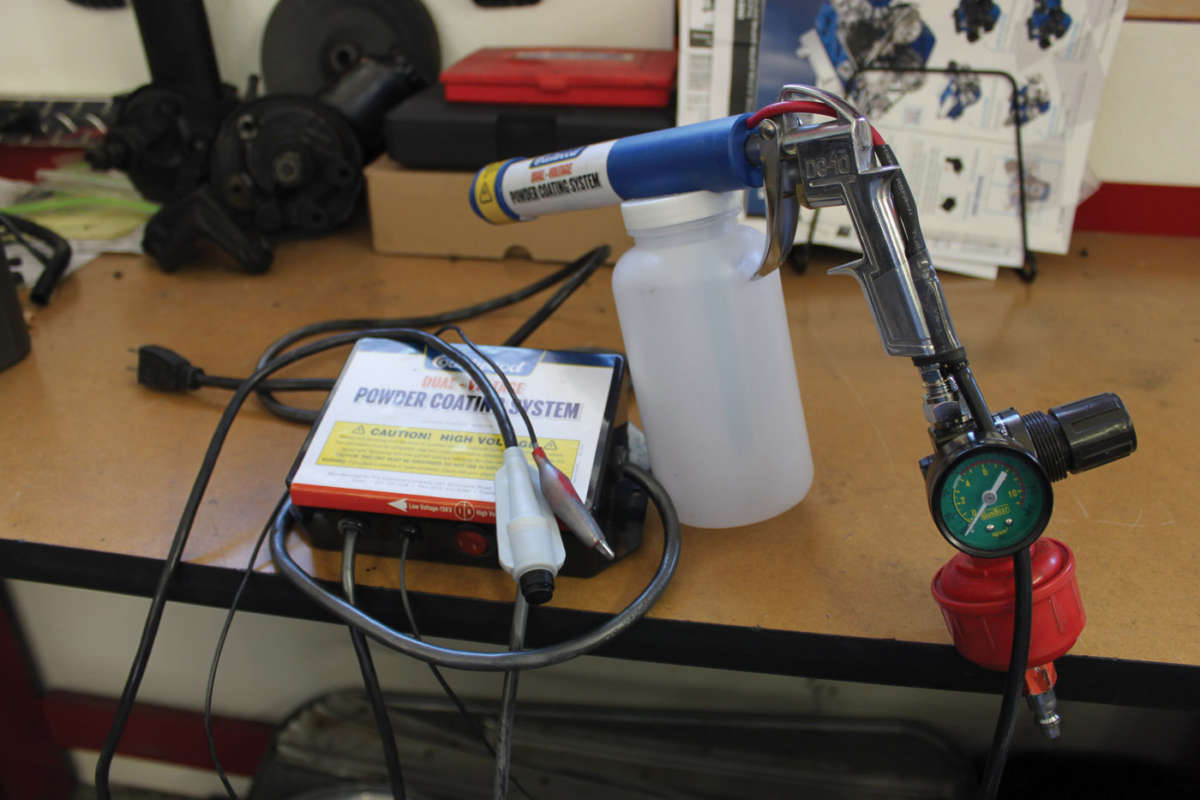
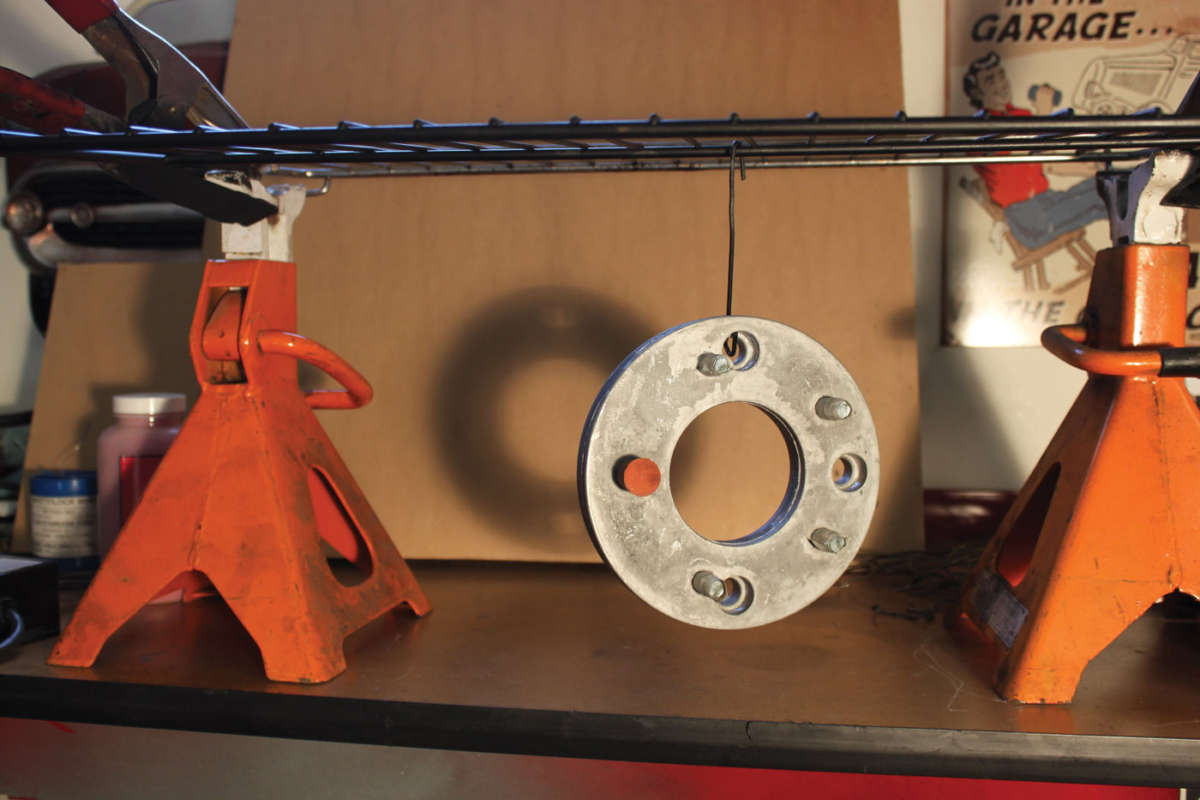
Surely by now you’re asking yourself, “So, what do I need to get started powder coating in my garage?” Admittedly our experience is limited to the Eastwood systems, the newest of which is their dual-voltage powder-coating system with high-frequency pulse technology ($109.97 for the gun, and starter kits with practically everything you might need starting at $153.97). We also have experience with Eastwood’s Original powder-coat gun system ($99.99) and it also works very well. Some other handy things to have before beginning to powder coat at home include a roll of aluminum foil, the high-temp masking tape mentioned earlier, a collection of high-temp silicone plugs, maybe a spool of stainless safety wire, and heat-resistant gloves or oven mitts. We’ve also found a collection of clothes hanger hooks, metal cleaning products, a disposable moisture separator for your air line, and a small adjustable air regulator at the gun and a timer to be helpful. Most of those things can additionally be purchased from Eastwood. It should be obvious from this discussion that you’ll also need an air compressor. The safety wire is useful for hanging parts on oven grates easily, as are the assortment of homemade hanger hooks.
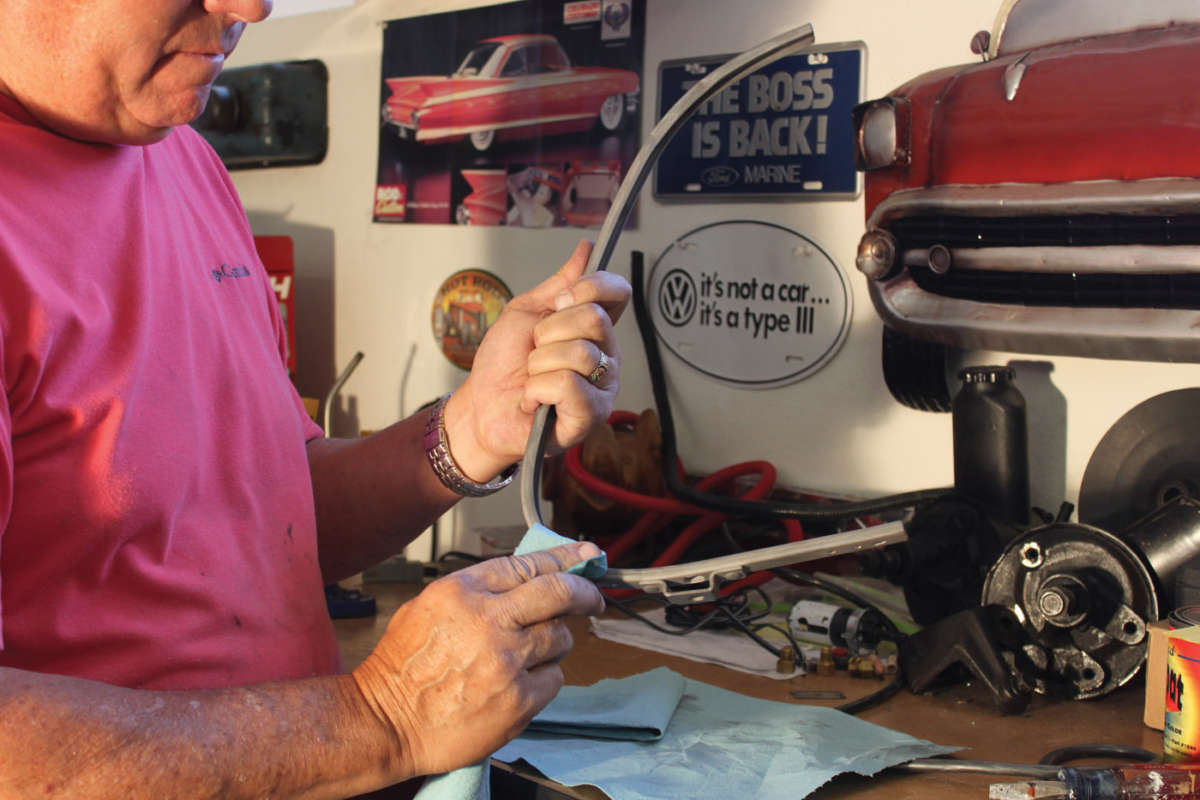
As with normal refinishing, powder can only be applied to clean, bare metal surfaces. It’s essential to properly clean the parts to be coated by removing all traces of old paint, rust, grease and oil. We like to sandblast parts to remove that kind of surface contamination, then use a good grease and oil cleaner as an added precaution. Once the parts are completely dried off, areas where you don’t want the powder to coat need to be masked, as mentioned above. It’s a good idea, too, to handle the parts wearing nitrile or vinyl disposable gloves to avoid fingerprints and such.
The actual process of powder coating, once you get the parts positioned on the racks or cookie sheets for spraying, is rather simple. Preheat the oven in prep for placing your coated parts. And be sure your path from where you are spraying to the oven is clear so as to not bump them and disturb the uncured powder. Set the air regulator to 5 to 10 psi with about 8 psi being ideal. Attach the ground clip to the part, the hanger or the rack itself. Depress the remote activation switch then pull the trigger on the gun and watch the puffs of powder being drawn electrostatically to the part.
Be sure to apply an even coating of powder to all the surfaces at the low-voltage setting. The higher, 25-kV setting is best suited for large objects or when applying second coats or clear coats to ensure good coverage. When the oven is up to the right temperature, transfer the parts carefully into the oven and watch the flow-out procedure, and then set your timer.
Cleanup is rather straightforward and doesn’t require any solvents or liquids. Using no more than 30 psi of compressed air, completely blow out all the excess powder from the gun and from the surrounding areas. It’s very important if you’re going to change colors that the gun is completely free of the previous-color powder to prevent undesirable results.
In our shop we always find plenty of opportunity to powder coat all sorts of metal components; the process is easy and the results pleasing and durable.
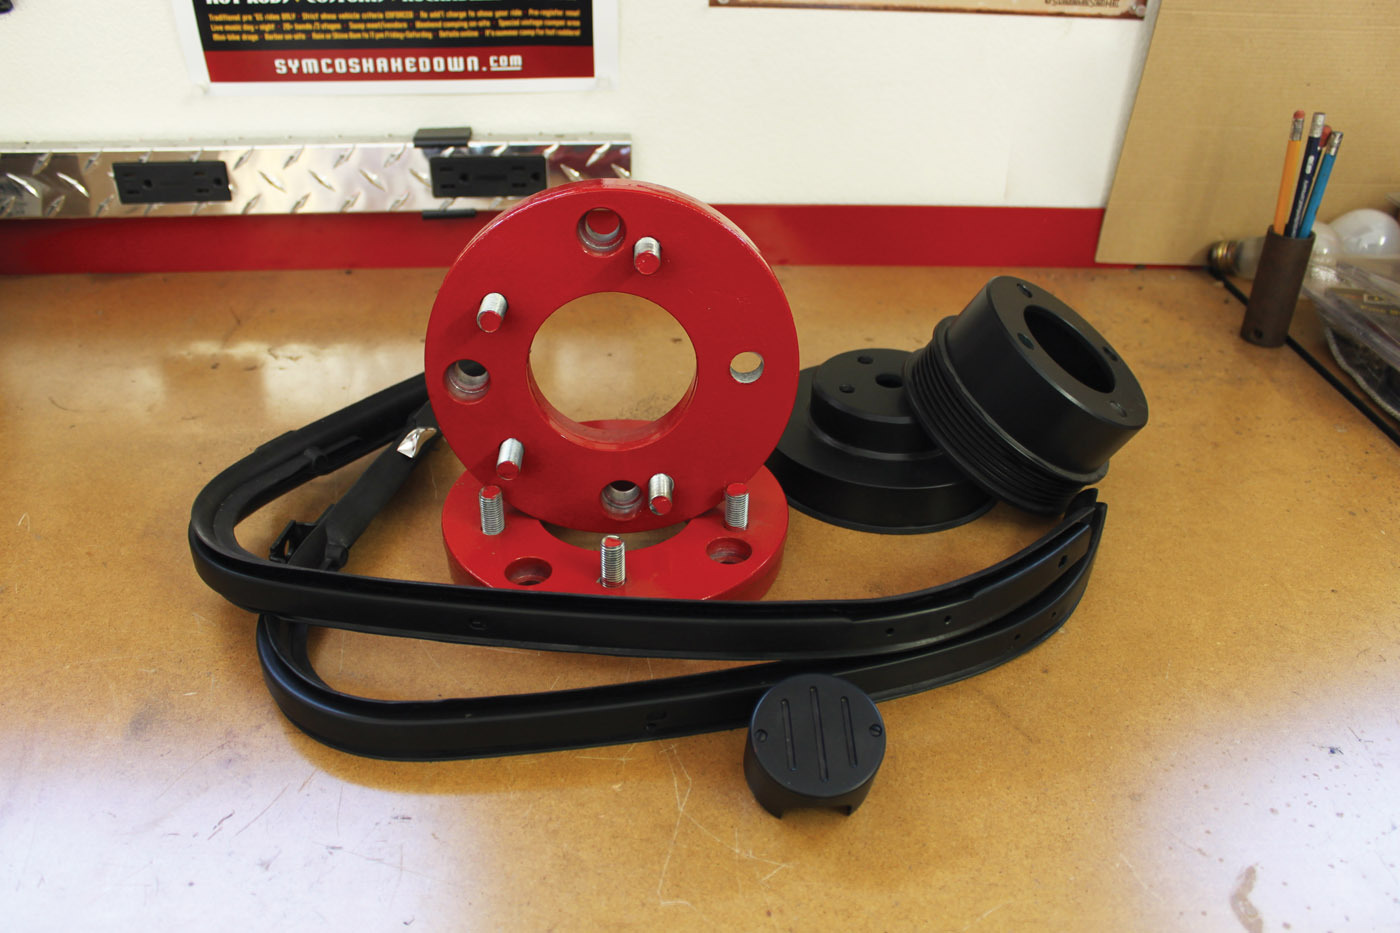
As you can see on these finished pieces (wind wing frames, wheel spacers, bulkhead fitting and a pair of serpentine belt pulleys) the finishes are smooth and ready for installation once they have cooled. The finishes are also quite durable and the process fairly easy, particularly when compared to the paint process.


Comments for: Powder Coating at Home
comments powered by Disqus