Measuring Devices
By Jim Youngs, Editor Emeritus
I’ll admit that precise measuring hasn’t always been the guiding mantra around the TajGarage, but I’m getting much better—slowly. I’ve always blamed the slight movement of that little “whatever it’s called” at the end of a tape measure or the thickness of a pencil line for any shortfall or overages on some material I’ve cut, but that’s probably not fully the problem. Carelessness is more likely.
Eyeball engineering, guessing at hardware sizes and a tape measure have always been my go-to methods of getting things to fit. That is until I started building stuff in earnest, using a mill/lathe and adding more exacting devices to my meager box of tools. Mind you I’m still not an expert when it comes to measuring things, but I’ve found some tools beyond my handy tape measure that greatly assist sizing things up, saving trips to the hardware store and/or ordering the wrong parts online. It’s not uncommon to refer to projects as a three-trip process, describing how many hardware store visits it takes to accomplish a task.
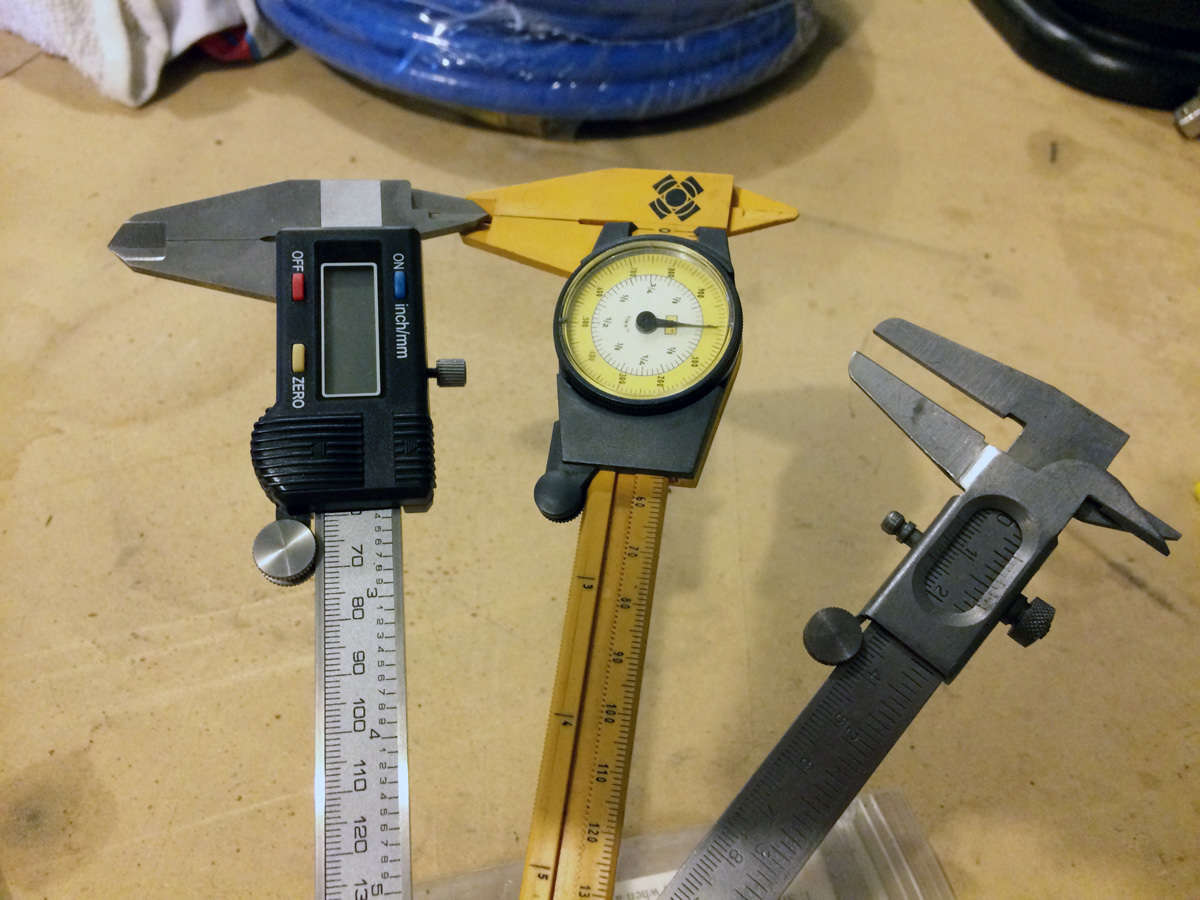
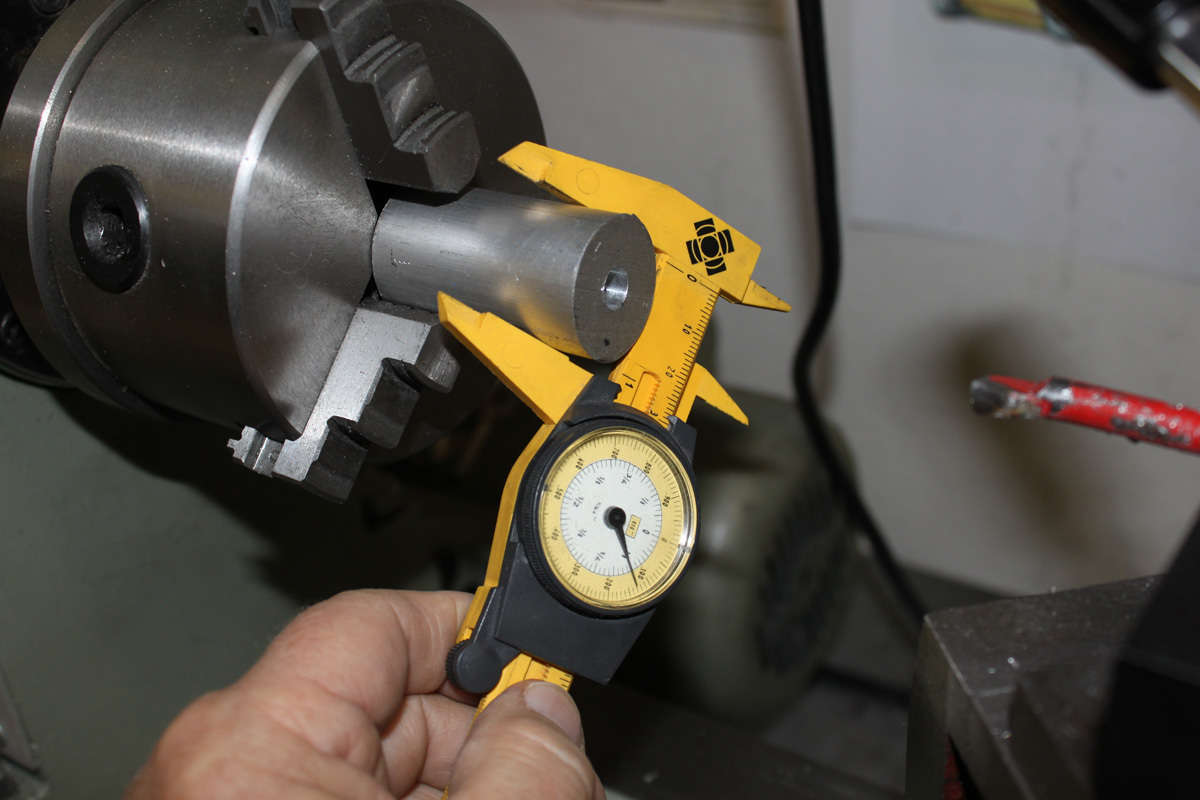
If memory serves, a car-building buddy who wondered how in the world I’d ever got a project on the road without it gave me my first sophisticated measuring device. Turns out, a dial caliper is an invaluable tool that I keep handy any time I’m in the shop. Doing plumbing and need to order some fittings? You can quickly determine the outside and inside diameters without guessing and order the correct fittings the first time. Admittedly, I’m not very good at looking at a piece of hardware and knowing what size it is. Dial caliper.
Need a clamp for a particular piece of tubing? Dial caliper. Curious as to the depth of a drilled hole? Dial caliper. A drill bit’s markings have worn off? Dial caliper. Need to turn down a piece of aluminum stock to a specific measurement? Dial caliper.
Since that first gift caliper I’ve added a digital readout version and a basic version that came as a part of a measuring set that also included a machinist rule, plus inside and outside bow calipers.
Like me, you probably have a cigar box or something similar filled to overflowing with random pieces of hardware that you’ve sworn to sort and catalog “some day.” Of course that’s a fruitless promise, as you’ve no doubt experienced the same frustration of not being able to find a usable nut or bolt in that pile when you really need it, and end up heading to the hardware store anyway.
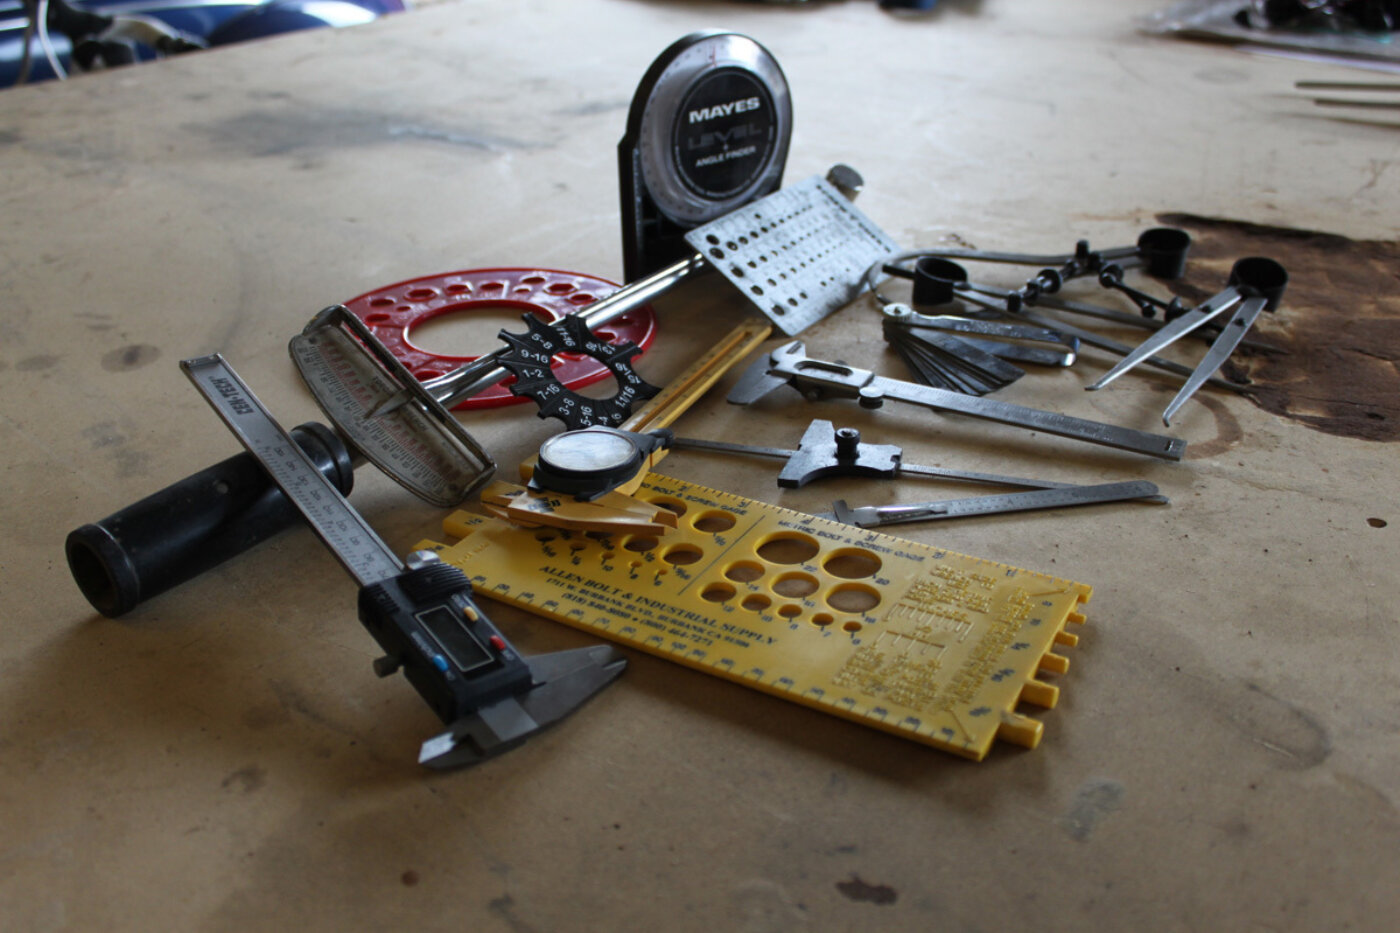
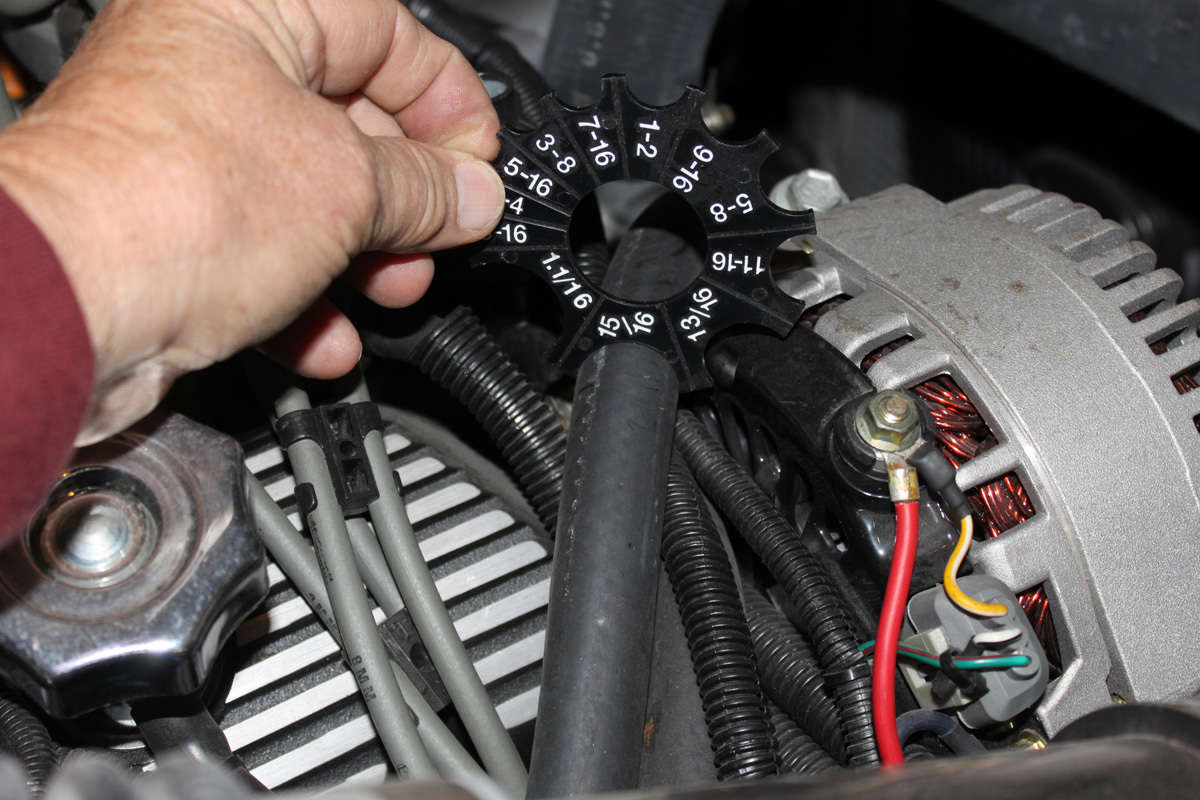
As already noted, I’m not good at guessing the size of a piece of hardware. I found a very handy Screw Chek’r at The Eastwood Company (www.eastwood.com) that makes trips to the hardware store much more effective. It is a 5/16-inch thick piece (I measured it with my calipers) of aluminum drilled and tapped with some common hardware sizes as well as appropriate drill and tap sizes. There are several similar devices for measuring hardware, including a yellow plastic one seen in the lead photo here, but it doesn’t have an easy way to determine threads and can be easily damaged.
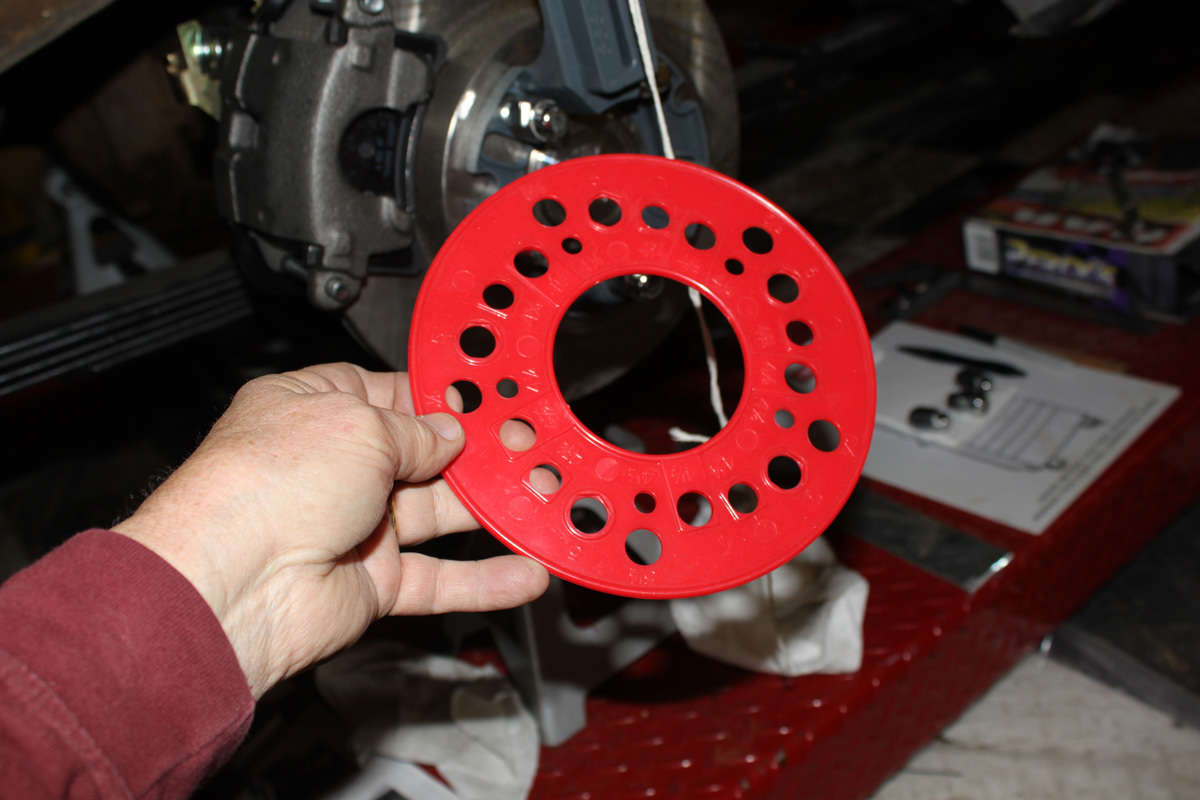
One of the least expensive and handiest tools in the box is a bolt circle template ($3.99 from Speedway Motors, www.speedwaymotors.com). It’s especially useful when scouring swap meets to determine bolt circles of a smokin’ deal on wheels or sizing up that found 9-inch rearend. It’s also proven helpful during my current project of determining the proper wheel sizes needed for my ’54 Belair.
Given that I’m plowing new ground here (atypical Ford 9-inch axle under an old Chevy with aftermarket leaf springs and spring hangers), I also decided to see if a Percy’s High Performance Wheelrite Wheel and Tire Simulator (Summit Racing, www.summitracing.com) would be any more helpful than the old-school, plumb bob and tape measure method of determining proper wheel and tire sizes.
The Percy’s tool is easily adjustable for wheel width, wheel diameter, front spacing and back spacing. I found it most effective for determining wheel diameter so as to clear the new disc brakes I’ve installed. It was also helpful to visualize possible wheel widths that wouldn’t interfere with anything in the wheelwells. As for front and backspacing, I relied on the plumb bob with a straight edge and tape measure.
Another handy, inexpensive device for measuring outside diameters of hoses, tubing and wires is Made4You Products’ Tube Gauge ($3.49, www.made4uproducts.com). To prevent second-guessing clamp sizes and fittings, this ABS plastic tool accurately measures the OD of tubing, hoses and wires so you don’t end up buying or ordering the wrong size stuff. This company also offers a version of the Bolt Circle Template mentioned above and even has for $16.99 a complete set of templates to accommodate virtually any bolt pattern.


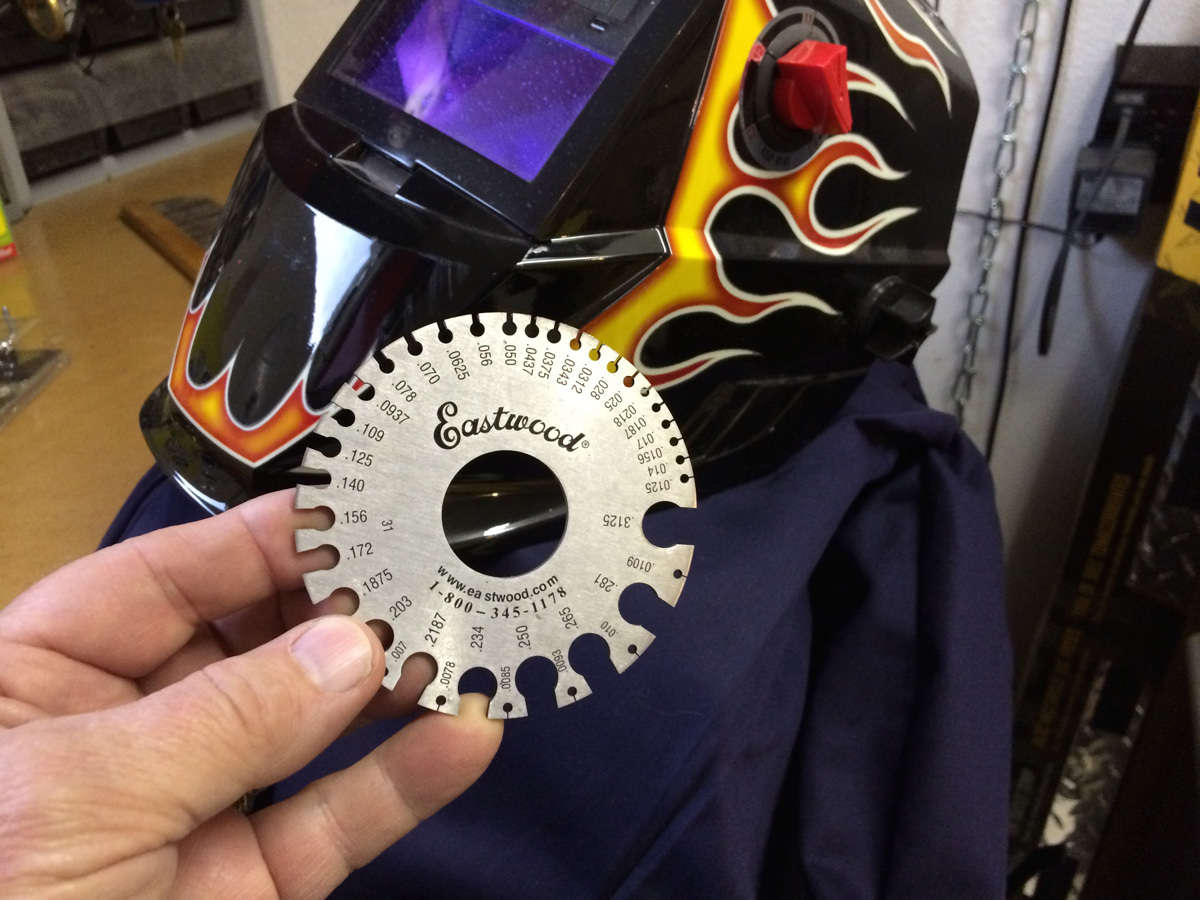
I tend to turn to The Eastwood Company a lot for all sorts of products. If you haven’t as yet discovered this company you need to, and get on its mailing list for their frequent catalogs. I even purchased one of its 220V MIG welders last year. And of course I had to have some of the company’s allied accessories, including a welder’s jacket and a welding blanket to prevent my shop’s plastic RaceDeck flooring from melting. In addition, I bought a handy Sheet Metal Gauge ($9.99 on sale) that takes away another of those guessing situations and allows accurate settings on the welder.
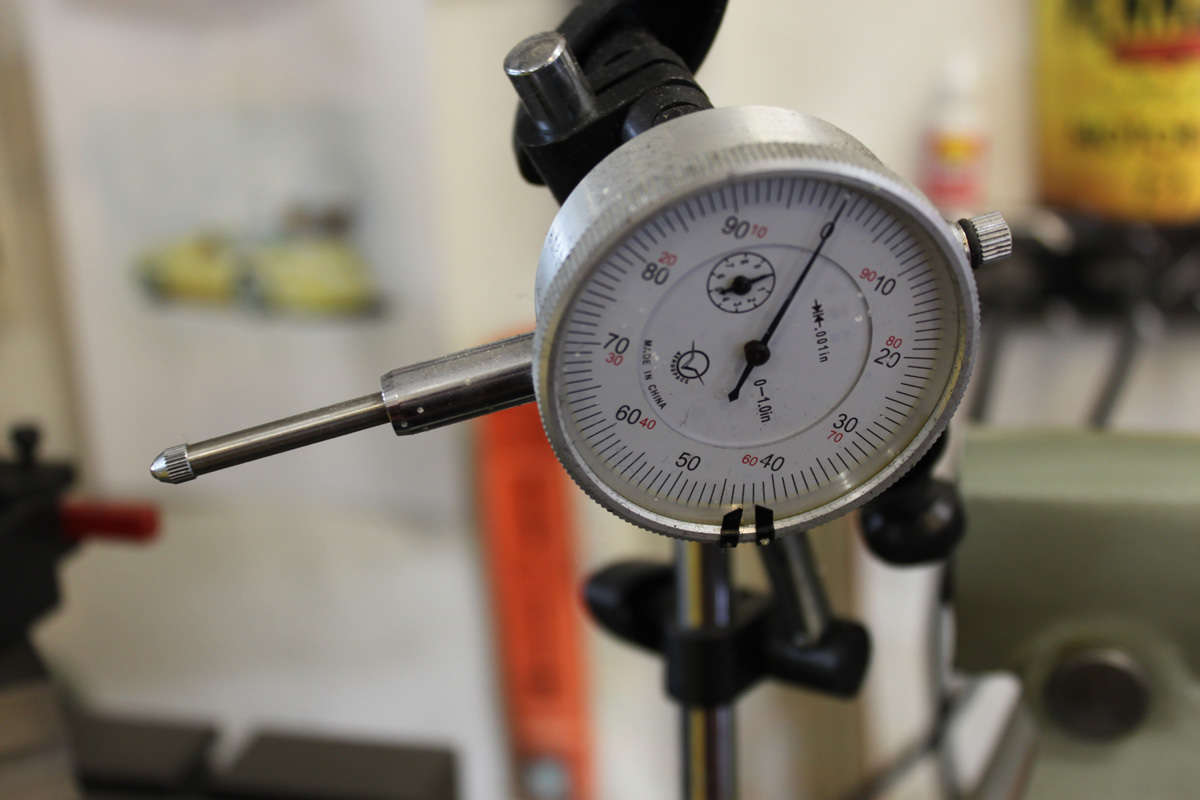
A dial indicator, and an associated magnetic-base and articulated arm, probably isn’t something a guy really needs, except for its cool factor, but I’ve employed one I got at Harbor Freight (www.harborfreight.com) a few times when working on the lathe. It also came in handy when building a Ford V-8 engine to determine TDC with the heads removed. Yeah, probably not something every shop needs, but when determining if a brake rotor is warped, or a turning piece is round or a milling table is squared to the head, then this is your tool.
A good torque wrench can also be considered a handy measuring tool as it measures and adjusts the amount of twisting force on a particular piece of hardware. Before I could afford a torque wrench, I just figured tighter was better and guessed that I was applying the amount of torque a bolt needed. Probably not a good idea in the grand scheme of things.
My first torque wrench was a rather useless tool that required conversion math (something I’m particularly bad at). It was a wrench that measured inch-pounds rather than ft-lbs. Next I bought a Craftsman unit with a long needle from the head to a scale at the handle (shown). I always questioned the accuracy of that wrench, but used it nonetheless. In recent years I stepped up to a more modern version that allows its user to set the required torque and then makes an audible click when that level is achieved. Engine Labs (www.enginelabs.com) has recently published a useful, informative article on the pros and cons of the various types of torque wrenches and the need to keep them calibrated.
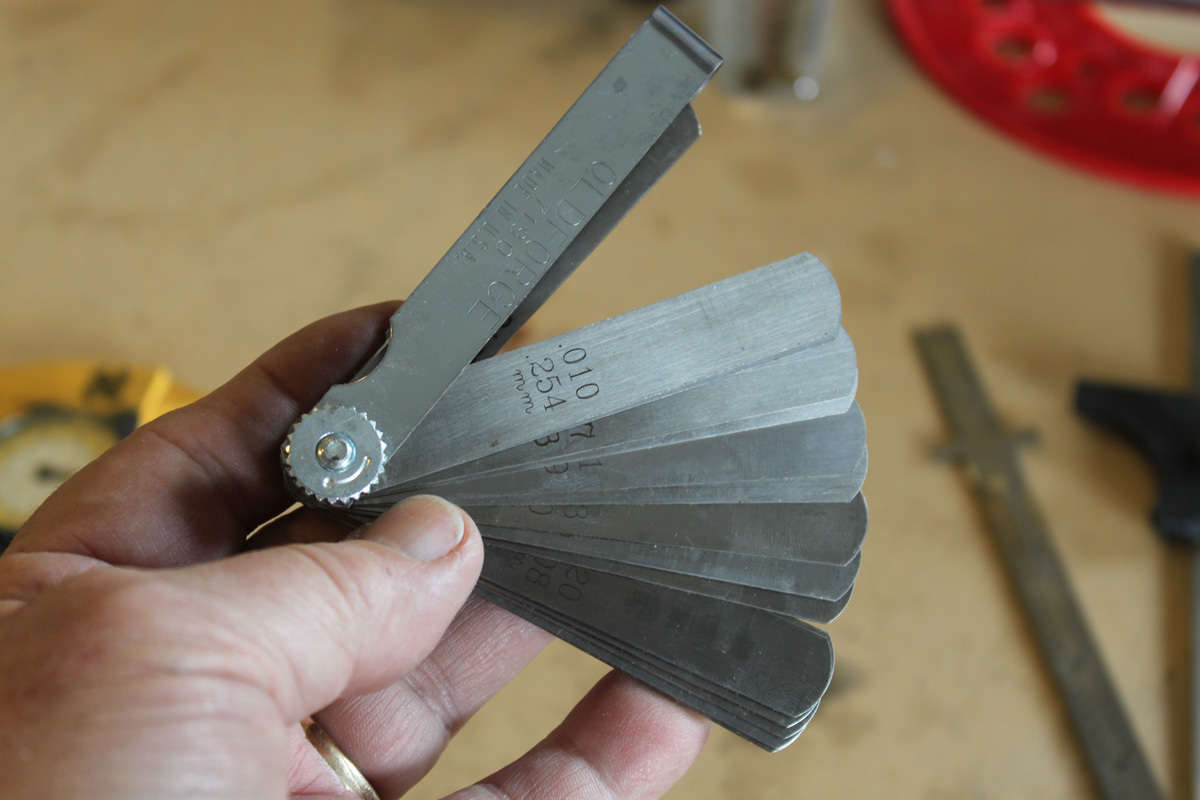
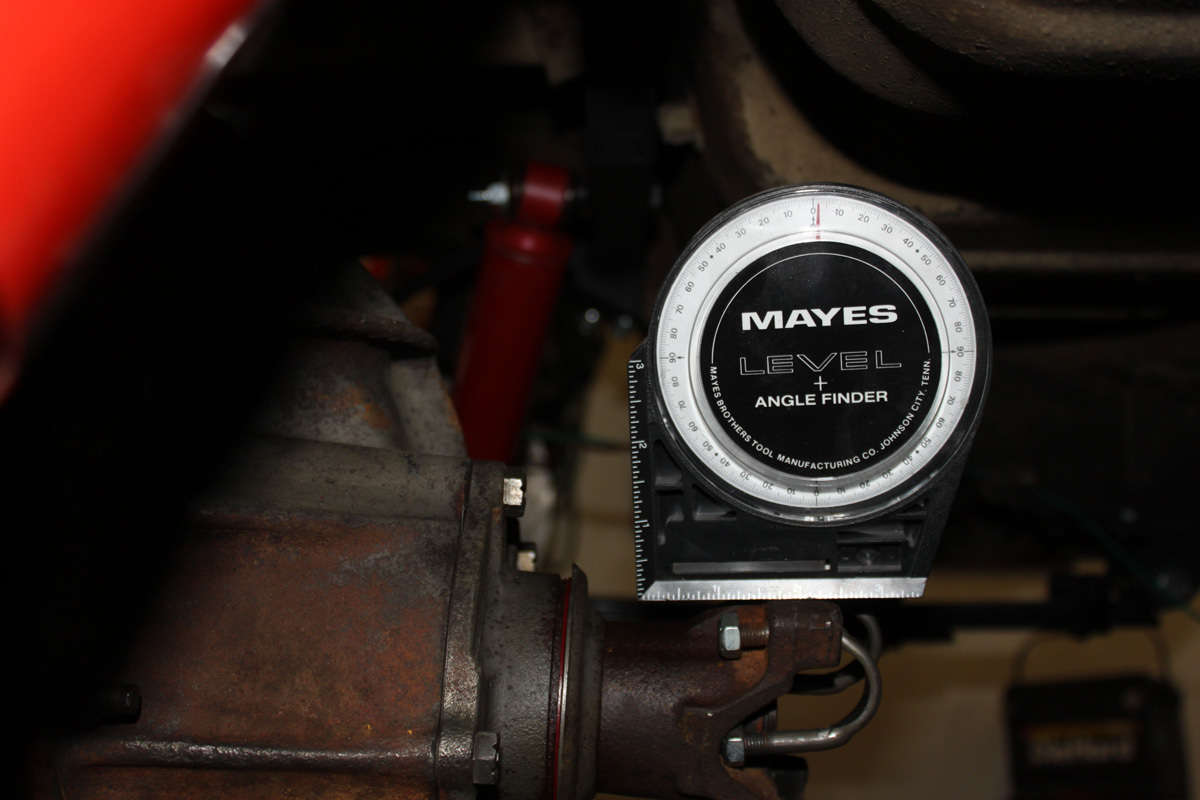
A couple other tools that don’t get used much but are handy when needed include an angle gauge and a feeler gauge. I recently broke out my angle gauge to determine the proper angle when mounting the aforementioned rearend. The feeler gauge is handy for measuring spark plug gaps or shim sizes, but I don’t use it much as I don’t do many tune-ups.
There are lots of great measuring tools other than the handy ones mentioned here and when I find some that I don’t have but seem handy, I’ll add them to my rollaway. One of these days I’m also going to divulge some of those handy modified, home-made and secret tools that pros rely on and may be useful in your tool box. And maybe you have some favorites that you’d like to share as well...


Comments for: MEASURE TWICE, CUT ONCE
comments powered by Disqus