Should I Have Leftover Dana 44 Parts?
By Jeff Bruss
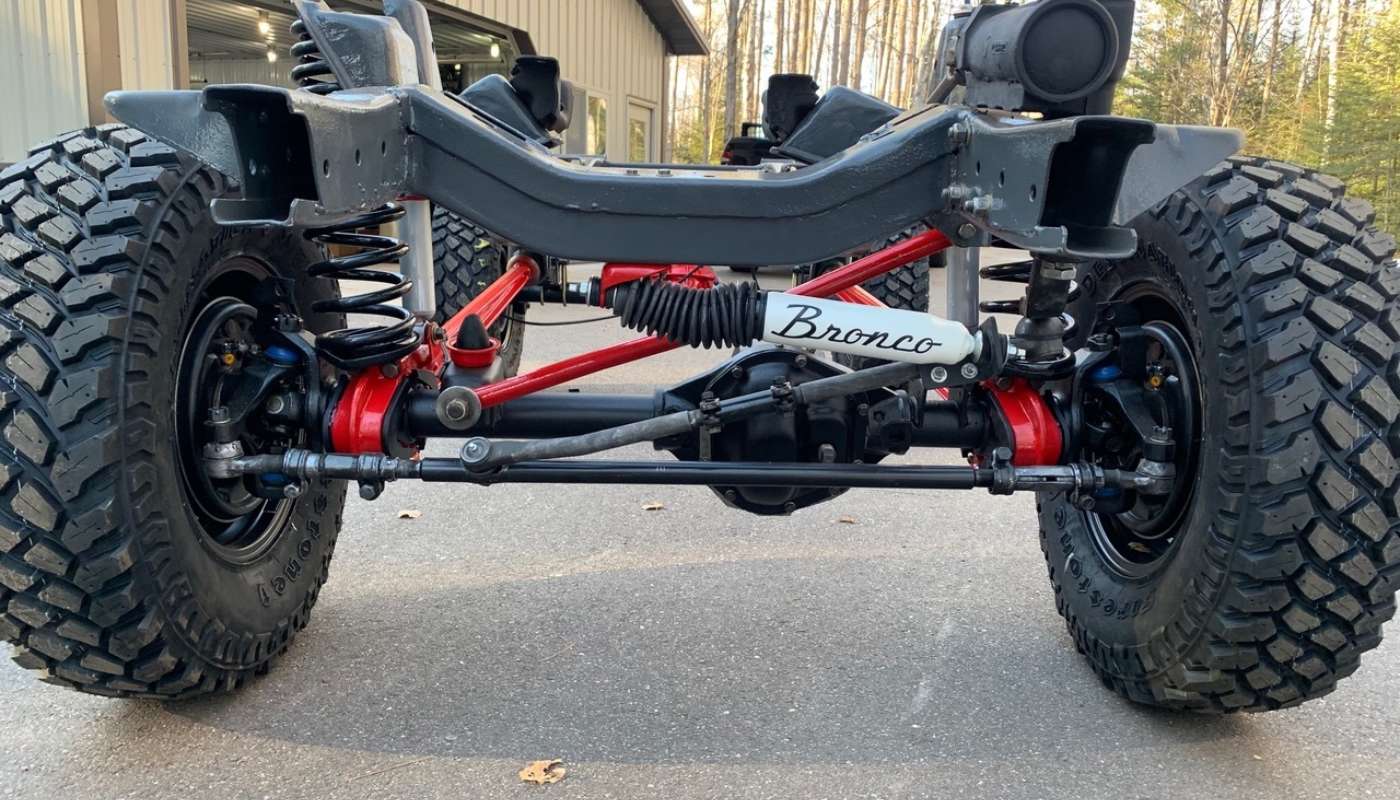
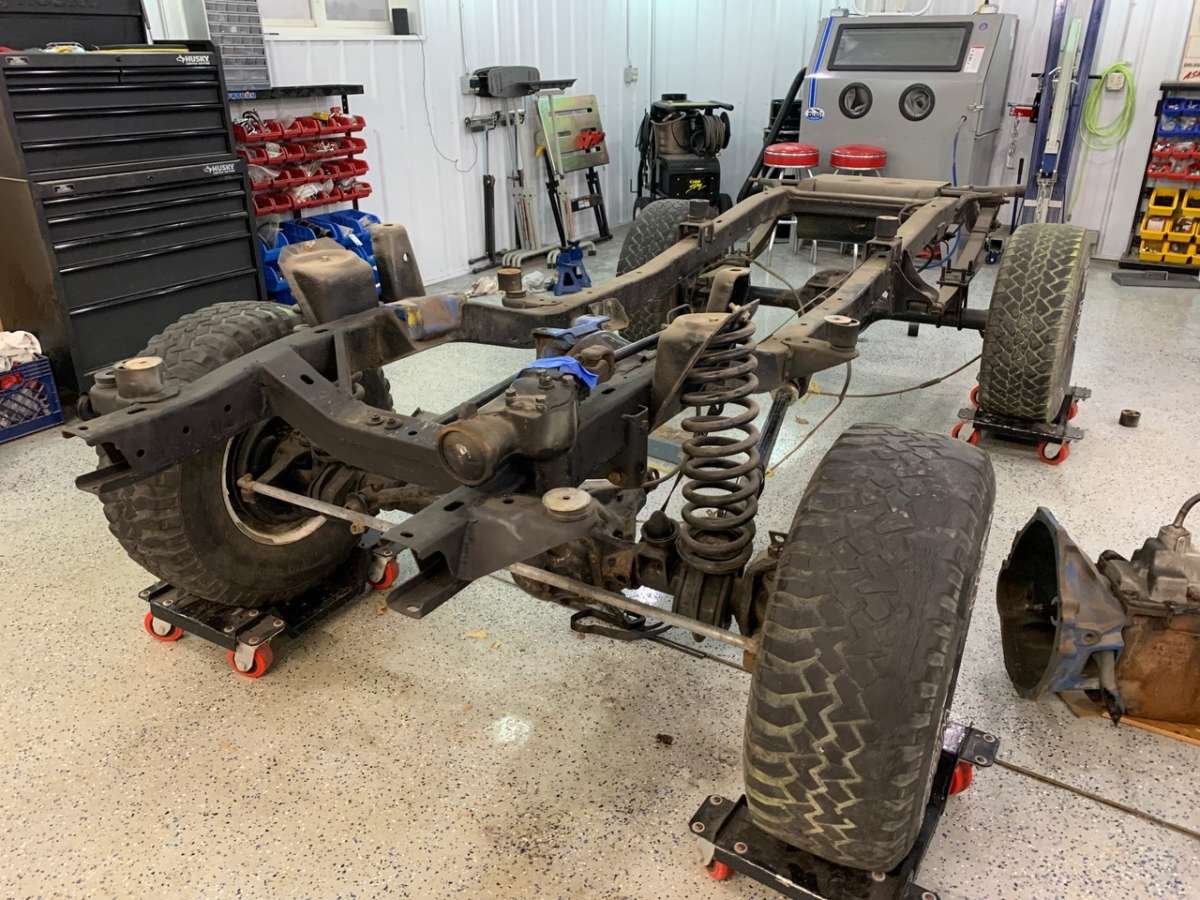
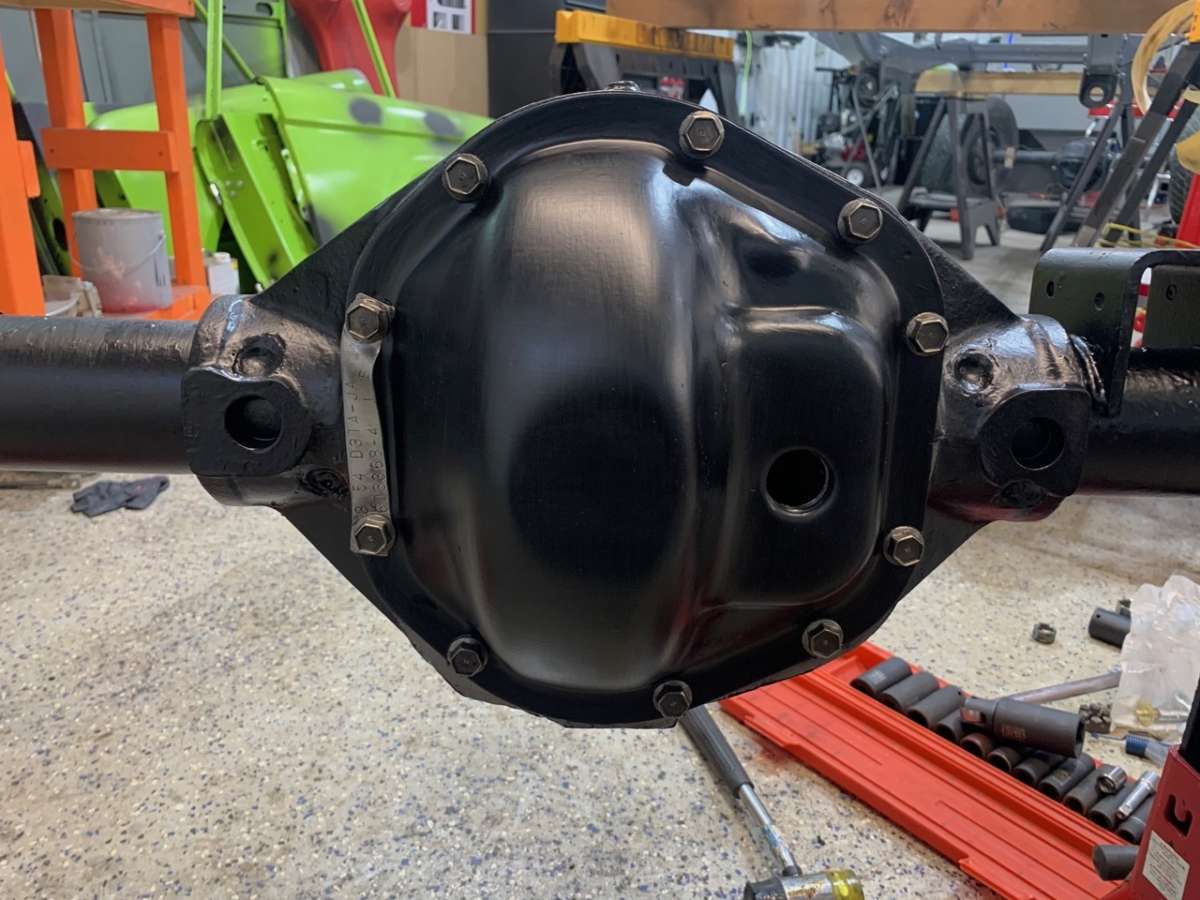
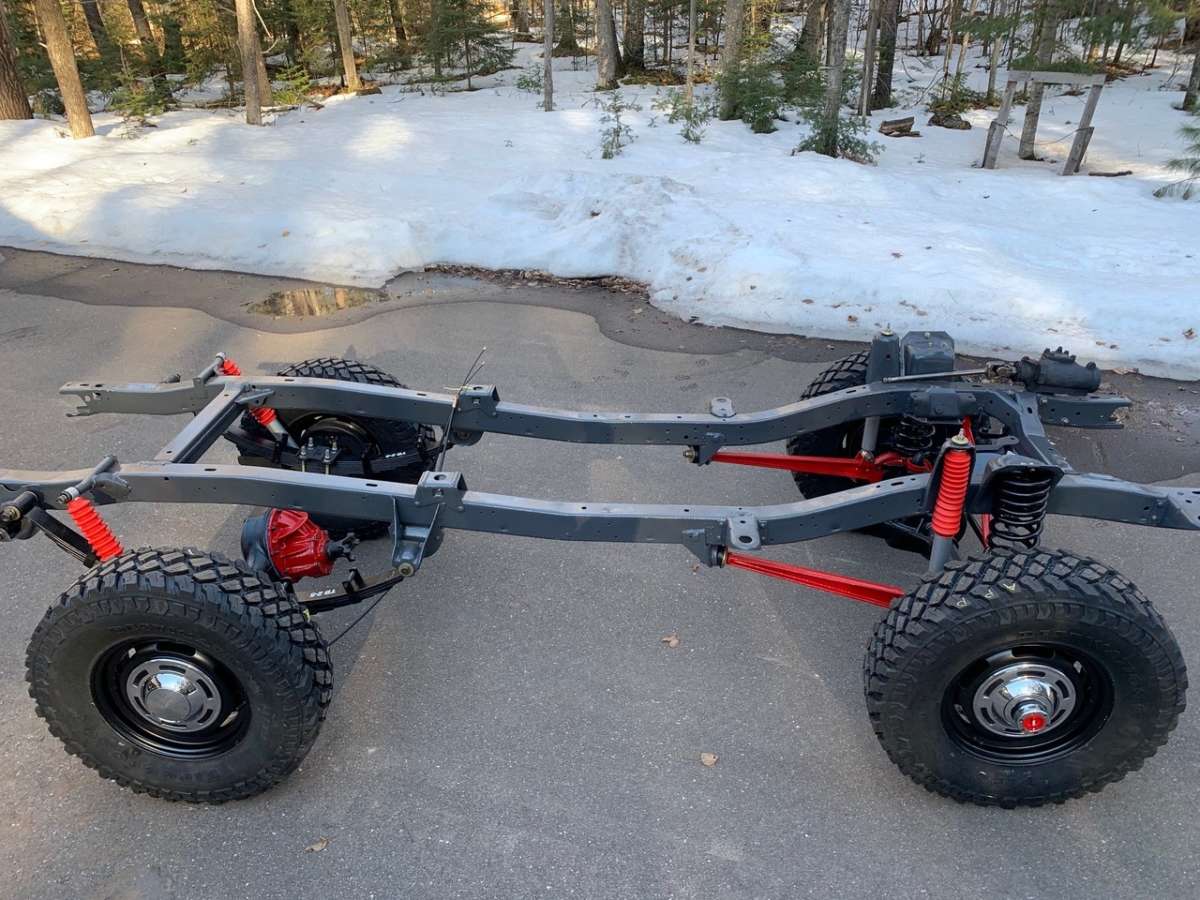
I've replaced and rebuilt some car things in my day — disc brakes, pretty much every external engine element on a V8, wiring, etc., but until now I've never touched the internals or externals of an axle. Early Broncos come equipped with a pair of straight axles, with a Dana 44 up front and a Ford 9-inch in the rear. Not knowing if anything had ever been touched in the nearly 50 years the Bronco has been roaming the pavement and trails, I figured a once over would be wise.
I tore into the front axle first. The Dana 44 is wonderfully simple and stout. While abundant and found in nearly every 4x4 over the past three decades, pretty much all Danas have slight differences. While a Jeep or Scout may have one knuckle, axle diameter or spline count, the Bronco may have another. As a result, I didn't want to risk messing anything up, since parts just ain't parts in this case.
To break down your axle, the 4x4 locking hubs and the factory drum brakes need to be removed first. The driver’s side locking hub assembly was in remarkably good condition. It had most likely never been serviced, but still had grease in it and seemed to operate as it should. I tore it down to every individual component, cleaned, inspected, greased and put it back together with no issues. I quickly moved to the passenger side expecting to make quick work of that hub — not so.
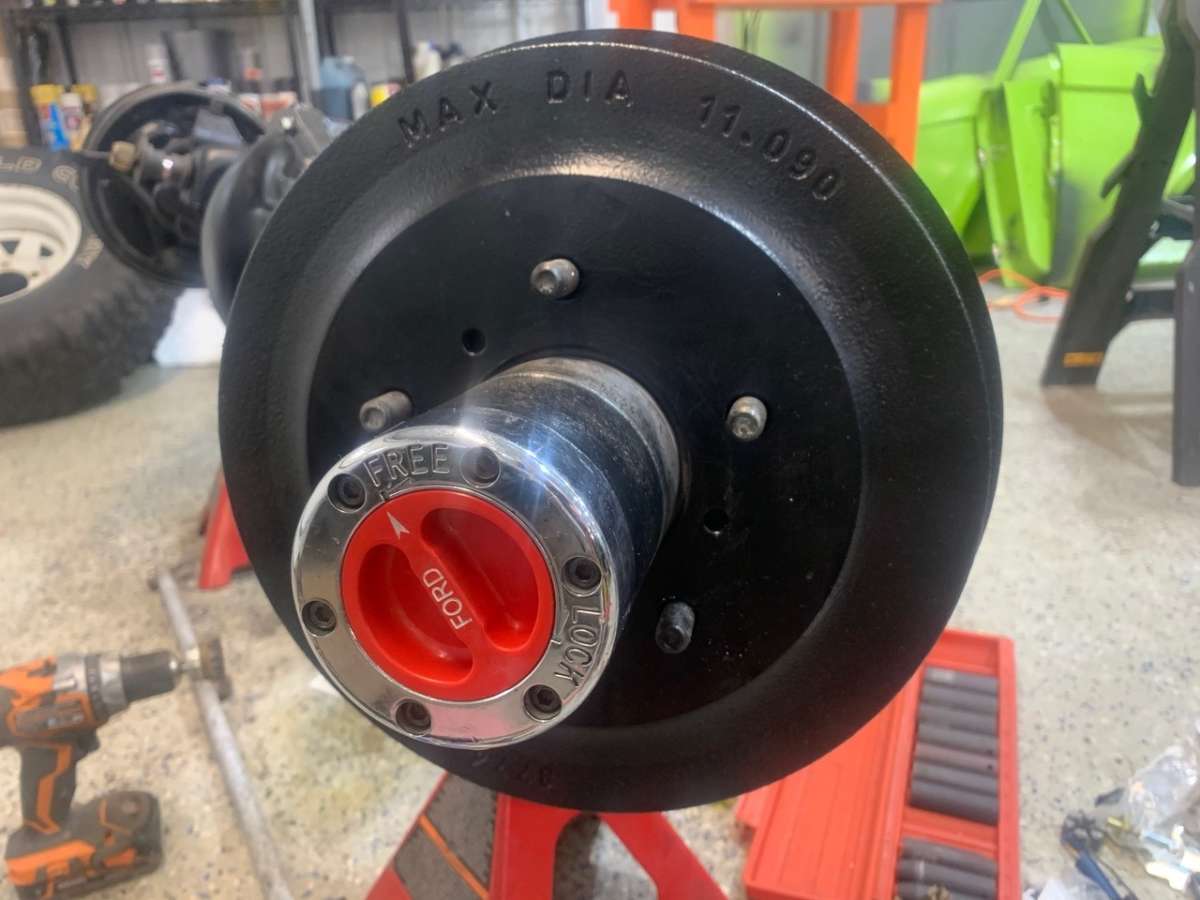

The passenger side locking hub assembly had rusted into one solid piece. Not slightly rusted and difficult — one solid iron-oxide chunk. I’m guessing it had been completely void of grease since the Reagan administration, and I had to cut the hub in half with a plasma cutter to free the internals so it could be taken off the backing plate and axle. Fortunately the hubs for an old Bronco are a relatively easy to find, since a front disc brake conversion renders them useless. I was able to get a pair of used hubs off an early Bronco Internet group. The two used hubs made up one good one, and a dozen hours of labor later, I had another side finished.
When restoring an early Bronco the parts are all readily available... and expensive. One of my 4x4 locking hub knobs was all chewed up from a pair of pliers being used as the persuasion for engaging and disengaging. I was able to replace the plastic knob for the not-so-gentle price of $22. A full Andrew Jackson for a $3 part inspired me to "restore" my other knob. Despite being sun faded to a delicate pink color, the other knob was in perfect condition. A fifteen second rattle can job with plastic-safe red, a delicate wipe of white enamel over the FORD letters and she was good as new. Plus $20 in the win column — I'll surely need that for other parts.
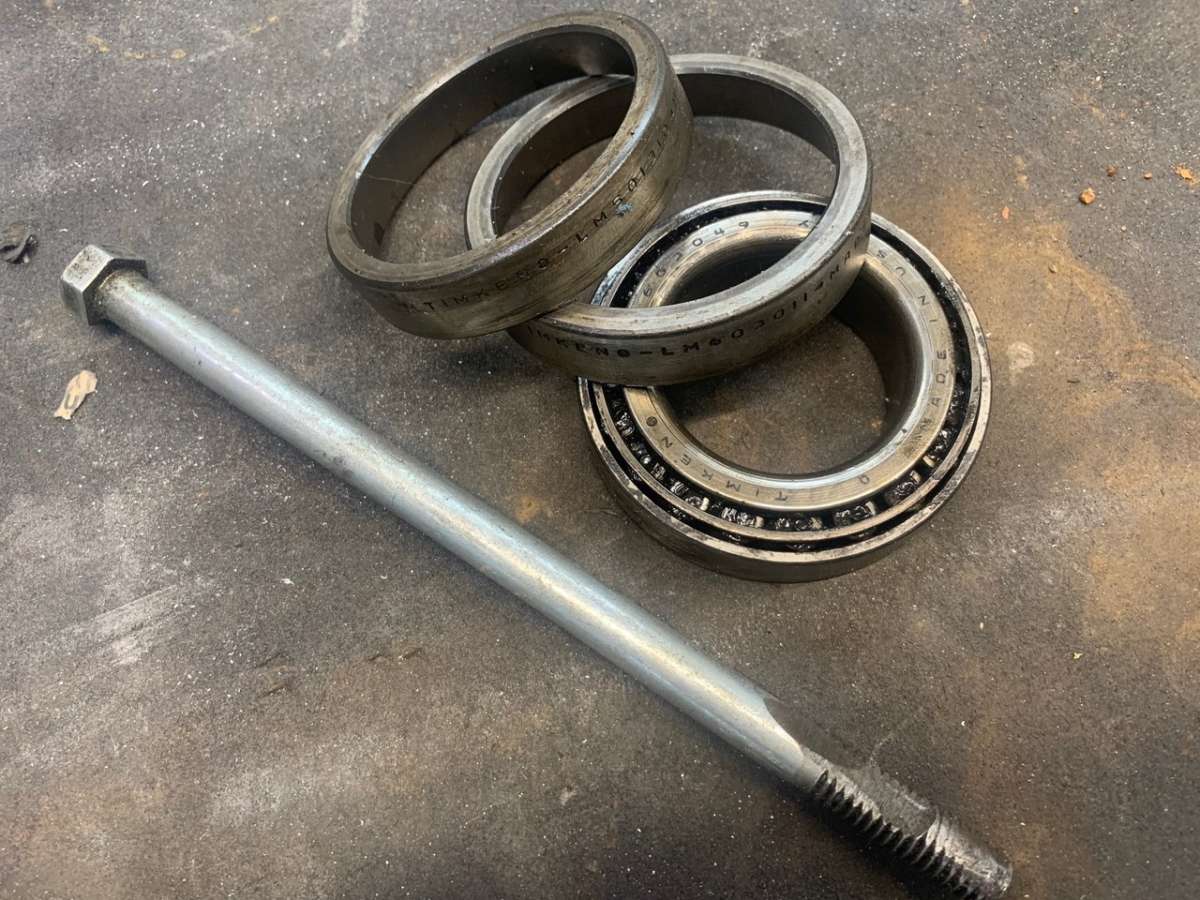
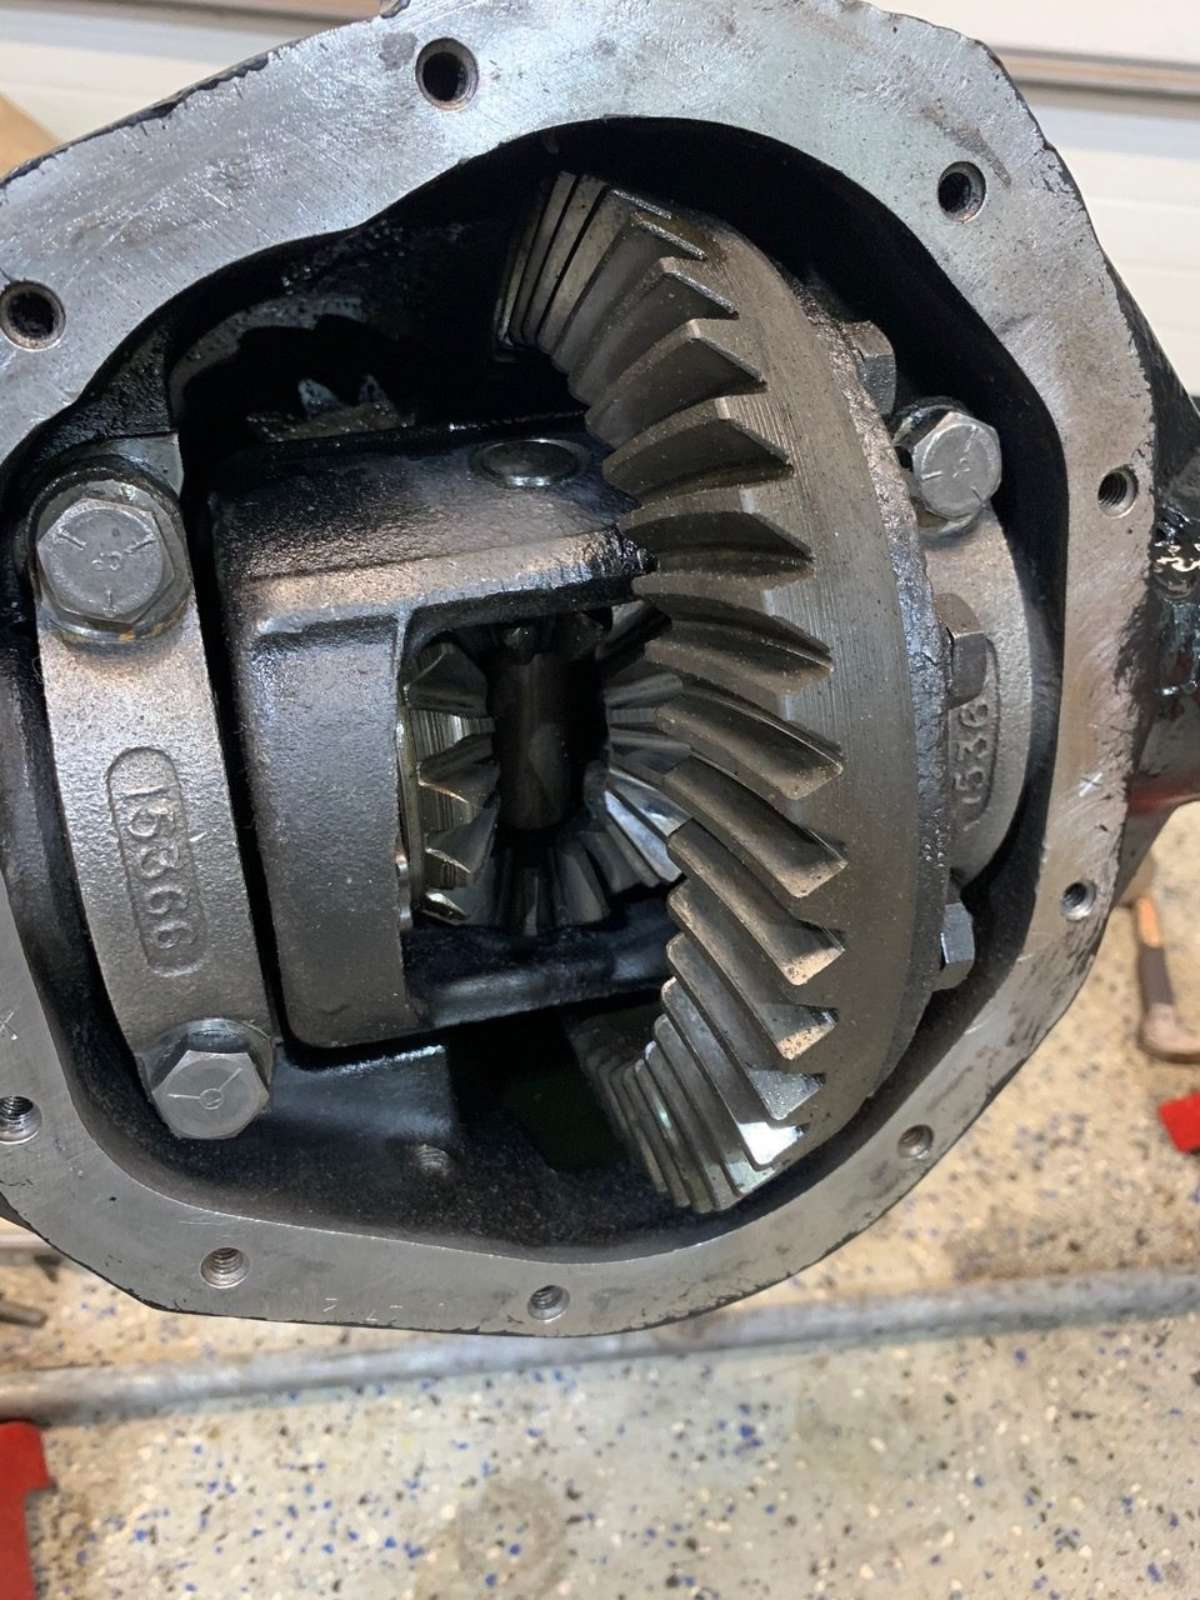
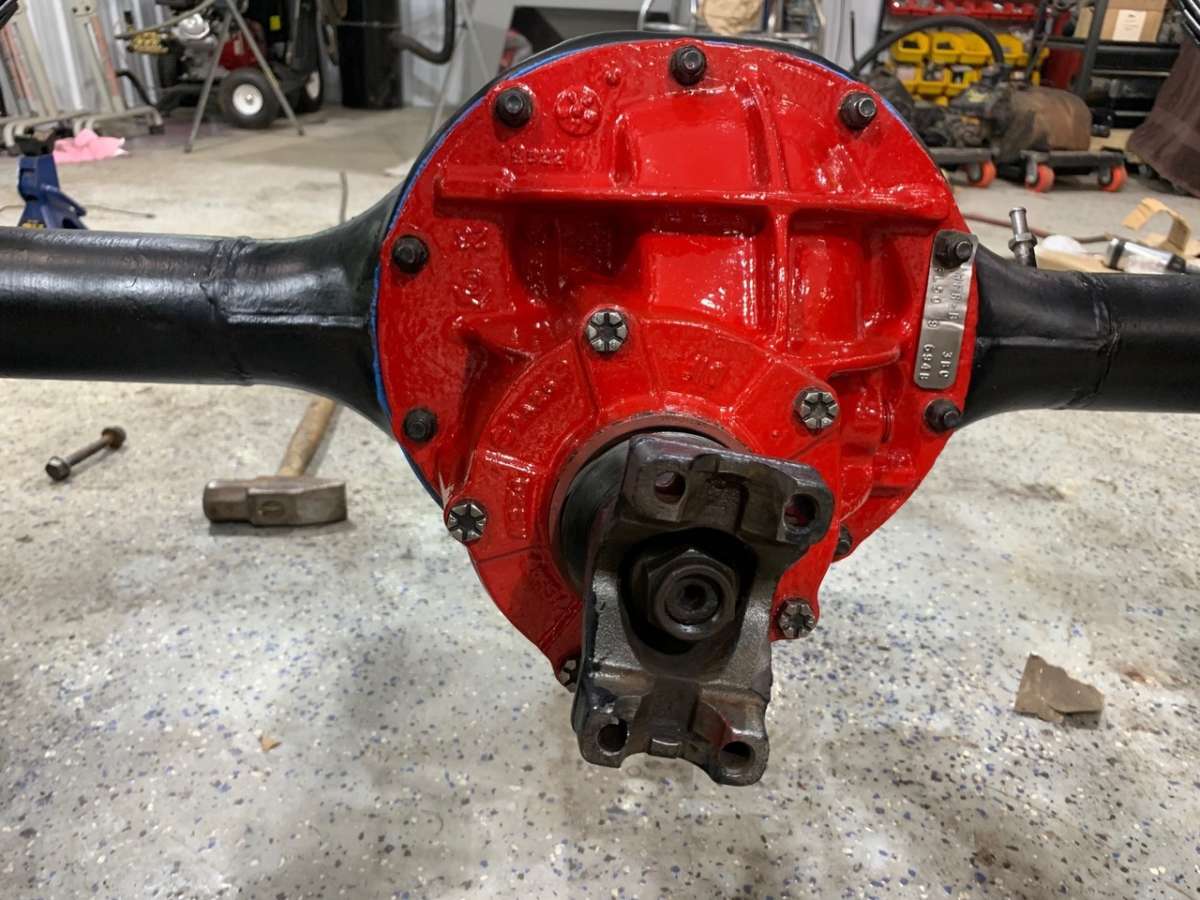
My axle housing was clean and rust free, so I was anticipating the innards would be similar, and they were. The shafts were all great, the gears and everything else. I began by pounding out all of the bearings and races with a homemade tool I made out of a 6" grade 3 bolt. Believe it or not, it worked like a charm. After hammering away at what I expected would be crusty old bearings, I found some snazzy as-new Timkens in perfect condition. That was a disappointment of sorts, since the bearings I put back in from National were probably not of the same quality as the ones I’d just hammered out.
I was now facing a dilemma. Should I do the other axle, or assume they replaced both? If I've learned one thing, it's to assume nothing when it comes to other people's work. I proceeded to pound out the passenger bearings, which also turned out to be shiny, as-new Timkens. I am not sure if Dana installed Timken bearings from the factory, but if they did it's a testament to their quality because neither race nor bearing showed any signs of wear.
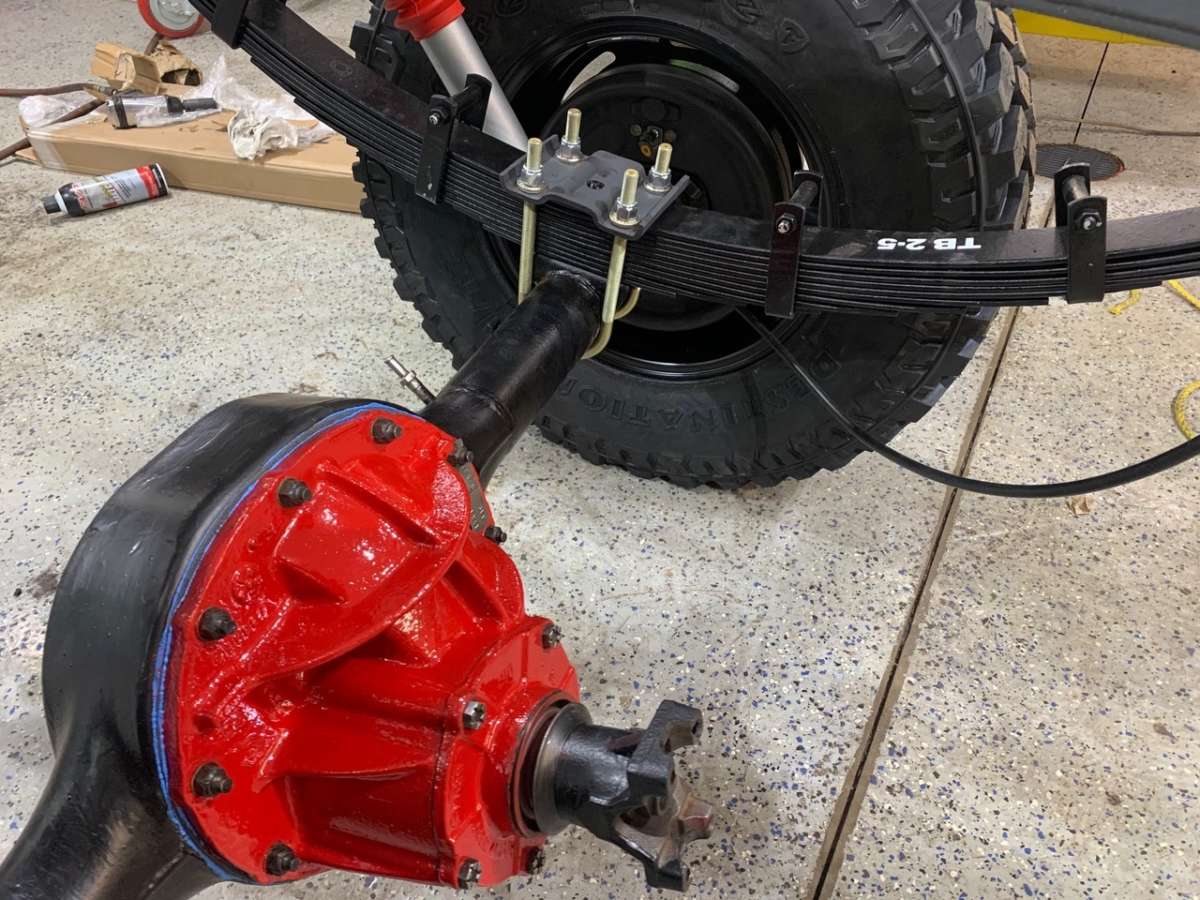

With new bearings in both shafts, I moved on to replacing upper and lower ball joints. Recall earlier how I mentioned not messing anything up? Well... I pressed out a ball joint the wrong way. Like really, really pressed. I ended up ruining my driver’s side knuckle after compressing it into a slightly different shape than Dana engineers penciled out in 1973. Luckily eBay had one for the lesson-learned sum of $150 delivered to my house, and I now understand which direction ball joints press out. I had planned on replacing the original toasted ball joints with Spicer/Dana brand, but oddly, the Dana's don't come with grease fittings. Instead I opted for some local parts store brand in-stock units that appear to be just fine, and they were greasable.
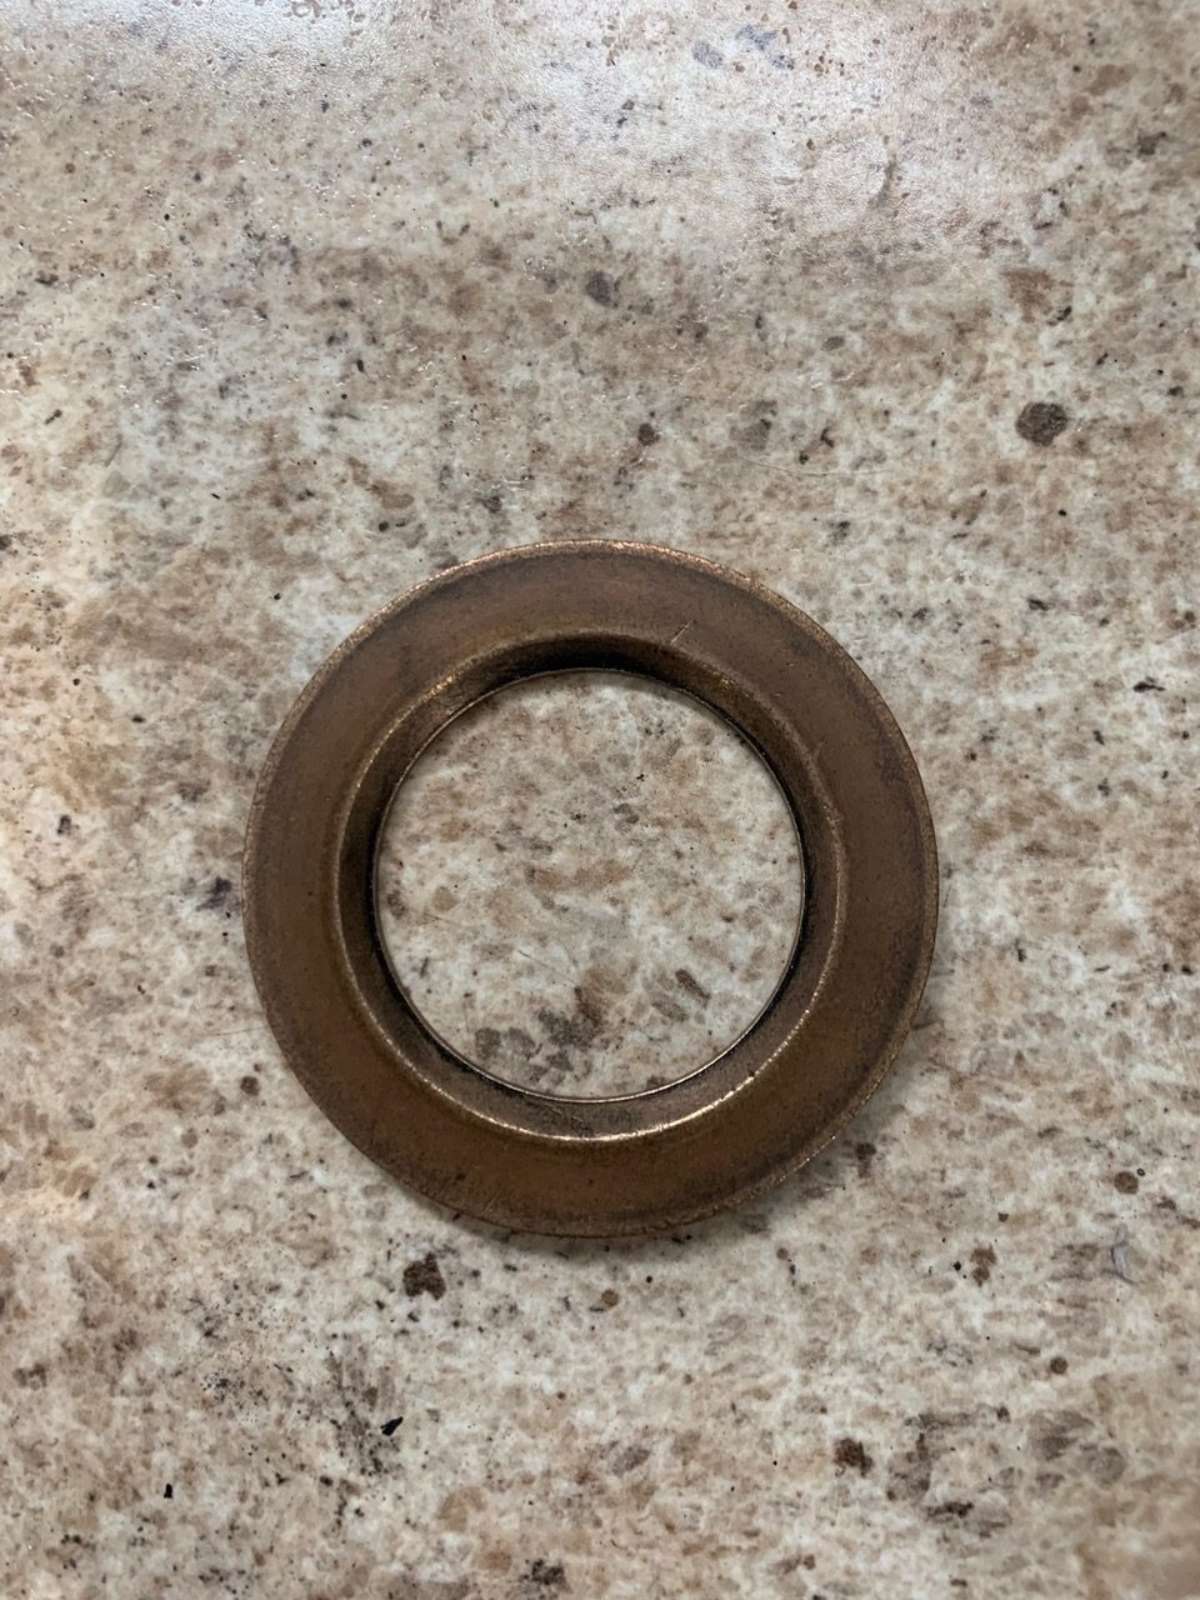
A week or so later, I was cleaning up my work bench and I came across a large brass washer-type part. My stomach turned to nausea as I realized my beautiful, completely re-done Dana was missing the little disc that keeps dirt and debris from climbing back into the axle housing tube. They say repetition and practice makes perfect — I'm getting there.
What did I learn? An old school shop manual proved invaluable to understanding the breakdown of pretty much every component I touched, as far as the order in which they went together, torque settings, etc. The university of YouTube helps immensely, but don't rely on one "professor" to know which way is correct. I probably watched six or seven "how to" videos on different elements of the overhaul. Also a good pair of spring pliers and loads of practice will do wonders for your drum brake rebuild skills. My first drum brake rebuild took about 2 hours, but now I'm now well into the 20 minute range to get torn down and rebuilt. Most importantly, I learned that ball joints come out the top, not the bottom. Stay tuned, I have a lot more to learn.


Comments for: Should I Have Leftover Dana 44 Parts?
comments powered by Disqus