RCN Windsor Build Pt. 7
By Dean Larson
Tag along with us for the next couple months as a pair of total amateurs tackle the complete rebuild of a Ford 302 Windsor engine. Despite being obsessive gearheads and project car addicts, neither of us have ever rebuilt a car or truck engine by ourselves before. Our subject is a bare Ford 302 engine from around 1972 that we picked up from a shop for cheap. In the end, we hope to come up with a fun and reliable Windsor engine that any guy could build at home with a few helpful resources. Will we prove to be Windsor wizards, or will this thing kick out a rod immediately? There’s only one way to find out.
Progress Without New Parts
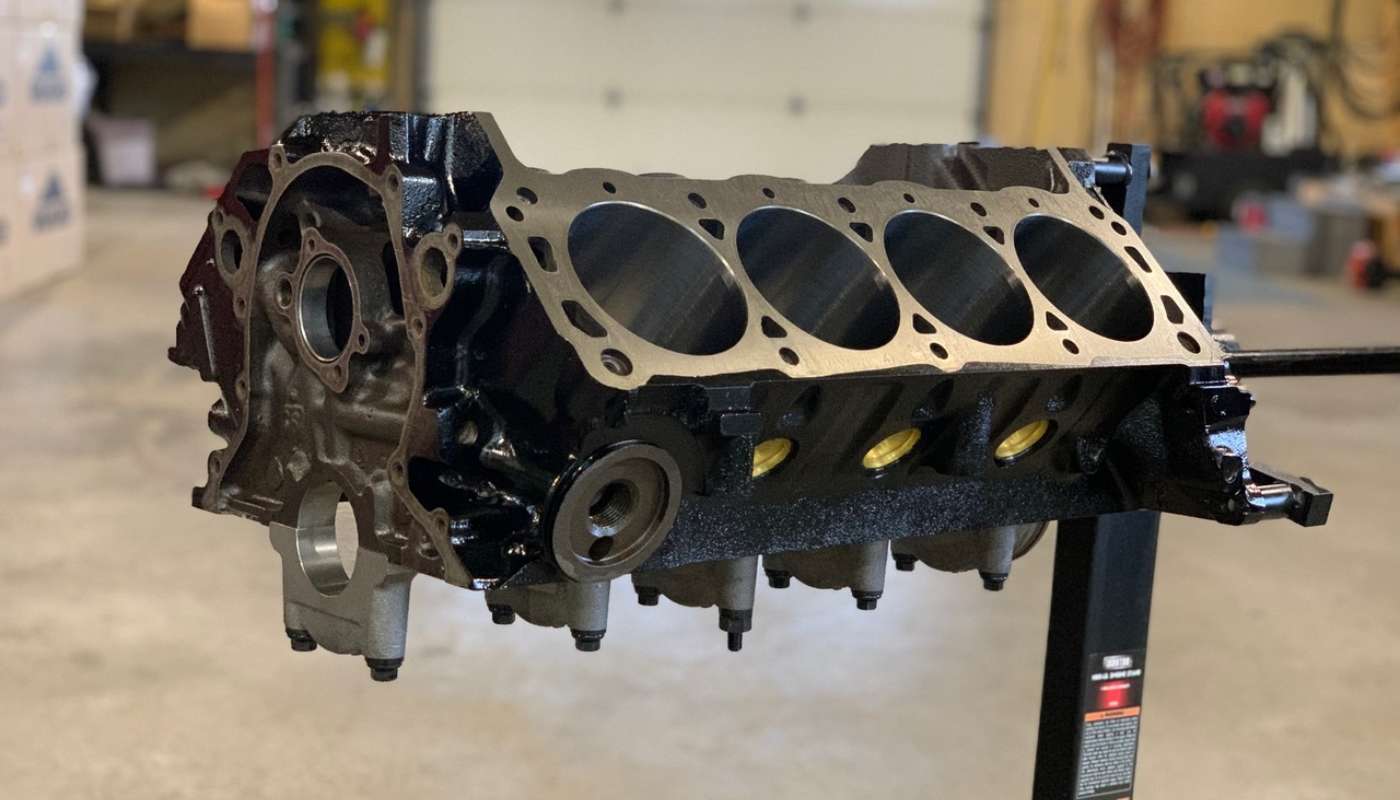
You never really know what you’re getting into when you take on a new project, but this is not what I expected our Ford 347 stroker built would be like. I thought the work would be the hard part, but that’s honestly been a breeze. The real trouble is that we just can’t get parts to get this thing done, and I’ve honestly barked up just about every tree in the forest. But despite the fact that I absolutely cannot track down cylinder heads or a camshaft if my life depended on it, the show must go on, and our next step was getting our engine prepped for assembly, which starts with paint.
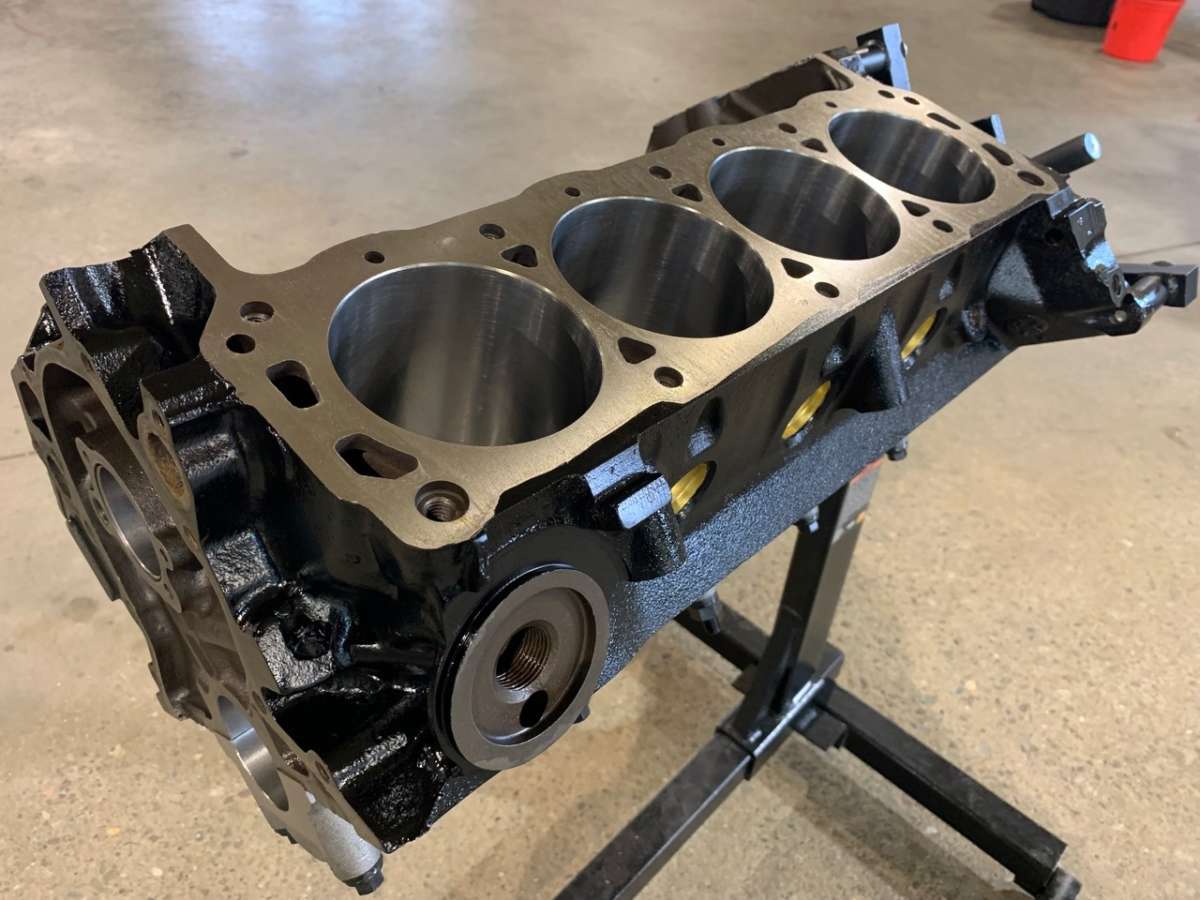
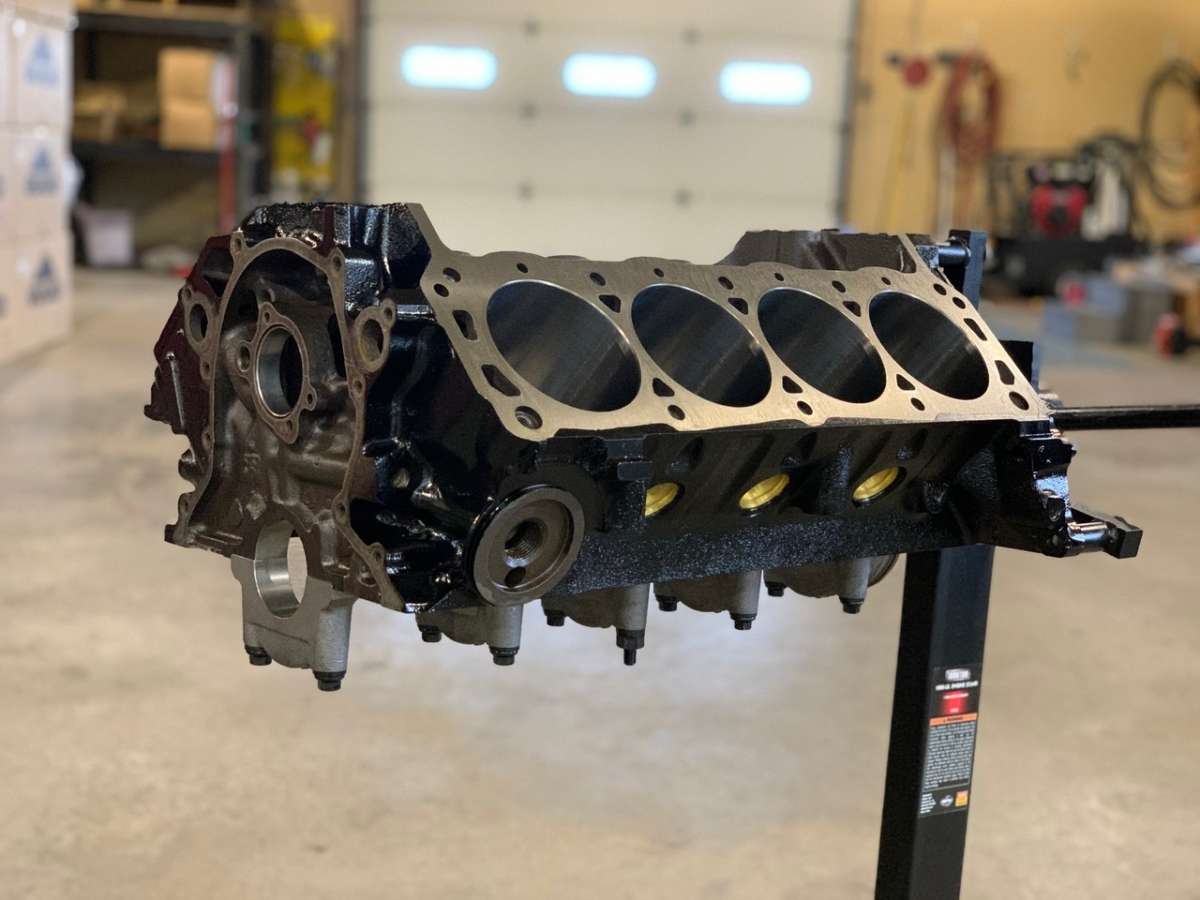
Painting an engine block seems like it would be pretty simple, but when you get down to the nitty gritty, there are actually a few important tricks you should know, and that’s really the main takeaway from this installment. Our engine block had come back from the machine shop as bare cast iron with some sort of protective solvent on it (probably nothing more than WD40), so our first order of business was getting this thing cleaned up. There’s plenty on conflicting info out there, but several sources I came across stated that Dawn dish soap and water was the best solution for the bulk of the degreasing. I was a bit apprehensive, given that flash rusting is a real concern here, so I decided to handle as much of the prep process as possible in one day.

First I hit the exterior of the block with the soap and water using a rag and small brush, and then I quickly wheeled it back inside and used compressed air to dry it out. Then I took a rag with WD40 on it and quickly wiped down everything that wouldn’t be receiving paint — bearing bores, cylinder bores, lifter valley, etc. Then I wiped down the exterior surfaces of the block with acetone and let it dry.
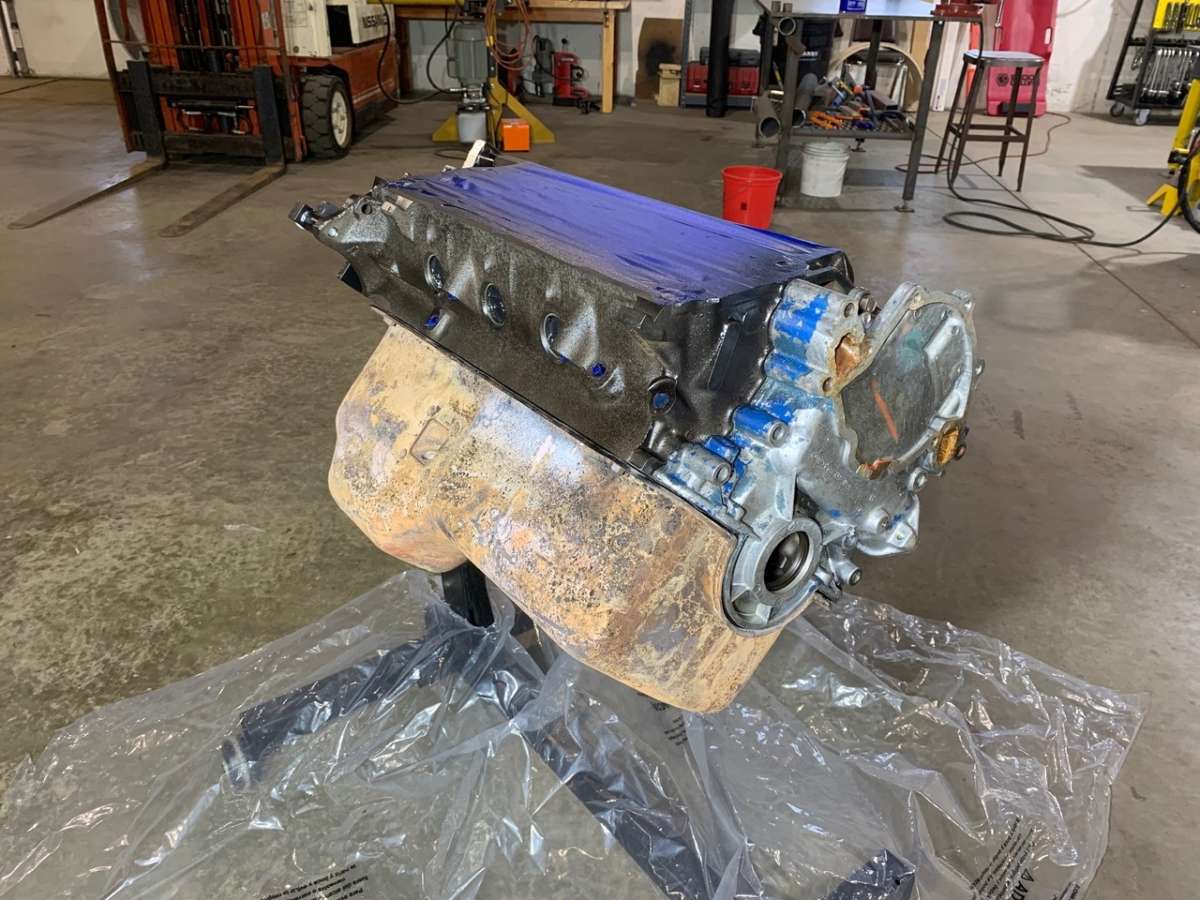
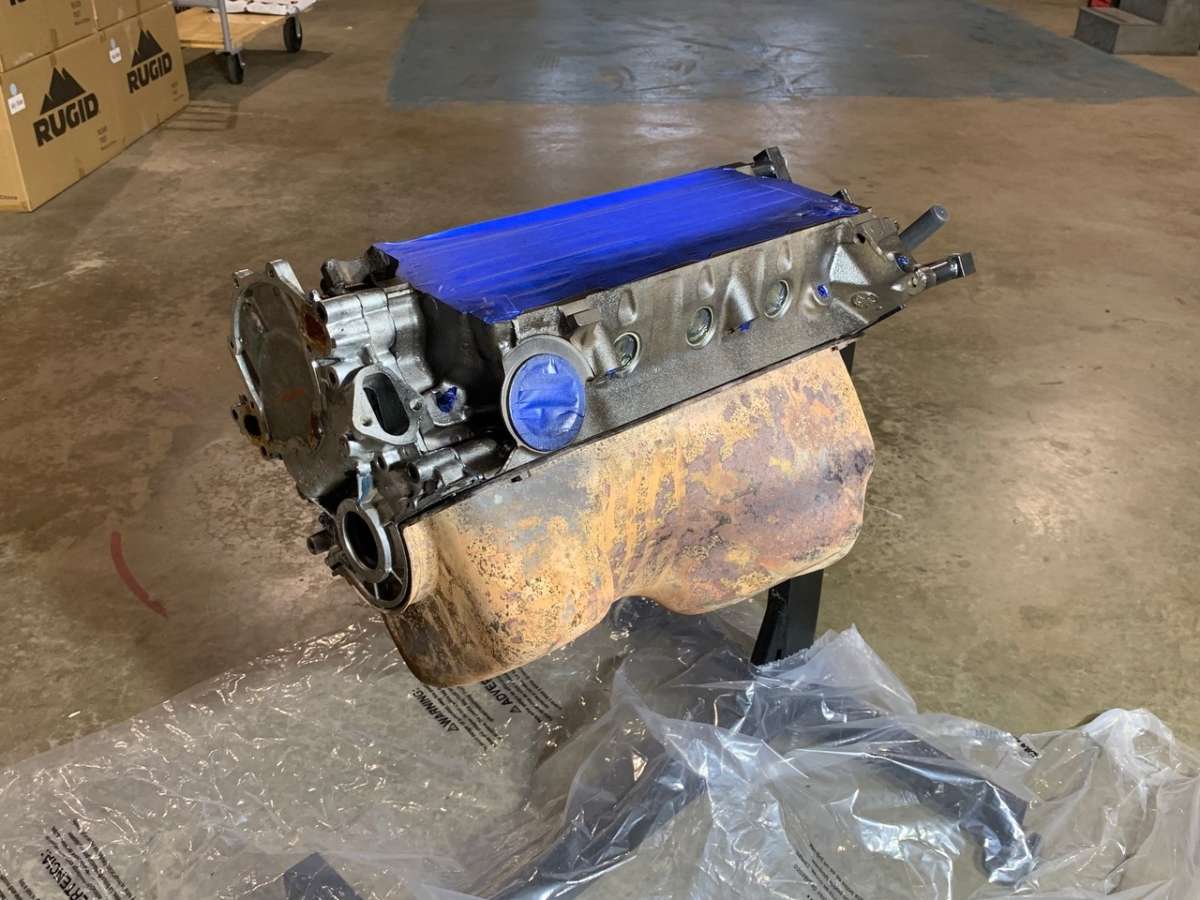
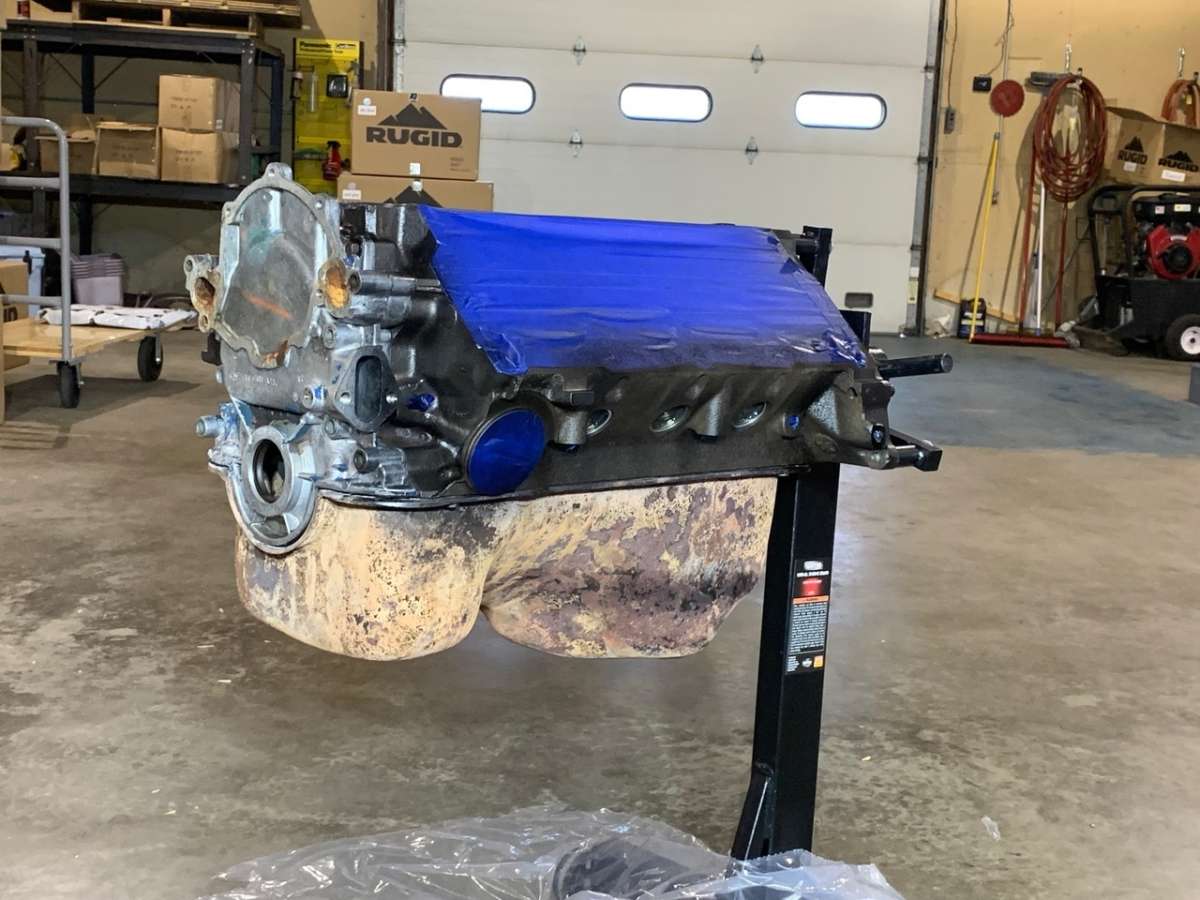
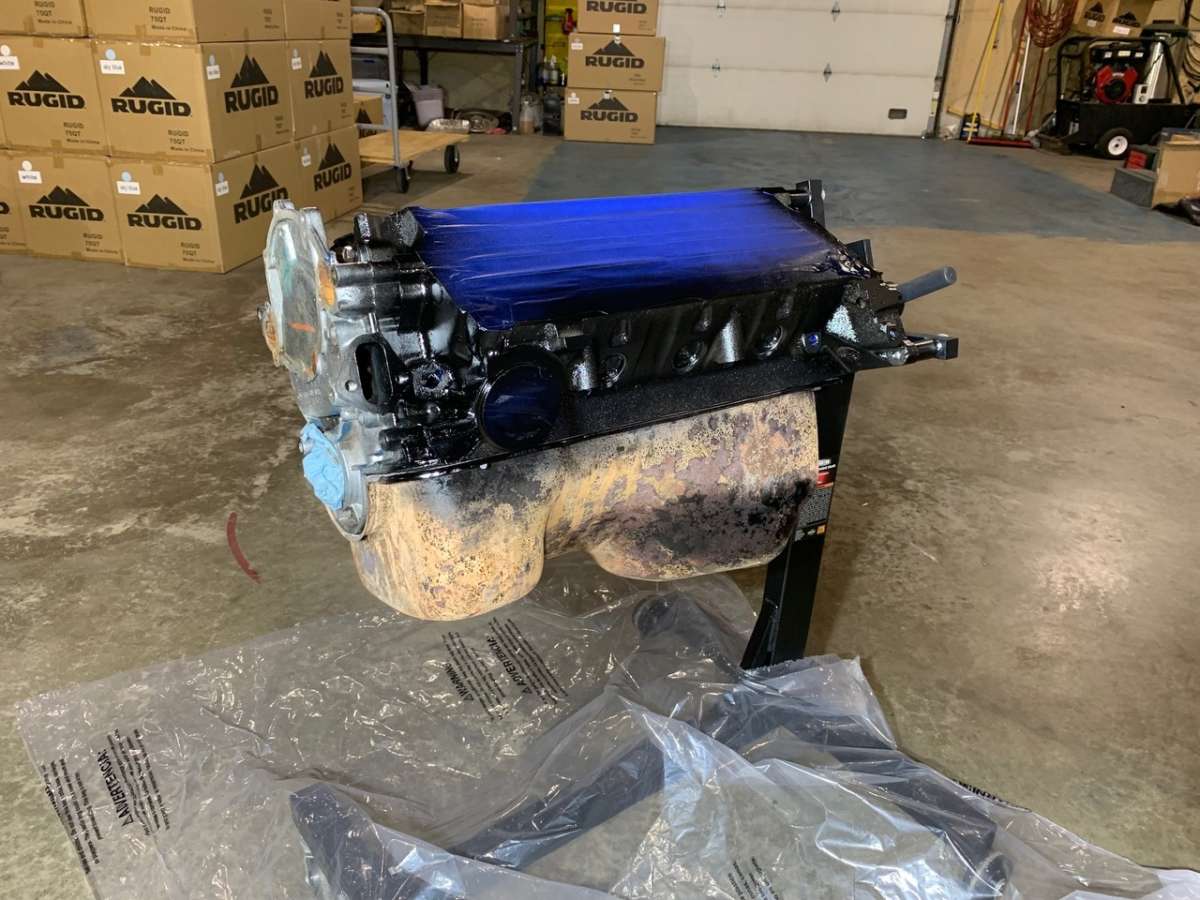
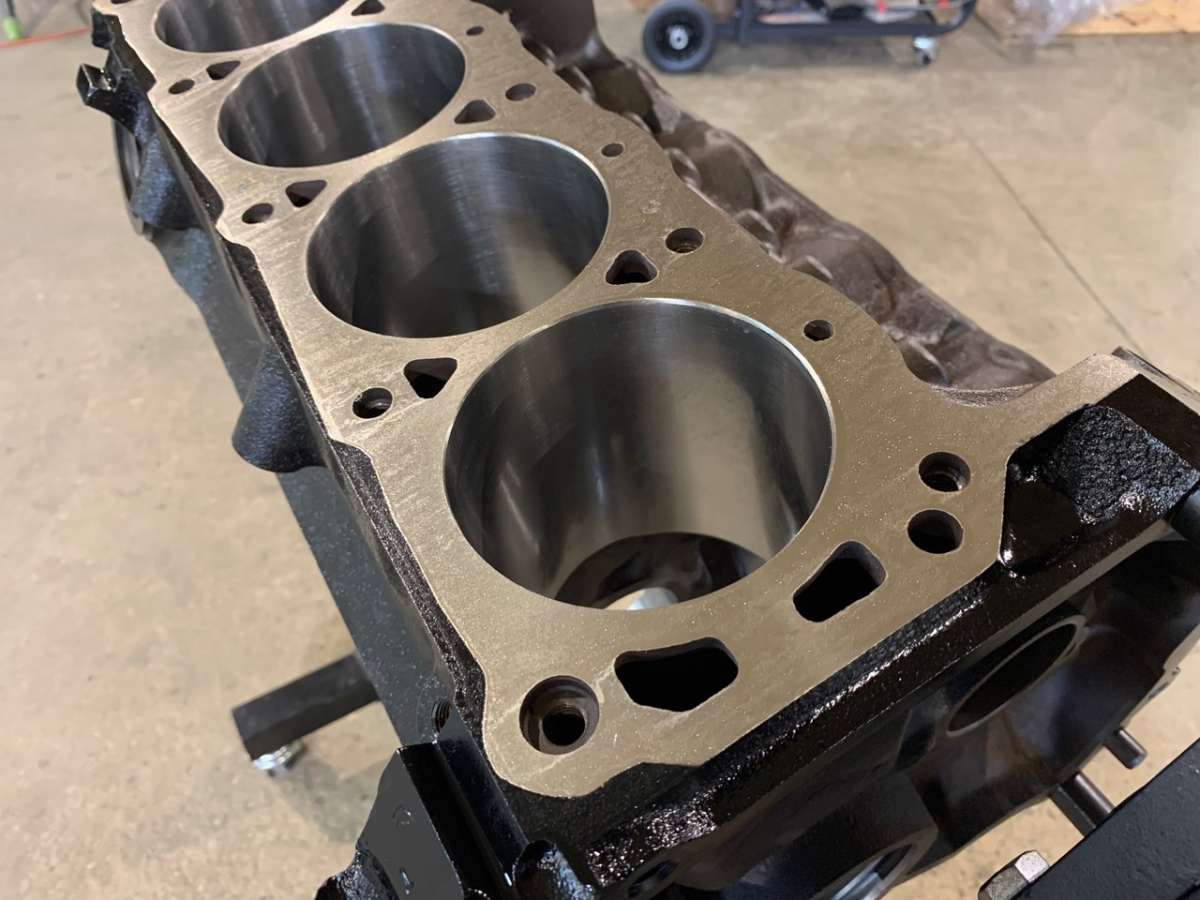
Next it was time to get this thing masked, which is actually takes a while if you don’t have the right stuff handy. It helps if you’re also painting your oil pan and cylinder heads at the same time, but we used a combination of painter’s tape and a few old parts. I masked off the entire deck surface with tape and used our new head gaskets to mark a cut line. This works nicely because there are parts of the deck surface that won’t be covered by the head, and now we’re sure they’ll be painted. I threw the old timing cover and oil pan on to mask those surfaces, and used tape on the oil filter surface, distributor location and any threaded holes. I left the back of the block unmasked, but I didn’t paint back there. There’s debate about painting the back of the block and lifter valley, but since I wasn’t using any fancy paint products, I left them alone. Last thing you want is a bunch of flaked-off paint plugging up your oil passages.
Cutting the painter's tape around complex curves can be difficult, and I used a razor blade in some places and a controversial hammering technique in others. Anywhere where you have complex curves and a hard edge, you can take a small hammer or other blunt object and tap on the edge of the surface to break the tape. I know it sounds sketchy to tap on machined surfaces, but if you take your time and do it gently, it works really slick.
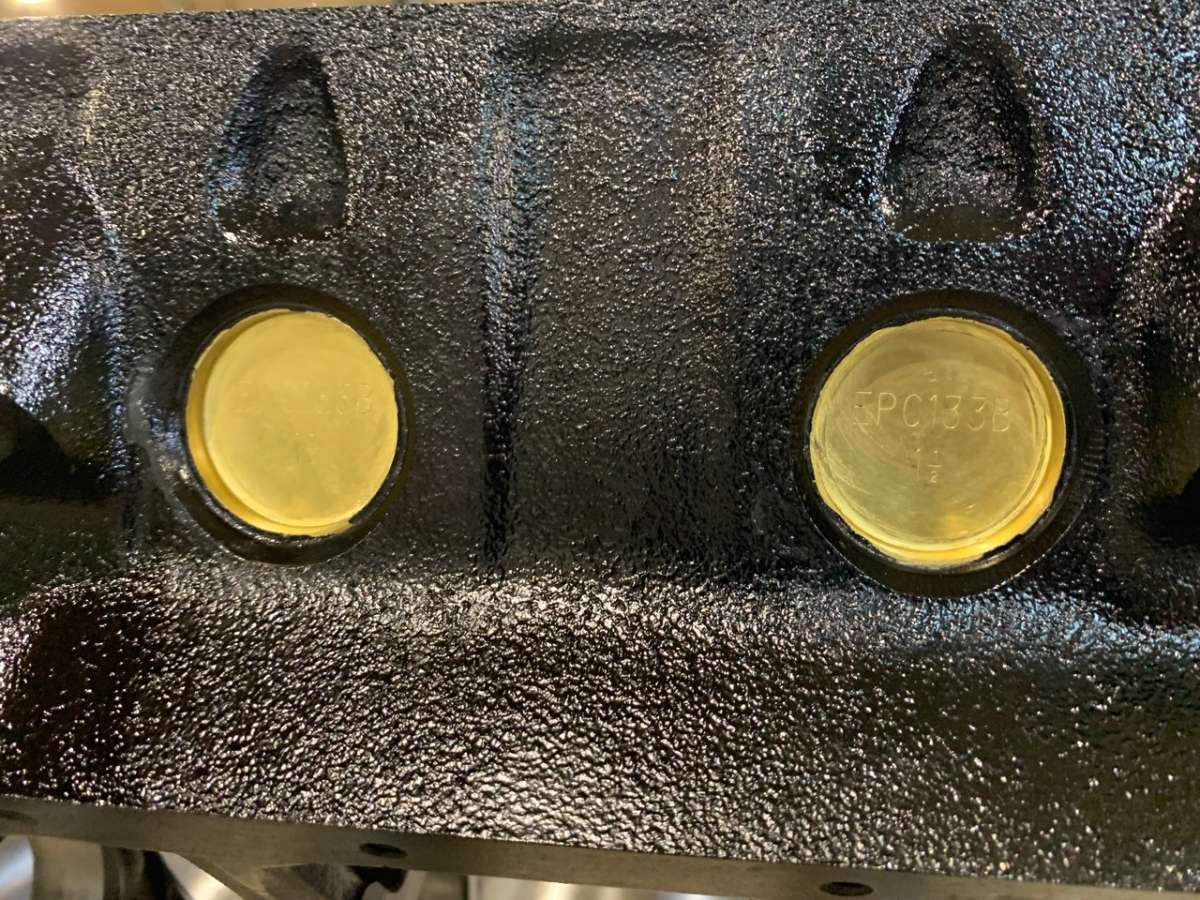
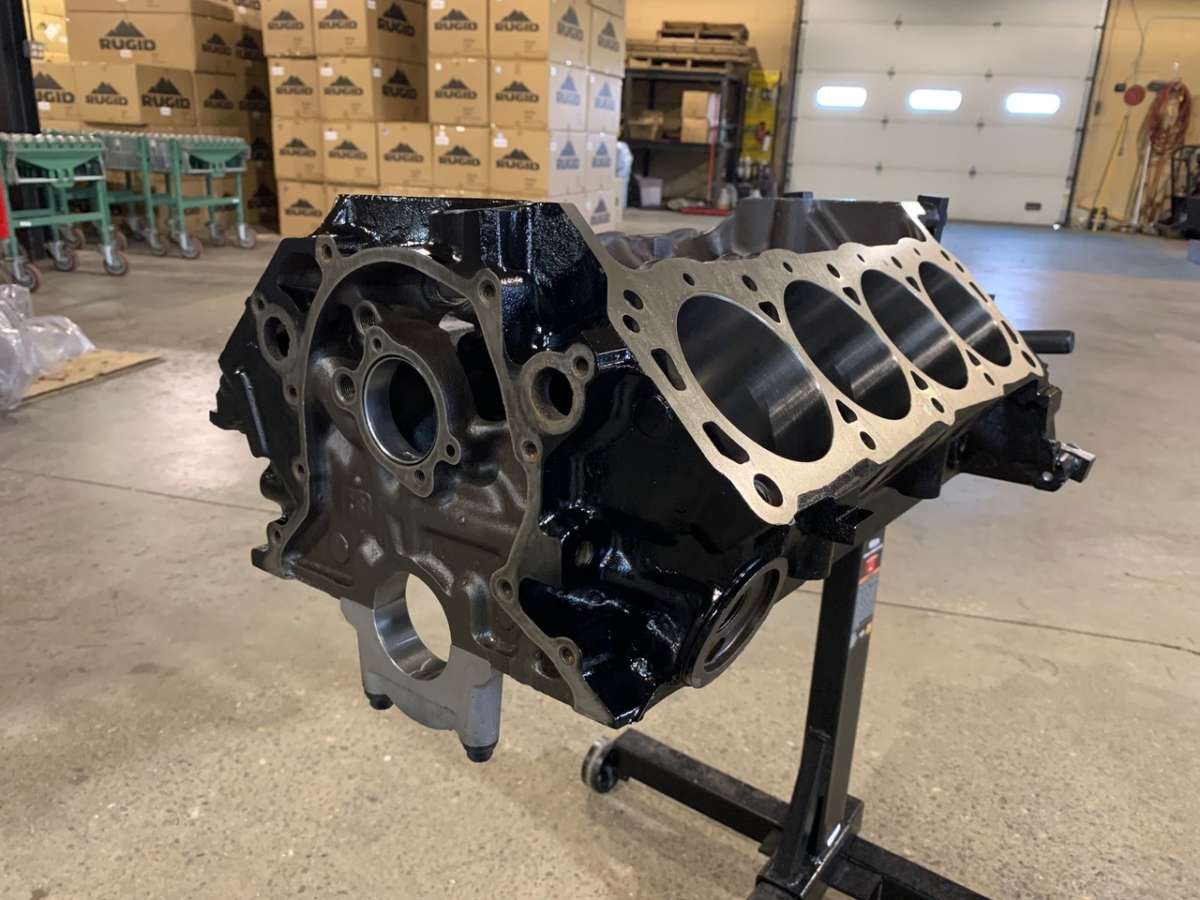
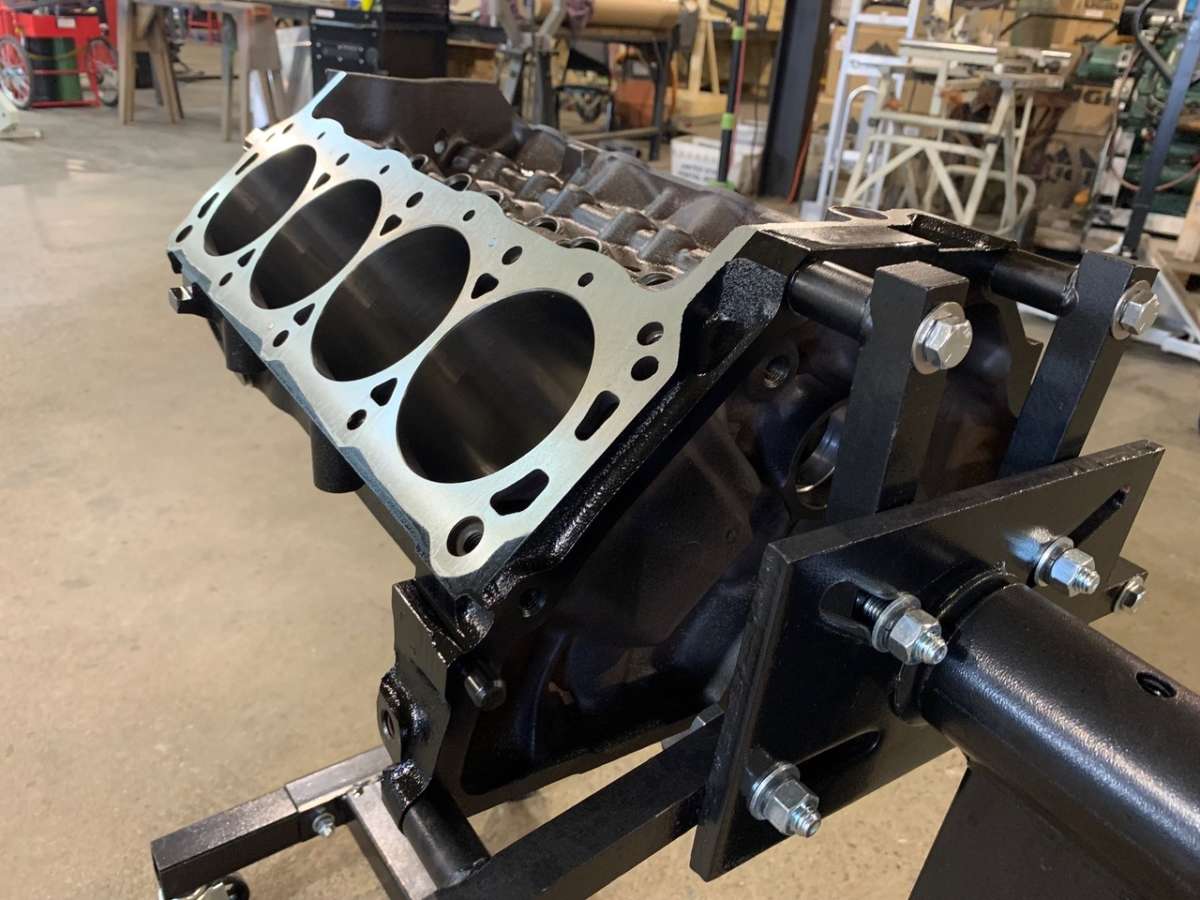
One other trick I did involved the core plugs (often called freeze plugs). Instead of masking these six holes before painting, I simply installed the brass core plugs (I used a dash of gasket maker with the install) and then coated the plugs with grease so the paint wouldn’t adhere to them. Be sure the block surface around the core plug doesn’t have any grease on it before you paint. Then simply clean the grease out of the plug with a rag after painting, and you’ve got nice brass plugs, or so the theory goes. Mine didn't come out perfect — I probably would have been better off masking with paint.
For paint, we kept it pretty basic with spray-bomb Rusto-leum engine enamel and primer, which is rated to 500 degrees. We used four coats of paint to get the job done, starting with a light fog and finishing with full coverage. You could probably do better with an automotive paint through a gun, but we we're really trying to get this thing sealed up to prevent any flash rusting.
We’ll be filing piston rings next, which we’re all set for, but my real worry is that I can’t find cylinder heads anywhere. What I really want is the Trick Flow Twisted Wedge 11R, which is a fully CNC ported head with a 170 cc intake runner and 63 cc chamber, but I’ll be lucky if I can find anything close — everything is sold out. I was also on the phone with COMP Cams and they told me they had one or two perfect cams for my application, but nothing in stock. They didn’t even have the cores to grind ’em.
Stupid COVID…


Comments for: RCN Windsor Build Pt. 7
comments powered by Disqus