Constructing a custom GT-style interior in a FFR Coupe
Story and Photos by Jonas Jasinskas
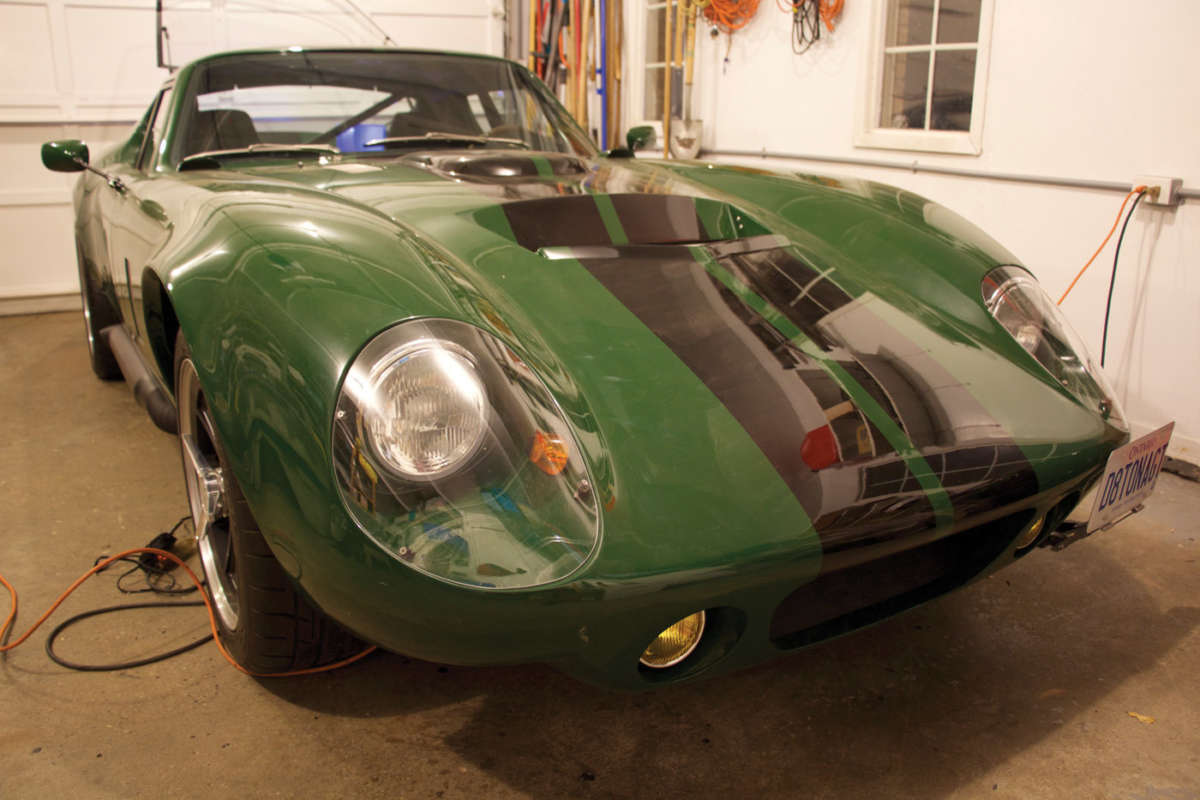
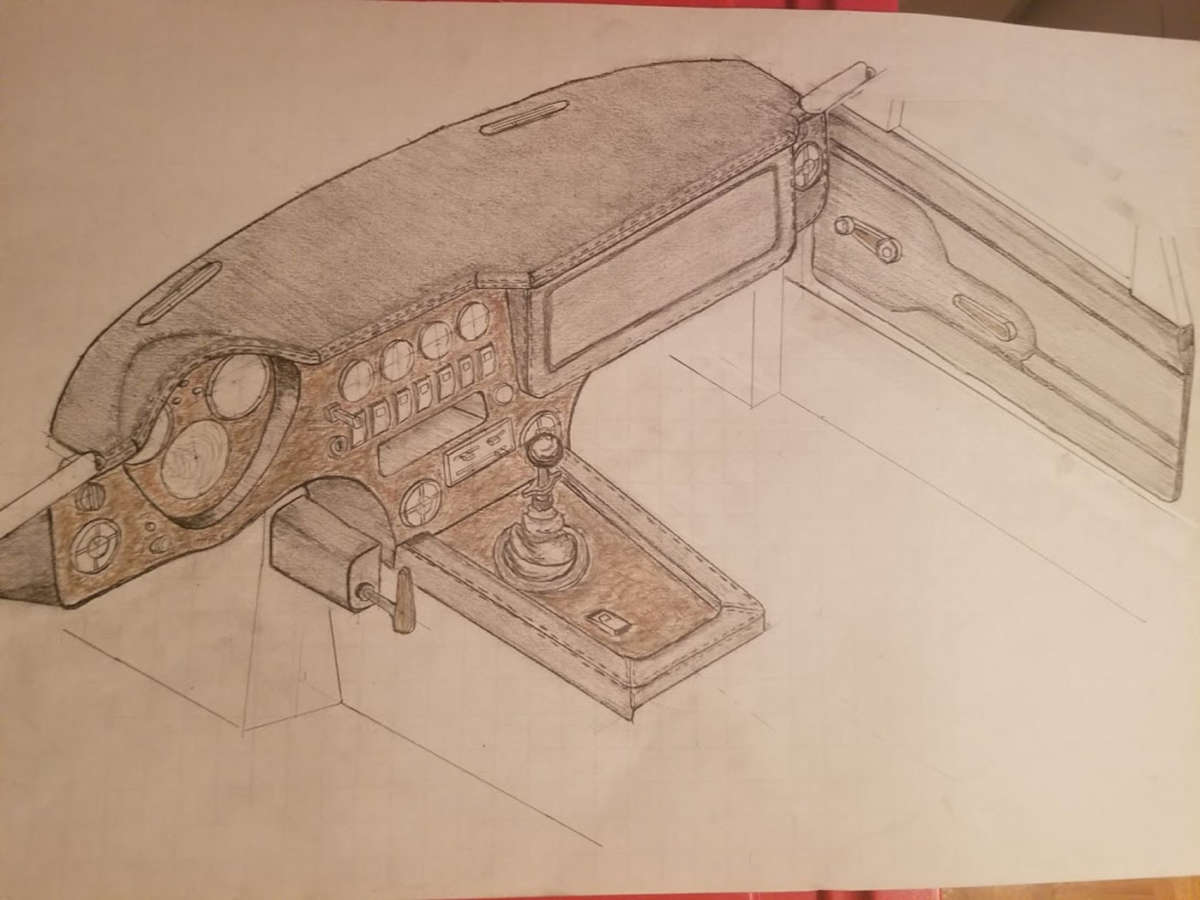
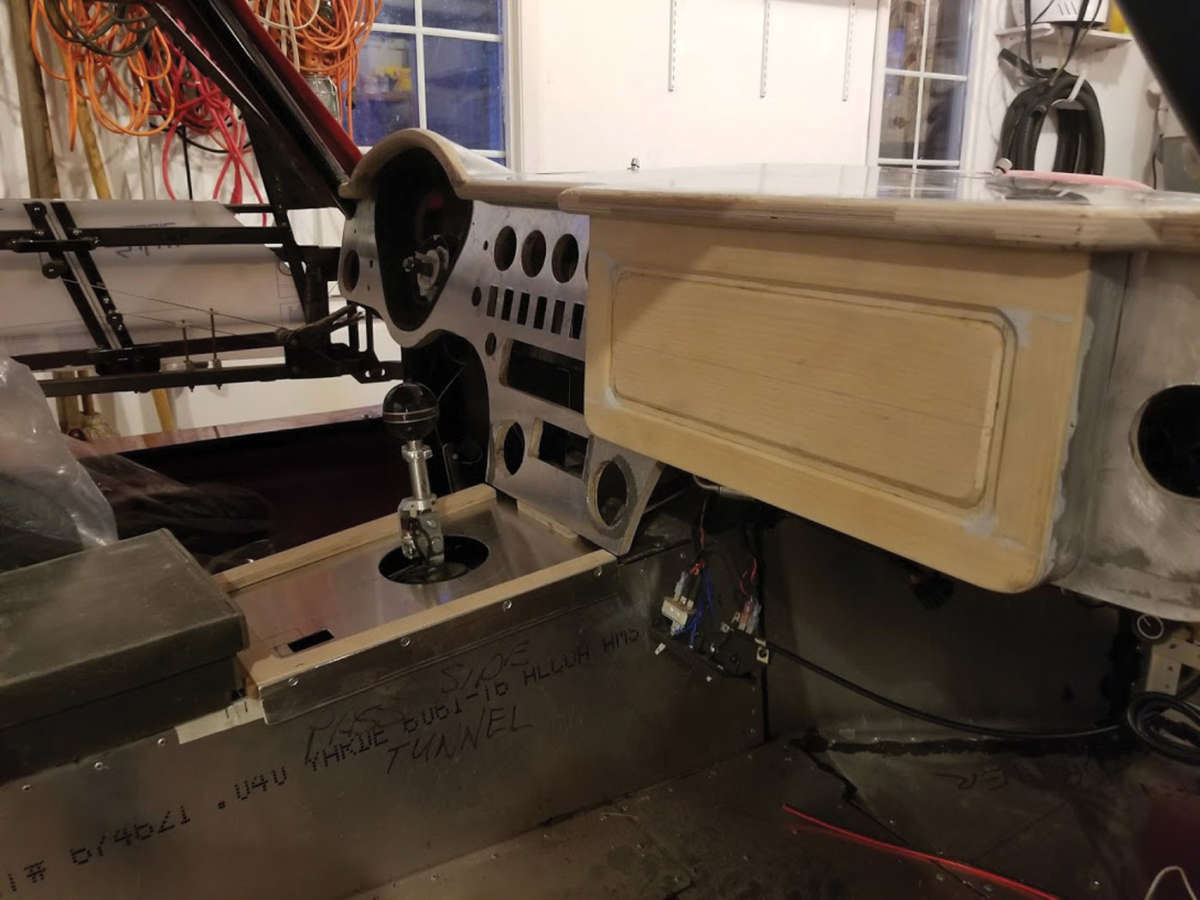
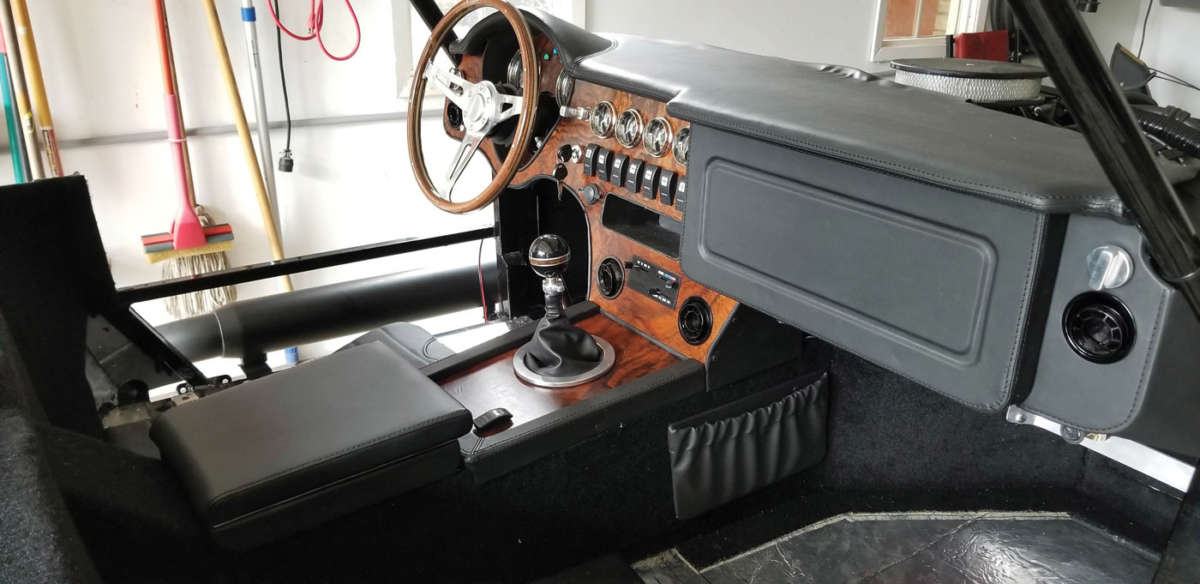
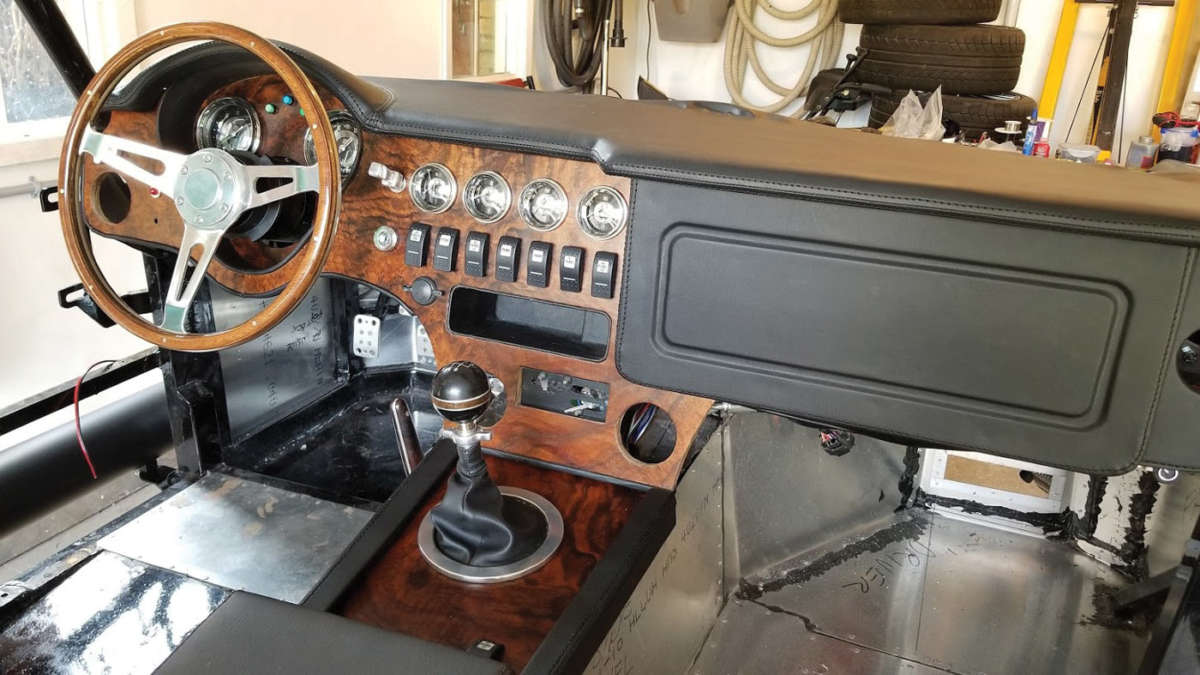
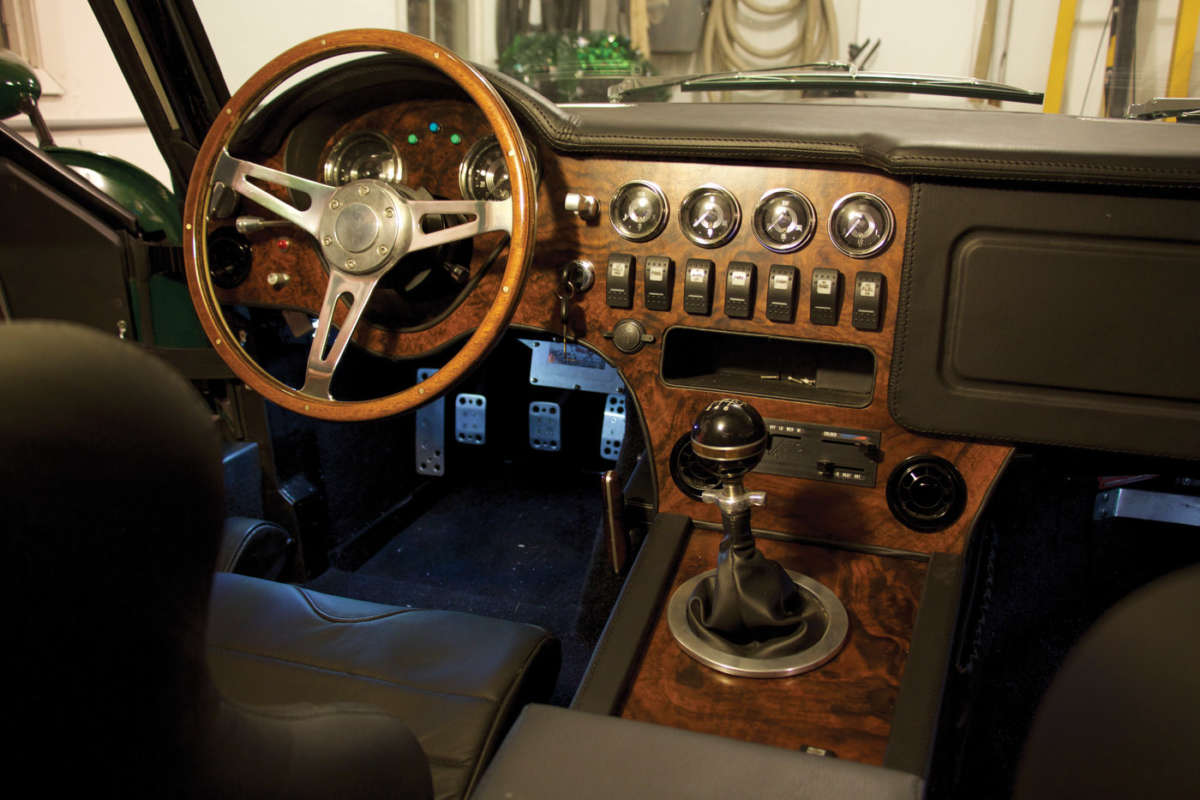
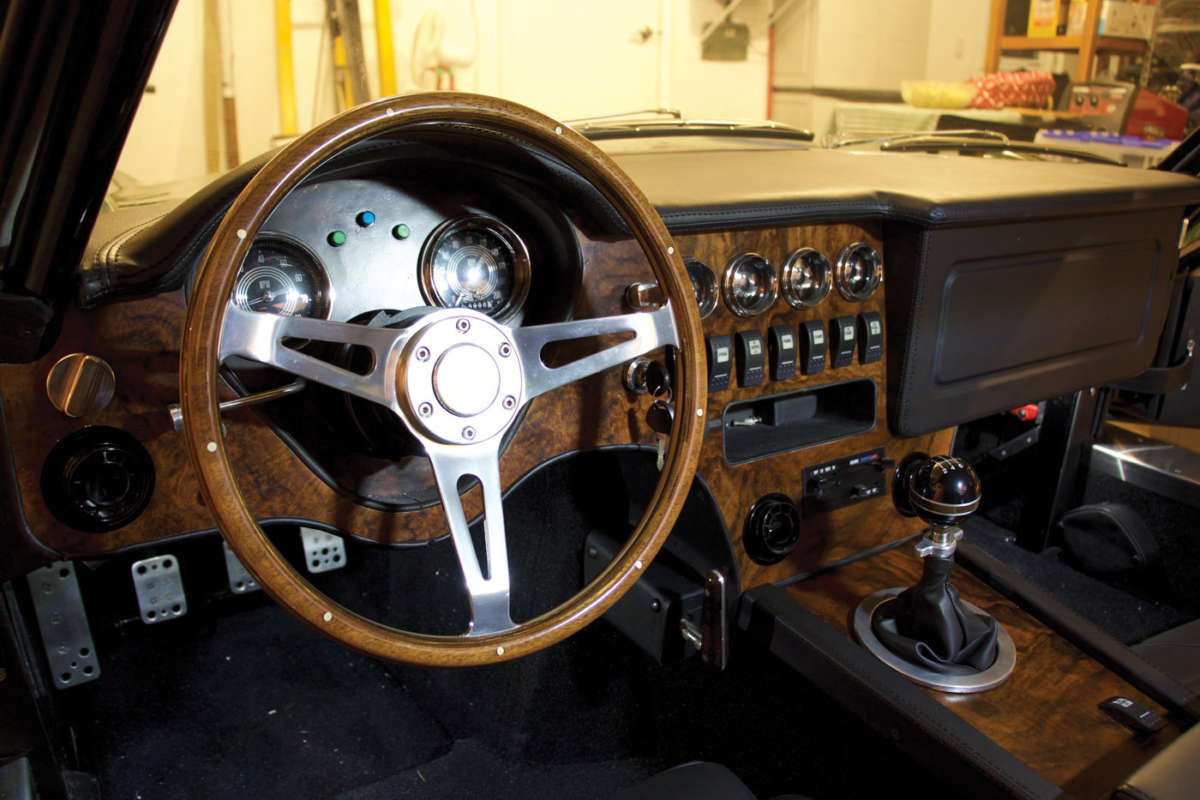
When my dad and I first started the build of our Factory Five Type 65 Coupe, we knew that we wanted to have something different and opted to go with a grand tourer theme as opposed to a track car. The original dashboard for the Daytona was functional for racing, not unattractive, but not really styled like a production GT car of the 1960s. Looking at the popular GT cars of the era, we decided that we both really liked the styling of the 1967 Toyota 2000GT. We didn’t want an exact replica, but we liked rounded shapes, wood finish, black stitched leather and analogue controls from the time period. So, how do you go from bare framework to a finished interior like this one? Well in our case, it was pencils, paper, plywood, aluminum and whiskey of course. (And my father’s 40 years’ of engineering experience also helped quite a bit.)
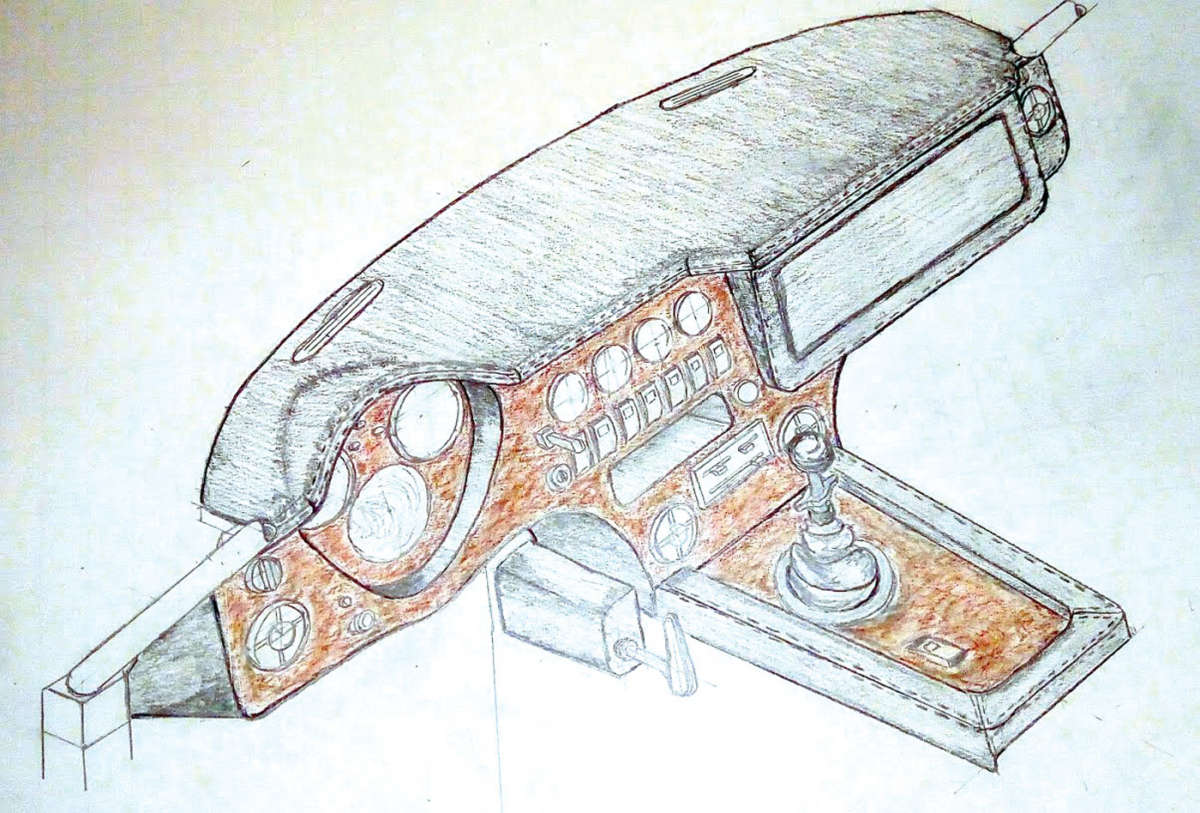
Dash layout is a matter of function and taste. Any arrangement works if you’re happy with it. After starting with some initial concept sketches, we started working on a great deal of cutaway drawings. Through every step, we constantly referenced the body and chassis to find out how all of this is going to get put together. It’s also important to consider future servicing of these parts; it’s not just a matter of putting it all together — it has to be able to come apart if we ever need to fix or replace a component.


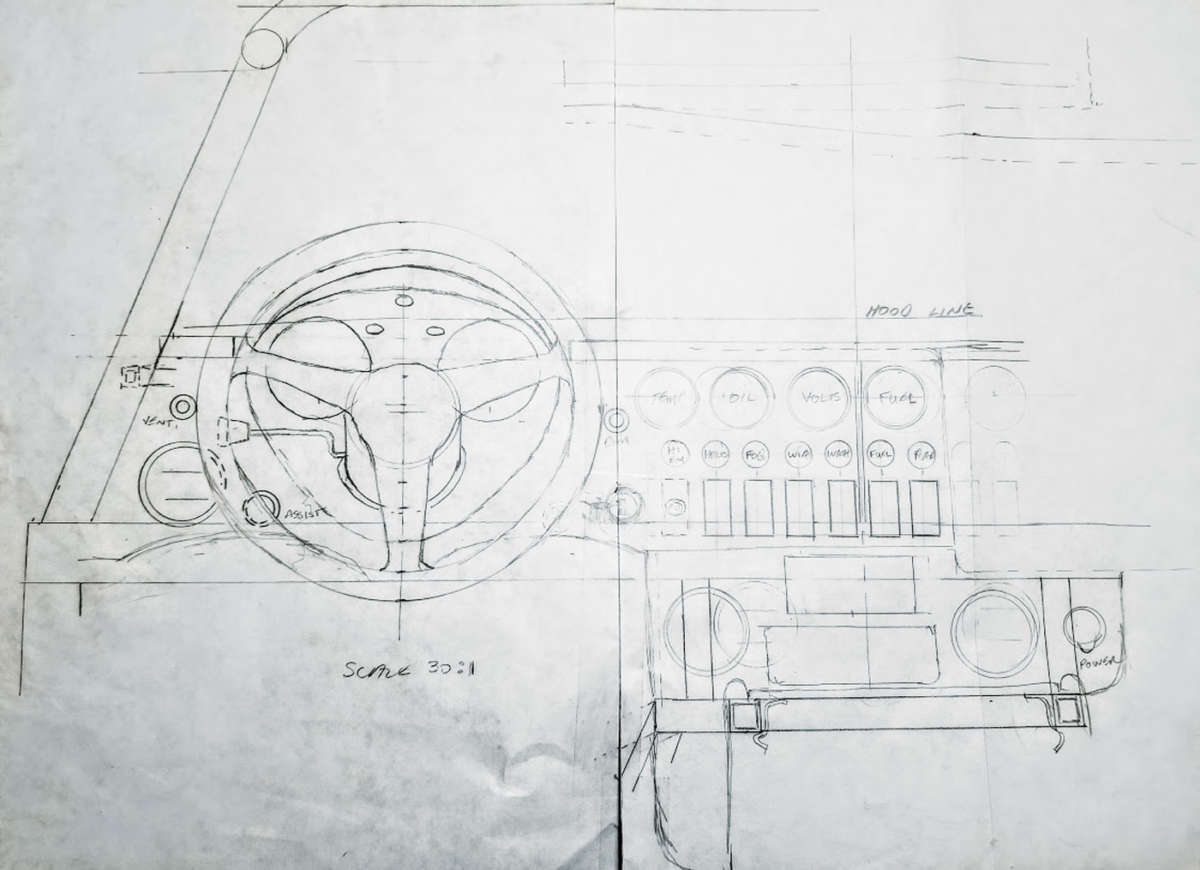
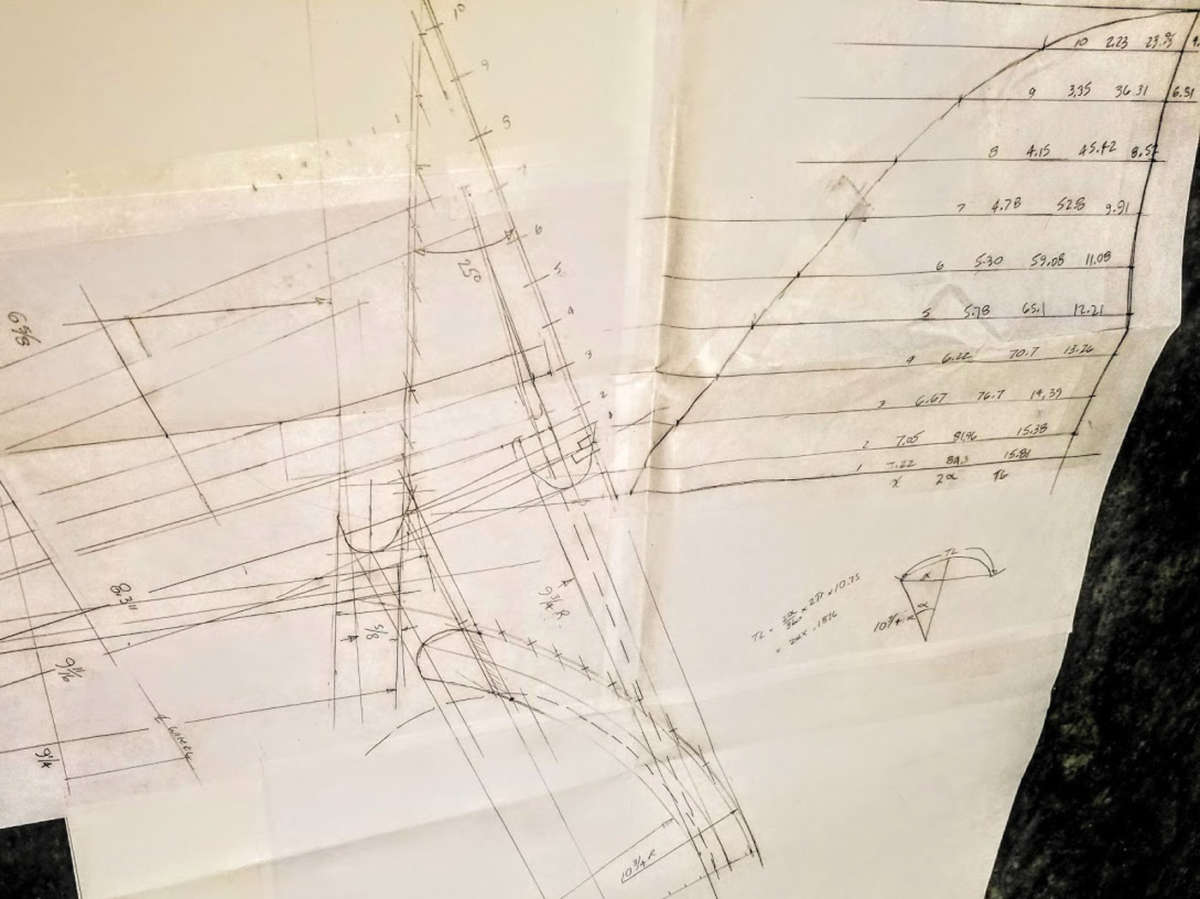
There was also a great deal of math employed in our effort. My father mentioned that this is the first time he’s actually had an application for some of his second year university math, especially where multiple compound curves and sheet aluminum were involved in the dash top.
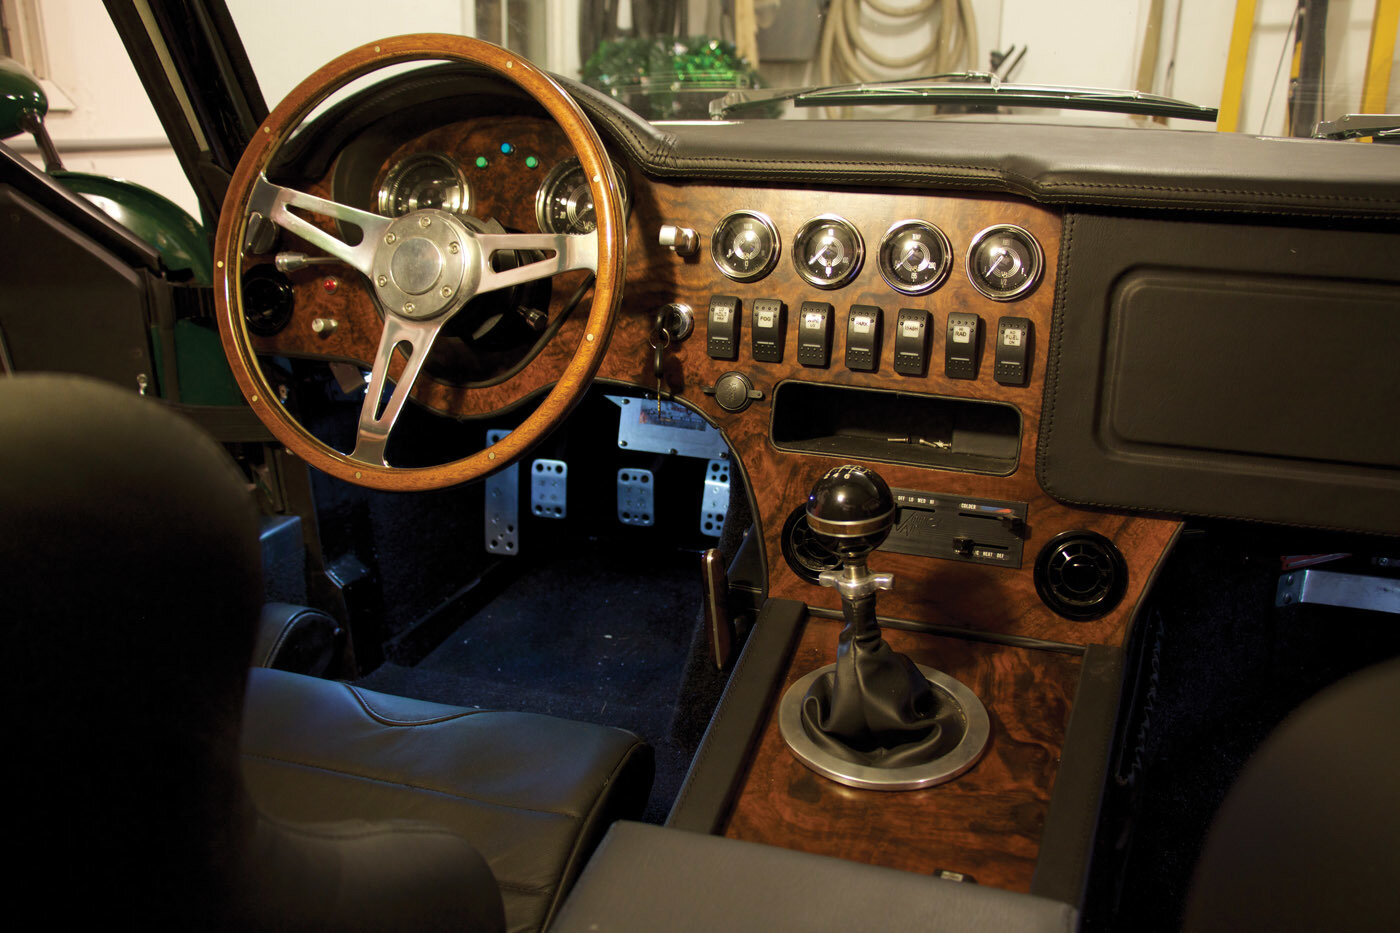
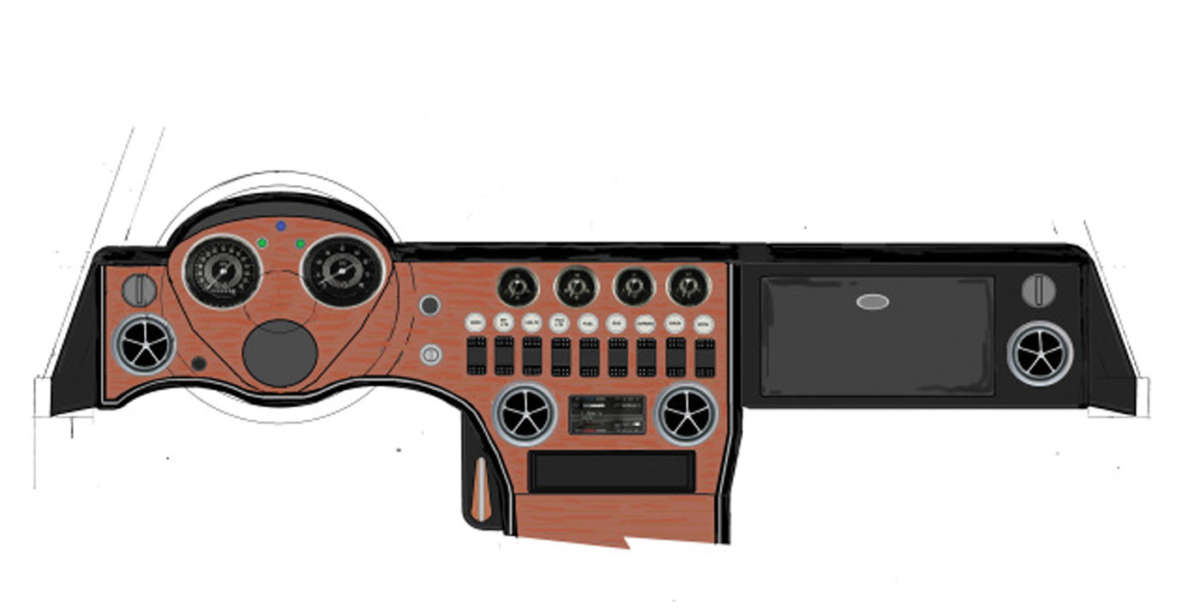
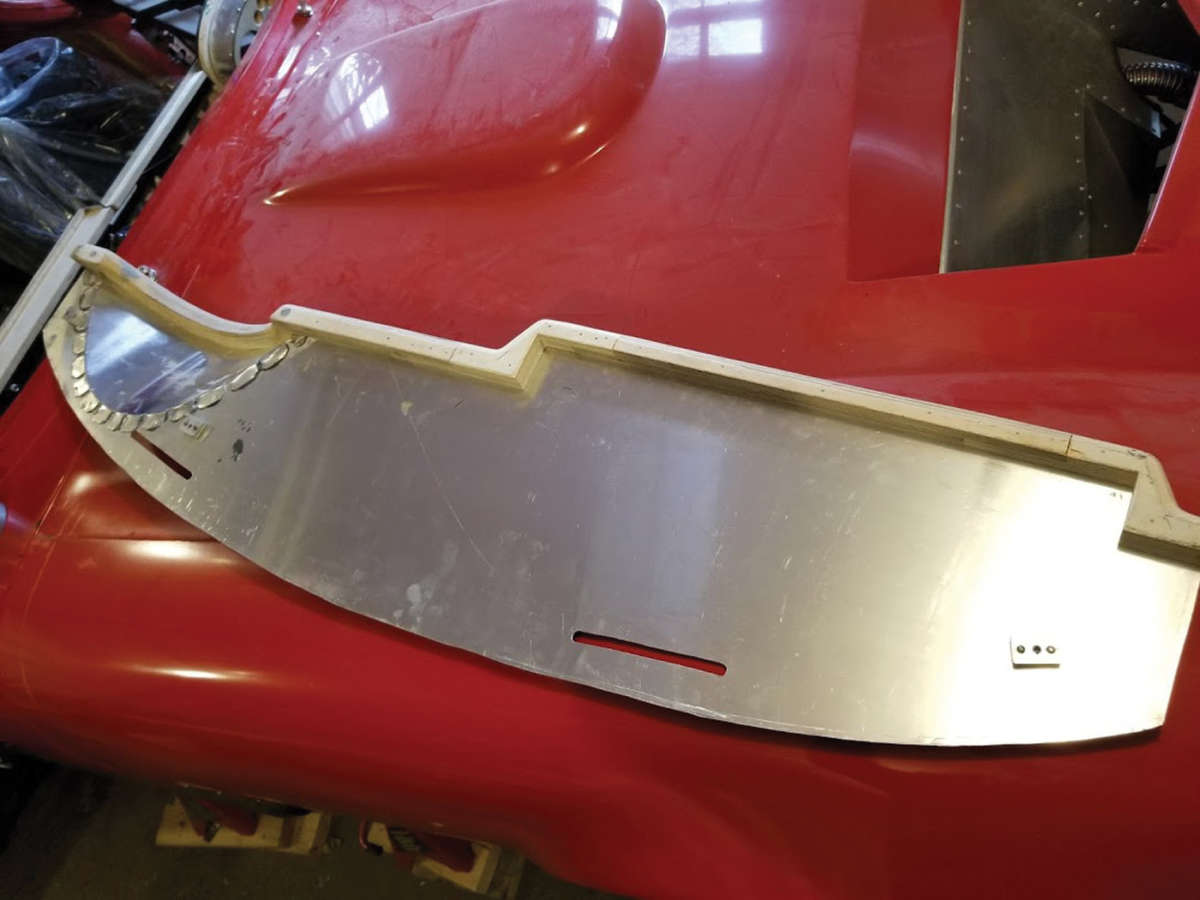
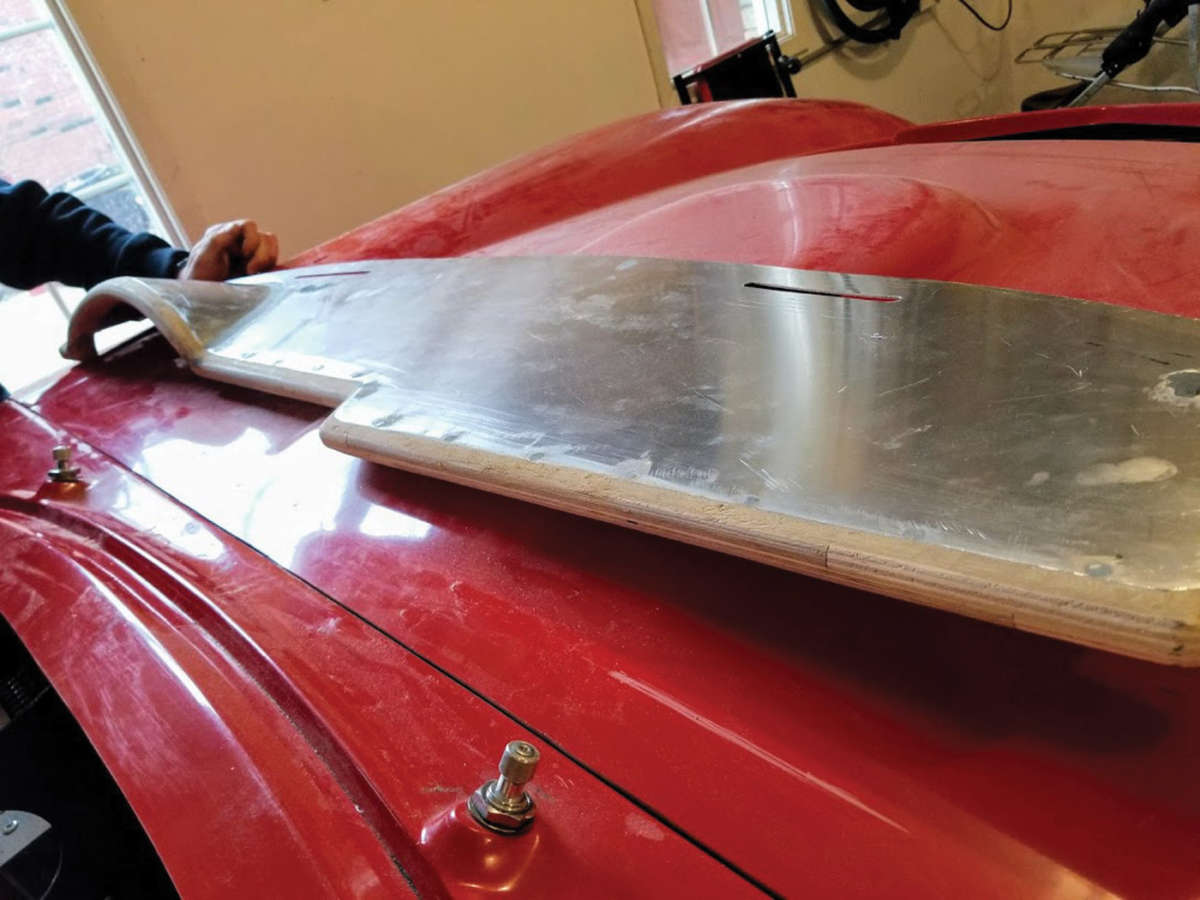
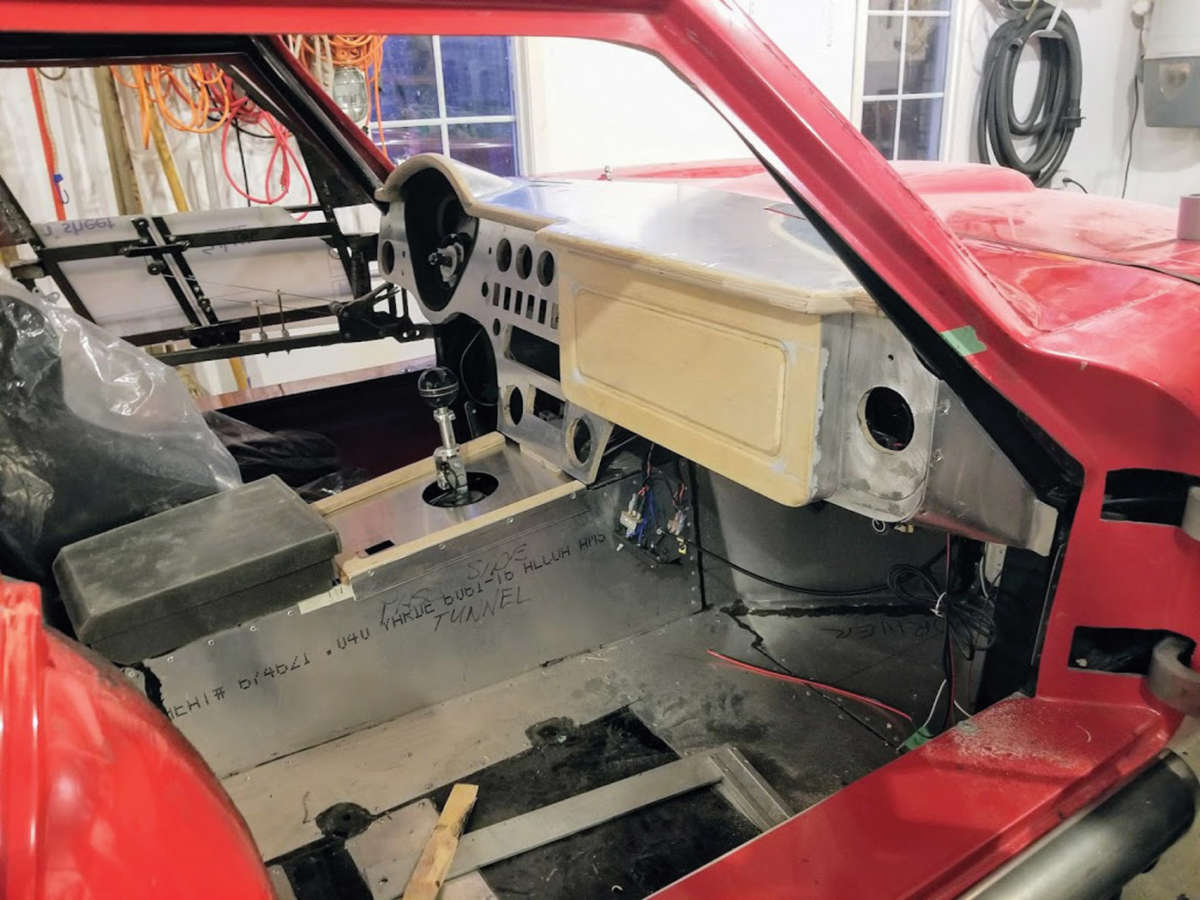
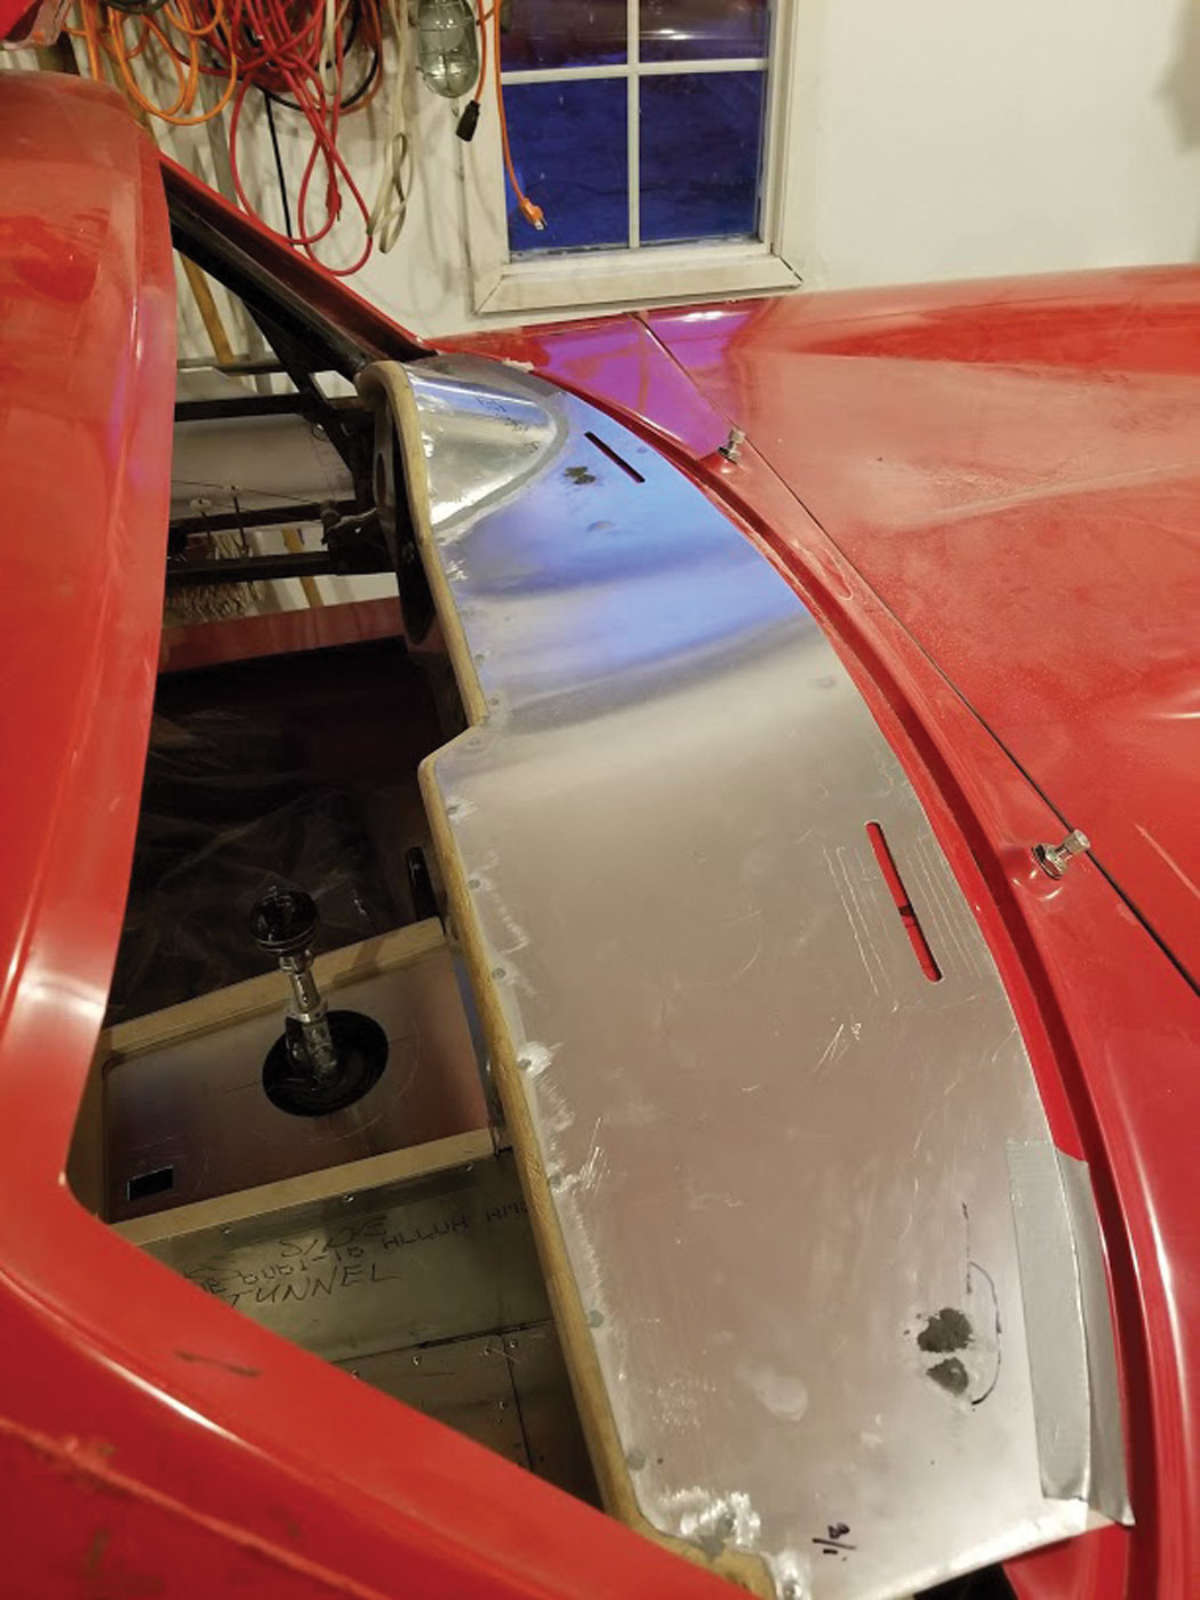
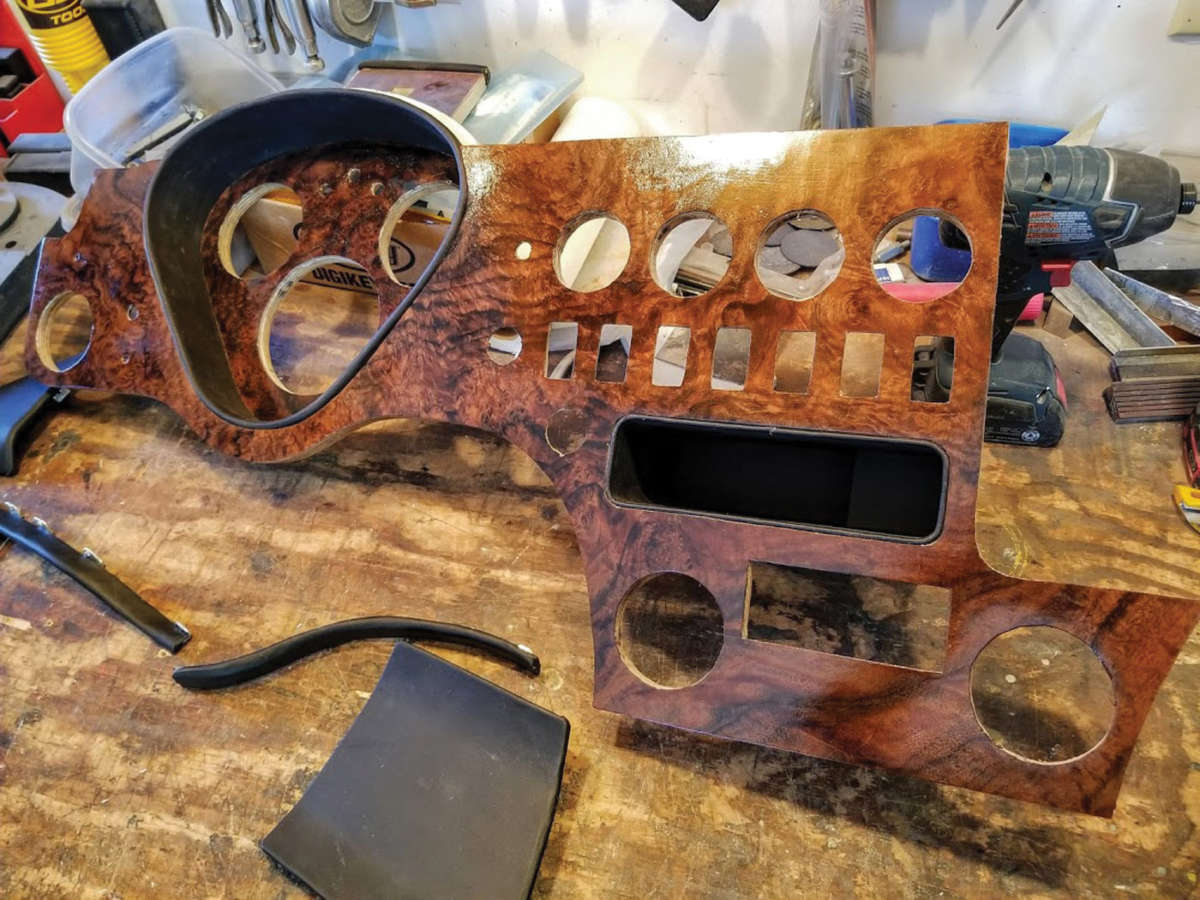
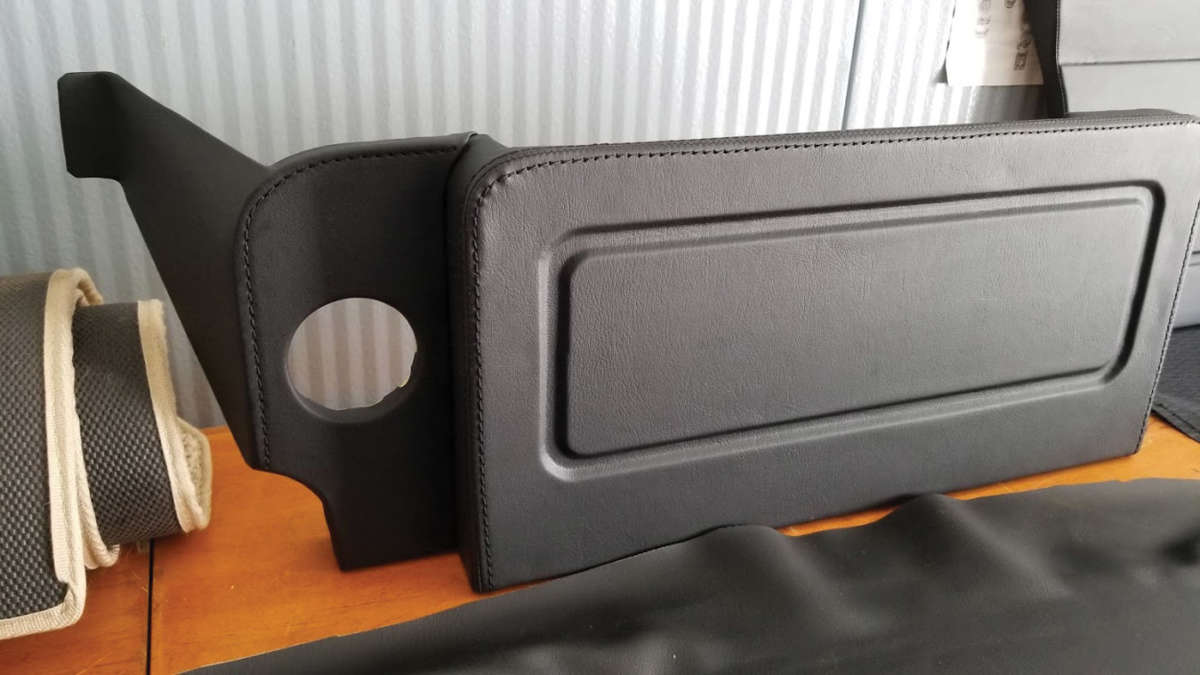
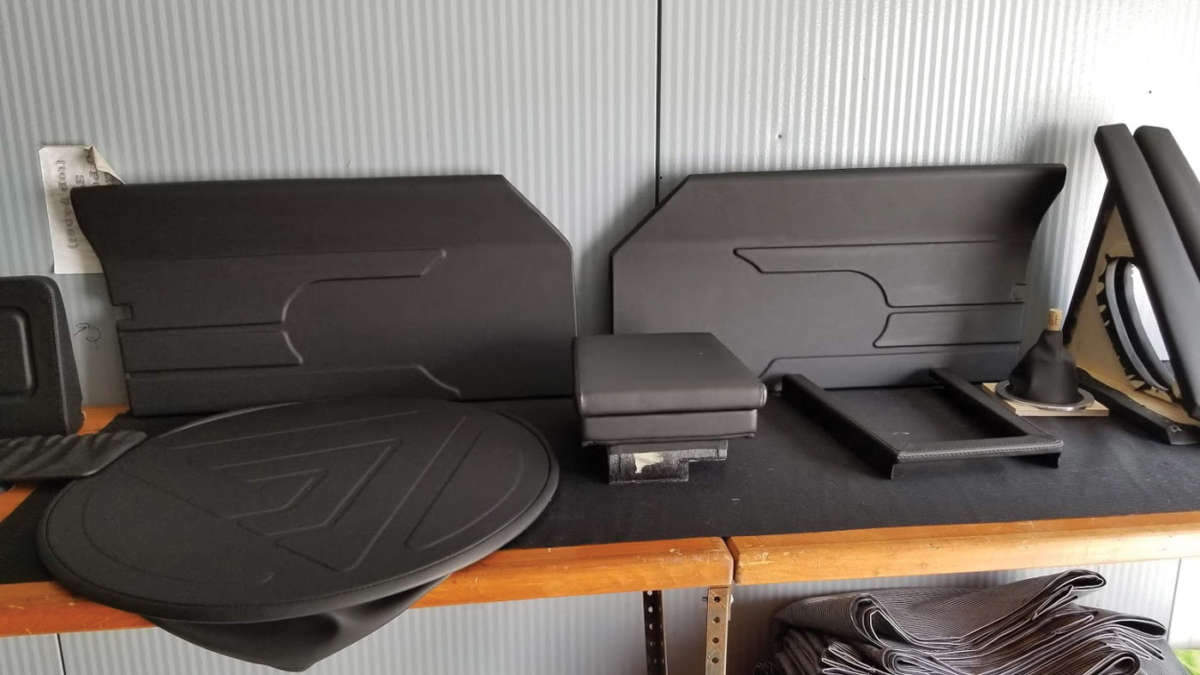
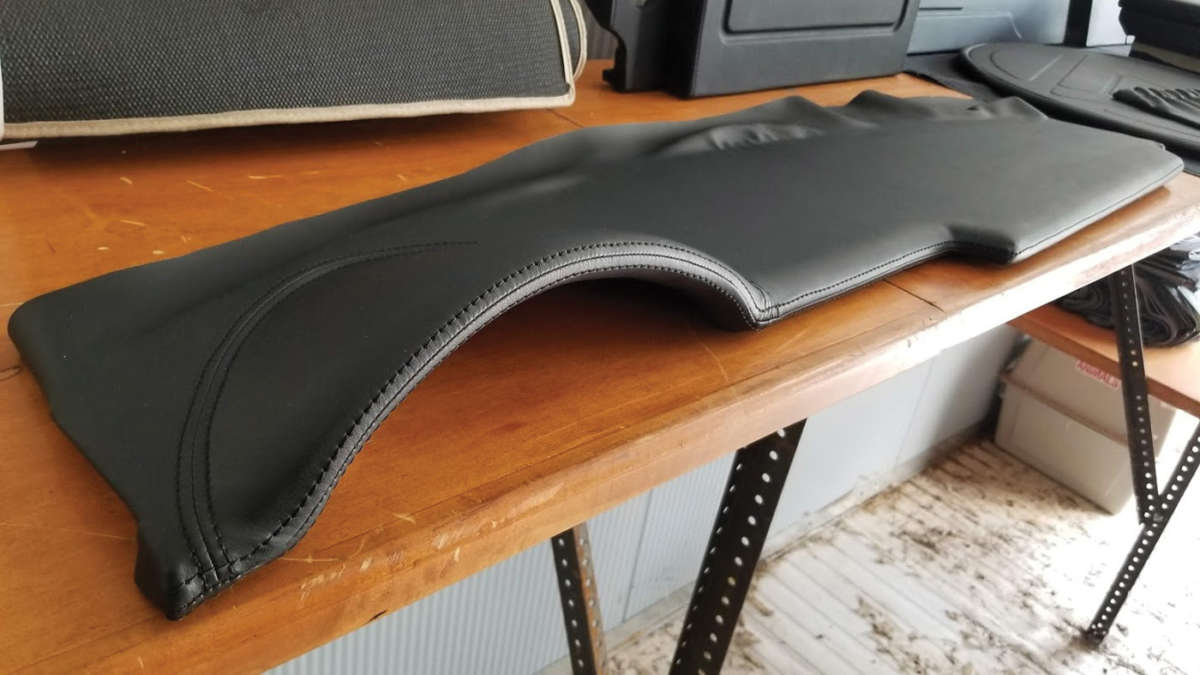
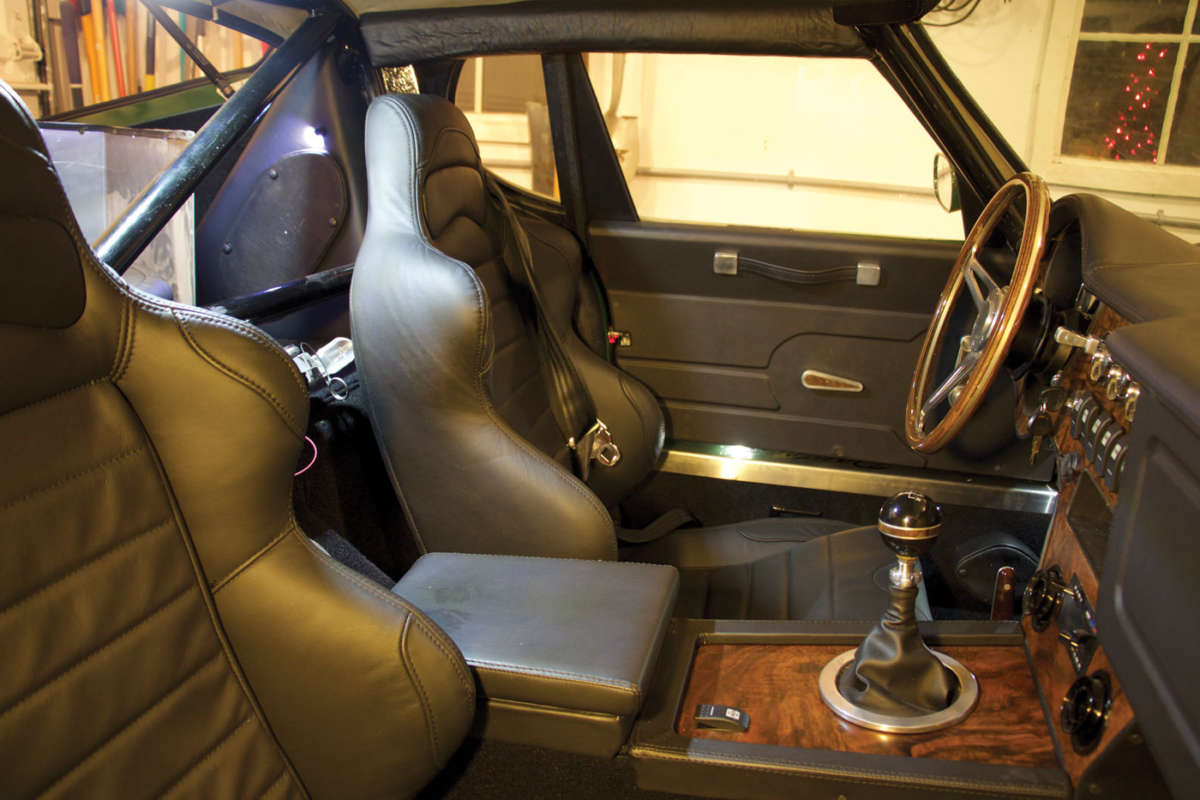
From here, we went on to materials selection. The dash structure is made from 1/2-inch, high-density plywood backing with aluminum sheet on the front. We selected 0.040-inch/14-gauge aluminum sheet, which is softer and a bit easier to work with than a hardened sheet. The dash top is also sheet aluminum with wood as the front bullnose structure — this will be covered in stitched leather by our upholsterer.
The first pieces we constructed were actually heavy paper templates (Bristol board), which reflected the shapes of all the aluminum parts to be cut out and fitted. We used a variety of methods to shape the plywood and aluminum sections that make up our interior, but none of which are rocket science. The raised portion above the gauges is a simple cylindrical piece bonded in with JB Weld. I believe I formed it over a paint can. The nose of the dash is made up of high-density poplar plywood attached with countersunk wood screws. The small bits of aluminum sheet, used to make the dash side supports and transition pieces, were bent and hammered to shape over bits of pipe and the like. To bond the aluminum to the plywood, we sanded the aluminum sheet with 40-grit sandpaper and bonded it to the plywood using premium-grade LePage contact cement.

Fabrication was done with simple hand tools. A drill and jigsaw were used for cutting the plywood as well as the instrument and switch openings. An electric sheet metal cutting tool was used for the aluminum, and this tool is almost a necessity. Doing long, clean cuts with hand shears is difficult and leaves a wavy, distorted edge.
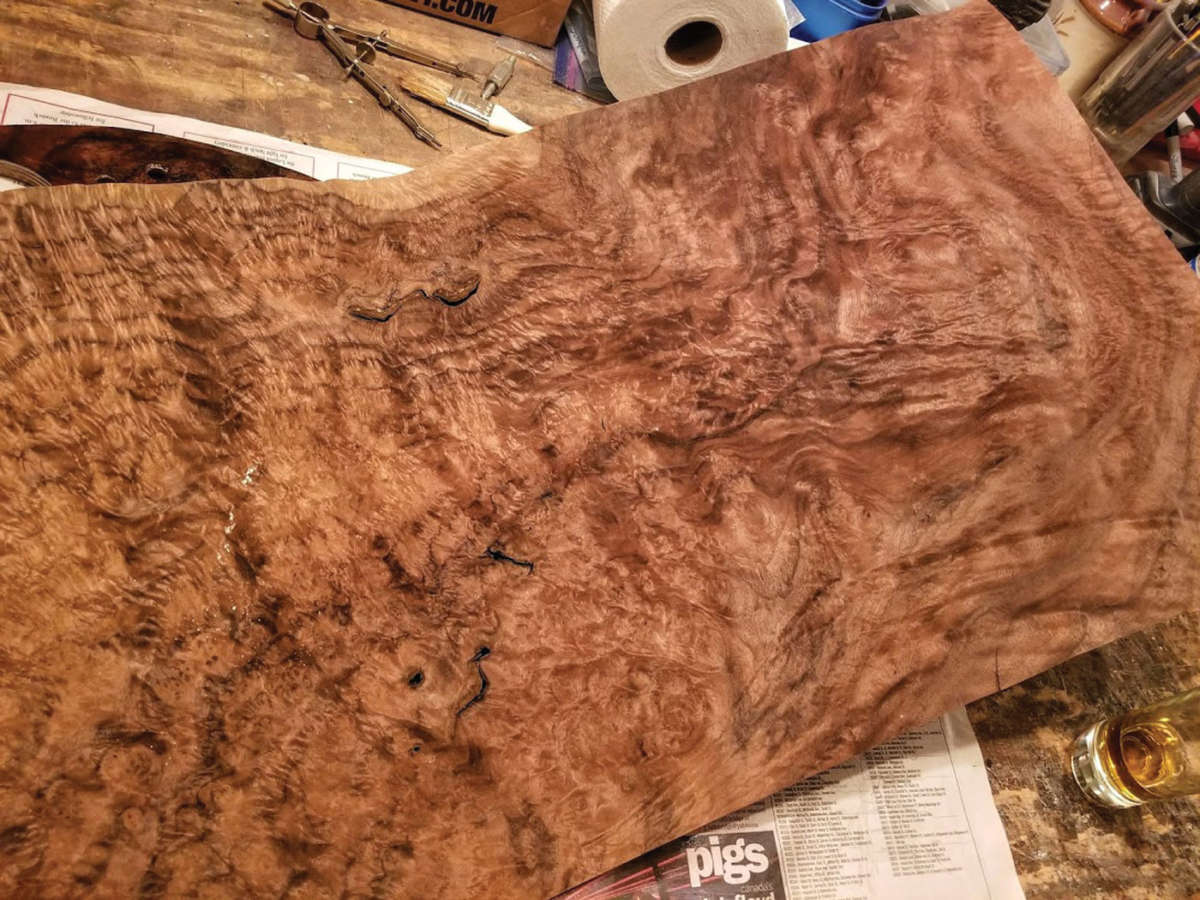
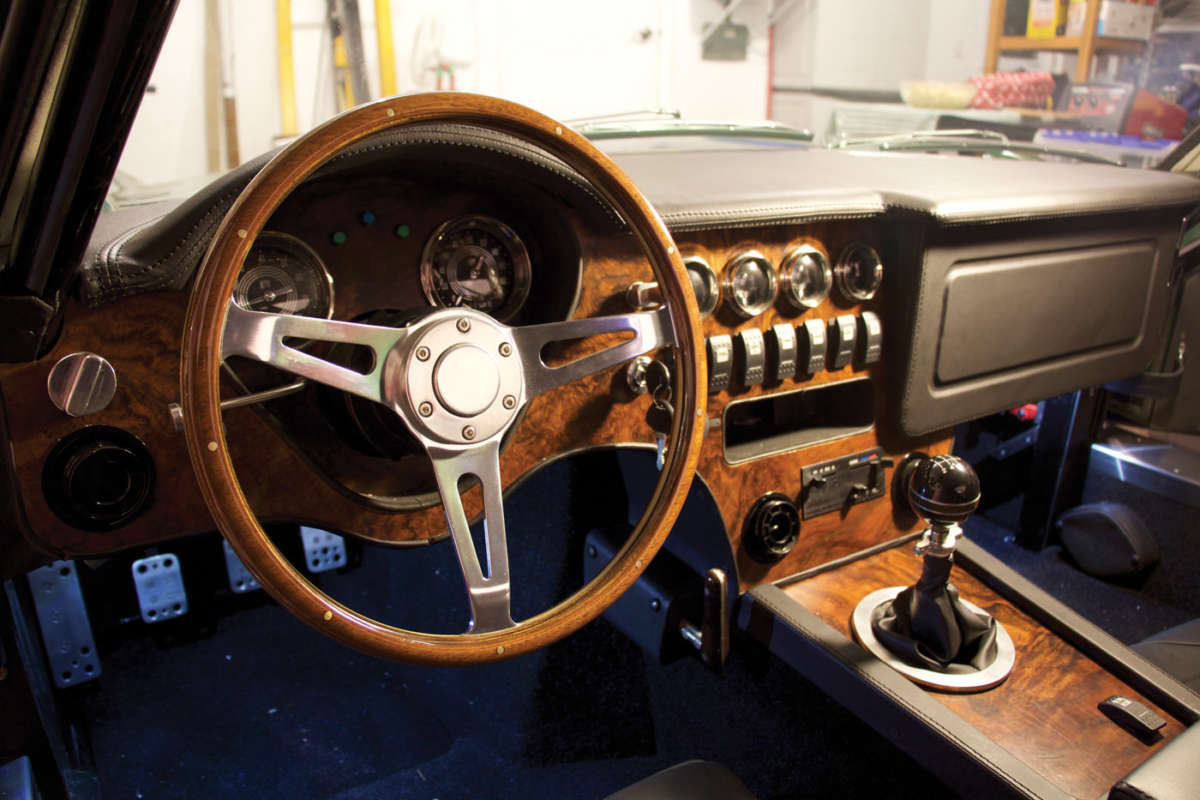
The wood veneer we chose is a 0.020-inch burled walnut. Most of the others that we looked at were far too orange or red in appearance, especially when coatings like automotive urethanes or epoxies were laid overtop. In its raw state, the walnut veneer is extremely wavy and irregular, so it was flattened by applying a veneer softener (commonly available at woodworking or hobby supply stores). The wetted veneer was clamped between plywood with craft paper and paper towel on either side to absorb excess liquid softener. It needed to stay clamped for two days to dry out reasonably well. Once released, the veneer will only stay flat for about a day, so it needs to be bonded to the aluminum right away. Even with this effort, the surface of the veneer was not flat. An inherently flat wood veneer would have made life much easier. Finally, the veneer was bonded to the aluminum using the same contact cement.


To achieve a matte finish, two or three coats of Dupli-Color automotive clear coat were applied and the surface sanded with 220 and then 400 grit. This process was repeated about eight to 10 times to achieve the desired flatness — extremely time-consuming. The finish coat used is Dupli-Color matte-finish alloy wheel clear coat. The automotive clear coats don’t yellow and are pretty good with UV light, not that that’s as big of an issue in a coupe.
Adding the walnut veneer to our dash was a lengthy, but worthwhile undertaking. I think the results speak for themselves — the burled walnut appears very deep.
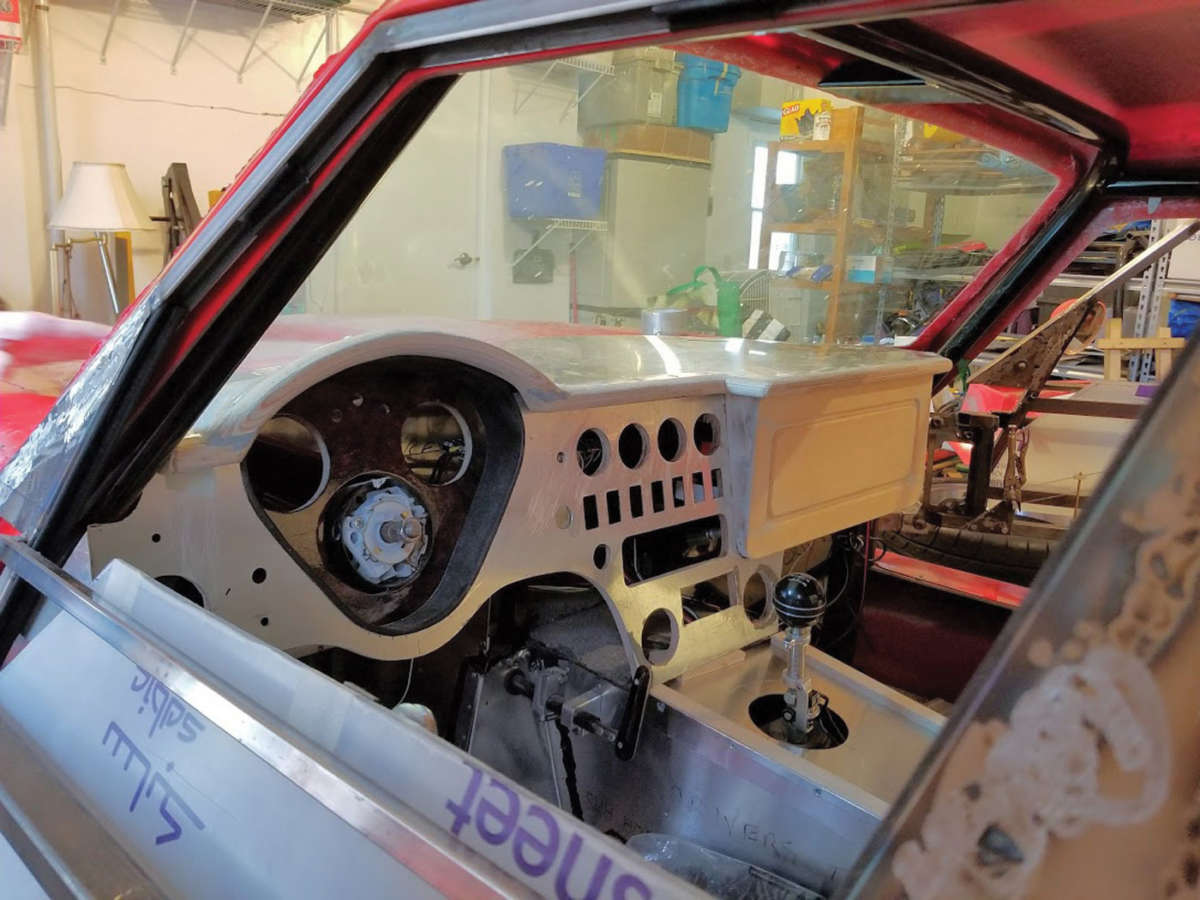


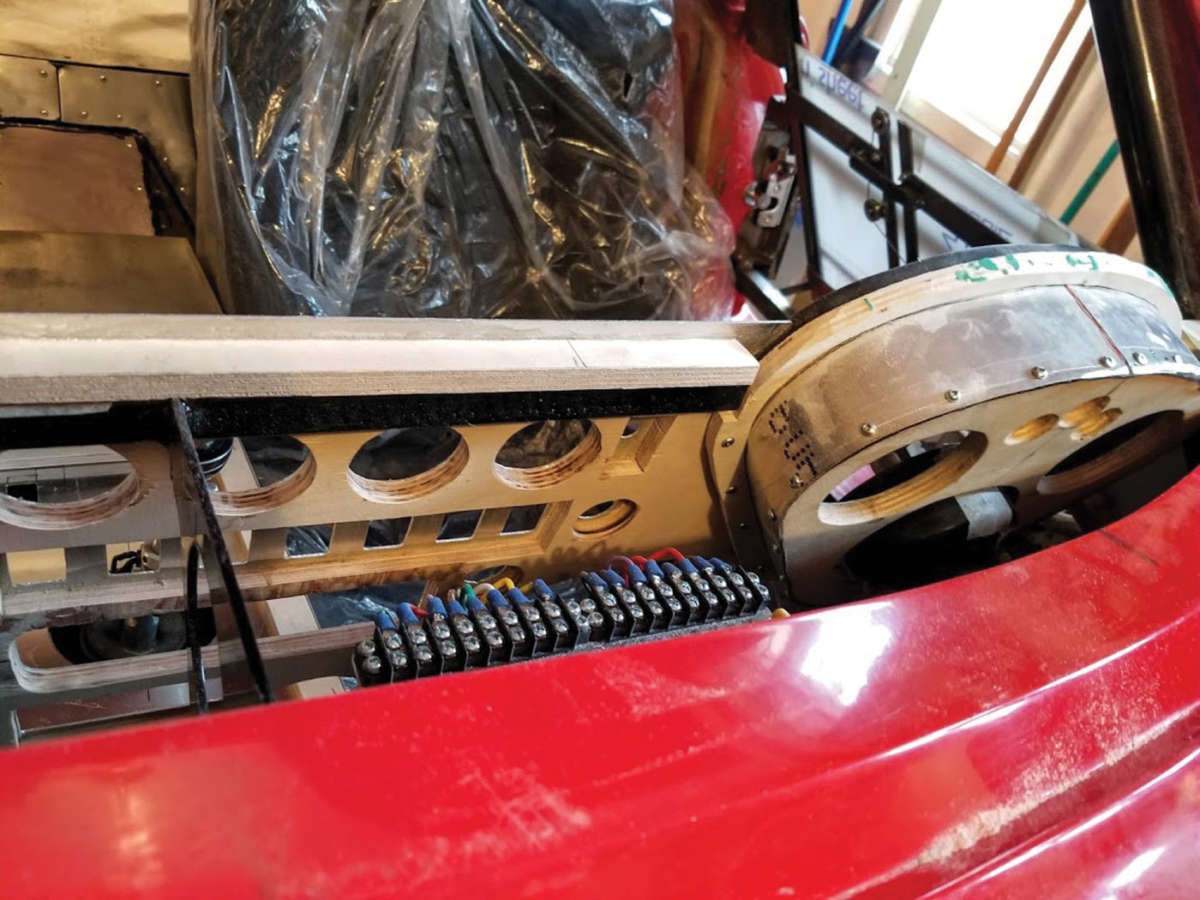
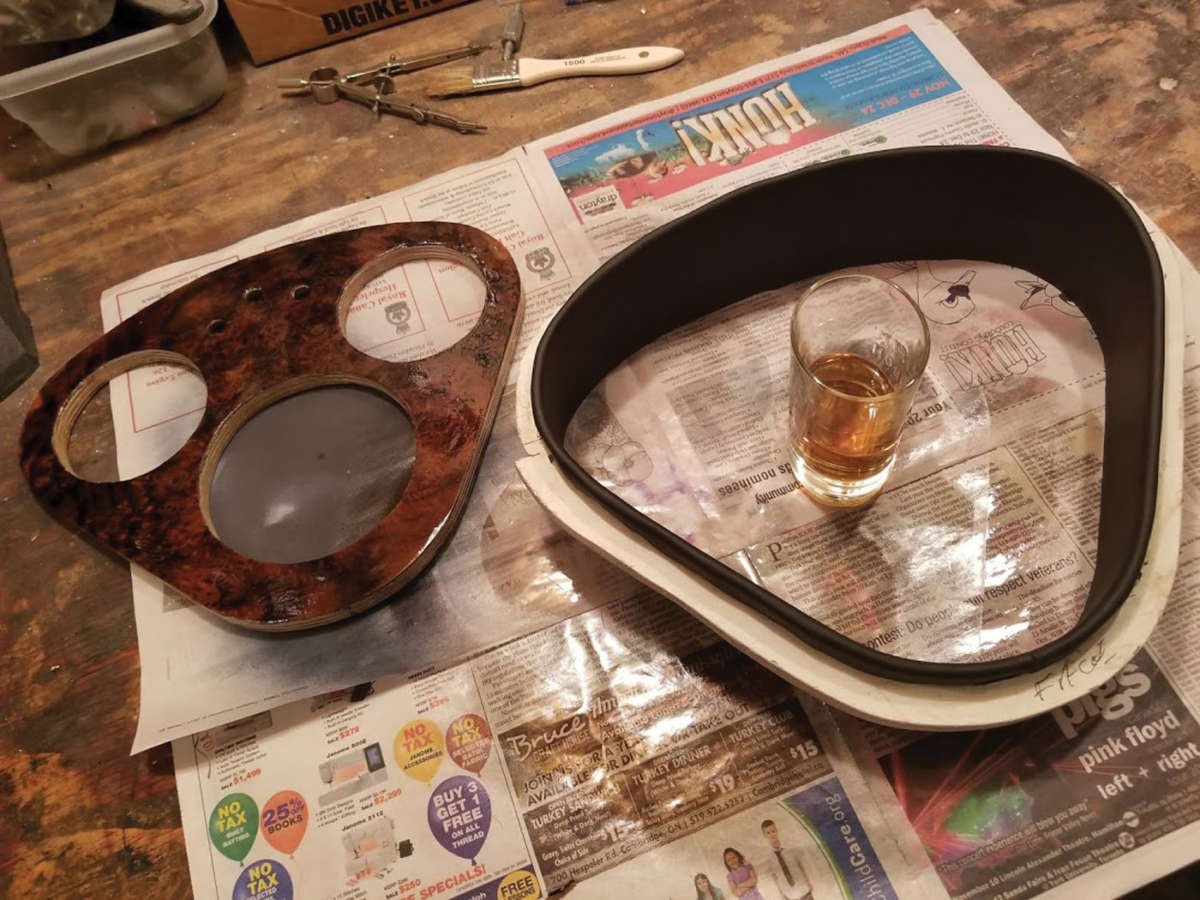
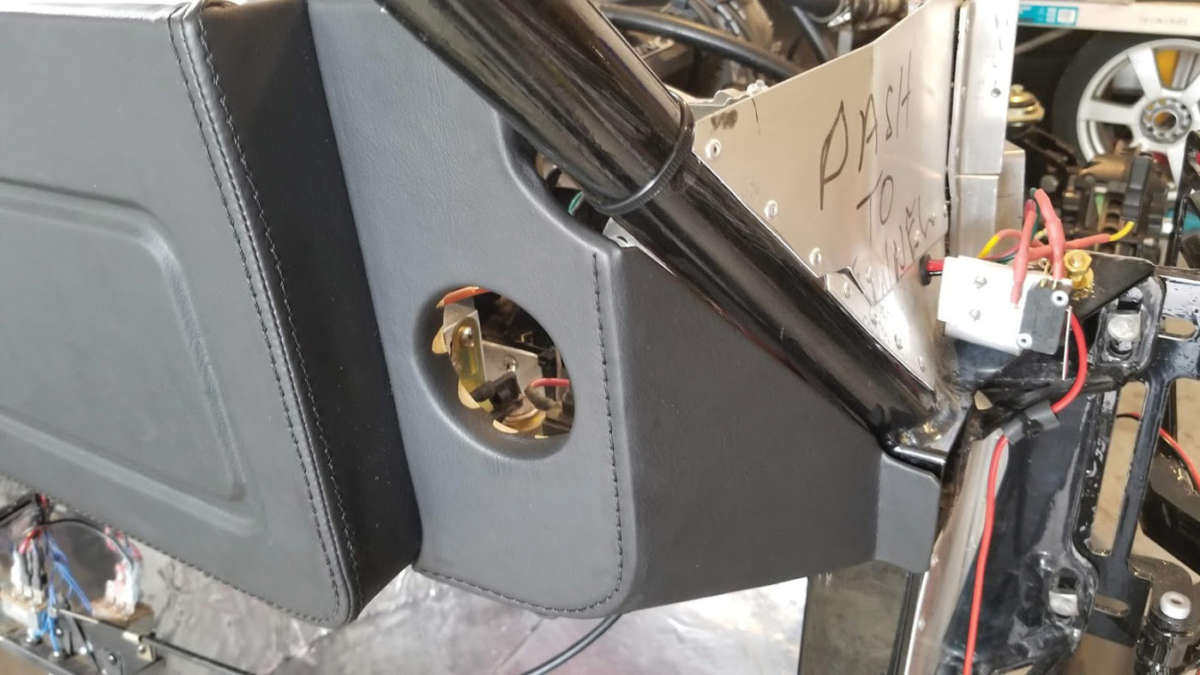
The dash recess, which houses the speedometer and tachometer, as well as some indicator lights, is identical construction to the dash face. Its aluminum surround is covered with black leather in a simple process. First, the aluminum is sanded with 40 grit, and then the leather is bonded using sprayed contact cement. The remaining leather/leatherette work was done by a local upholstery shop, as it’s way beyond my skill level.
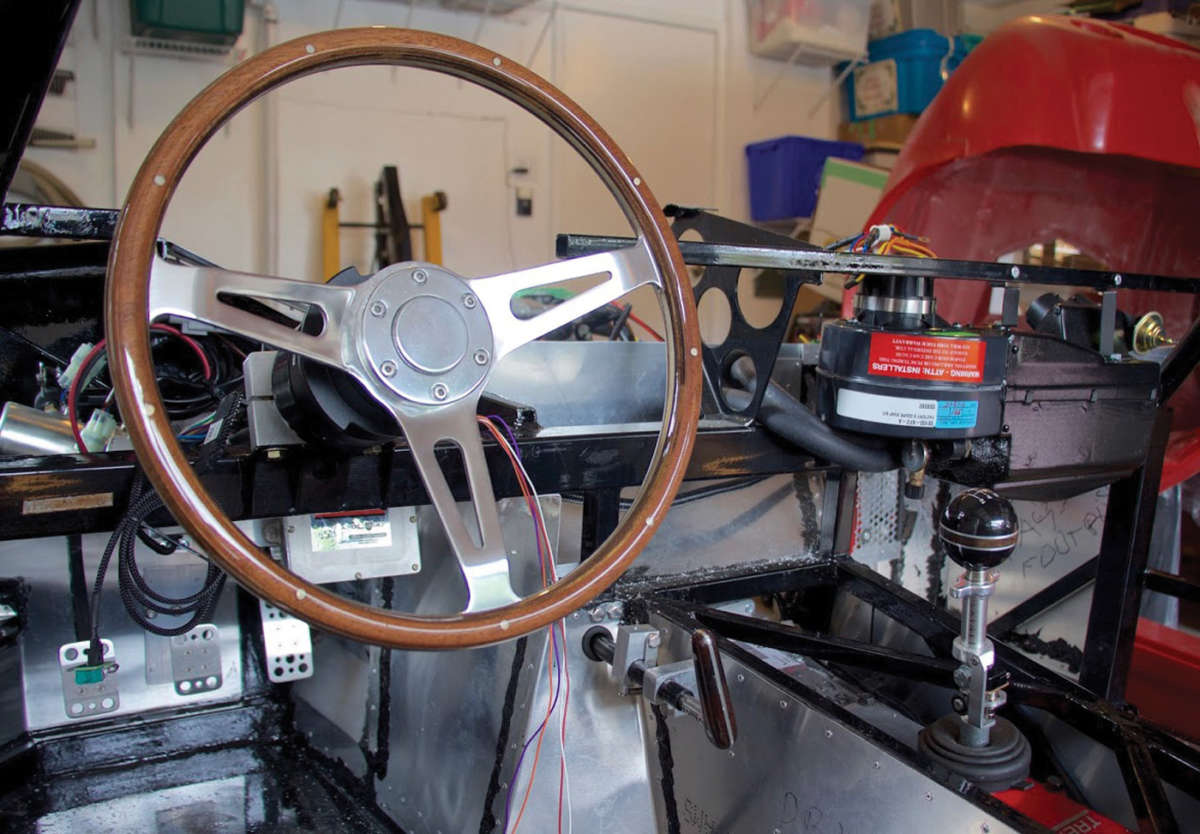
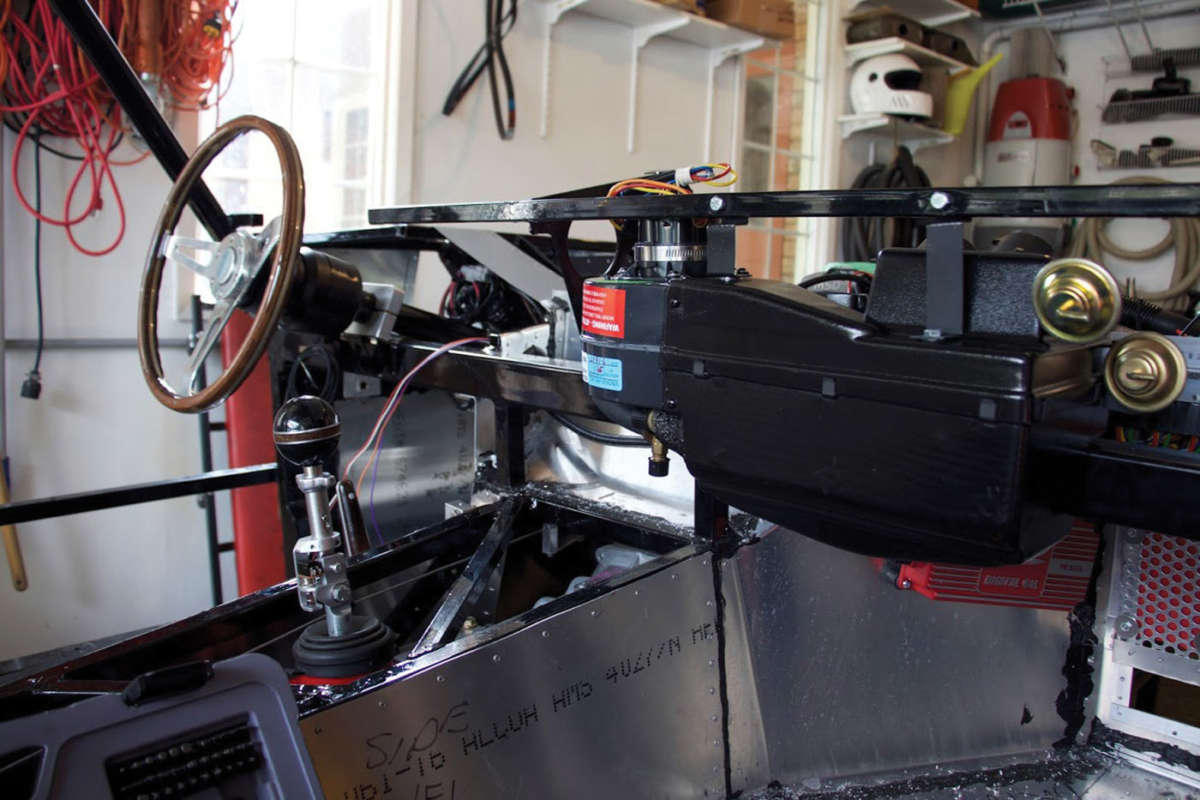
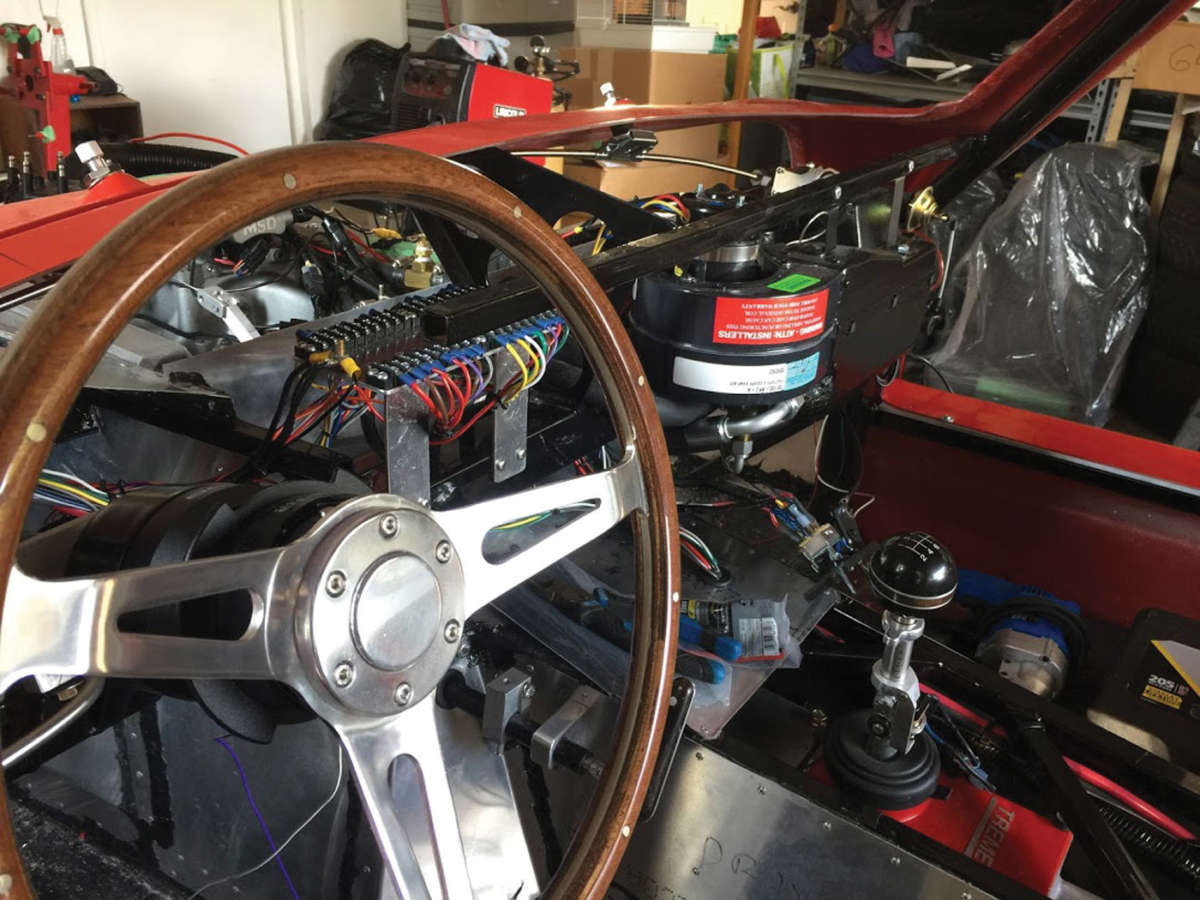
While it’s outside of today’s focus, you can also see the electric terminals for all of the wiring in and out of the dash. These terminals feed all of the gauges, as well as the switches and toggles for the various functions of the car. The large box that’s in front of the passenger area houses our Vintage Air heater core and air conditioning unit. With the limited space available, this was really the only solution, as we weren’t willing to compromise on climate control.
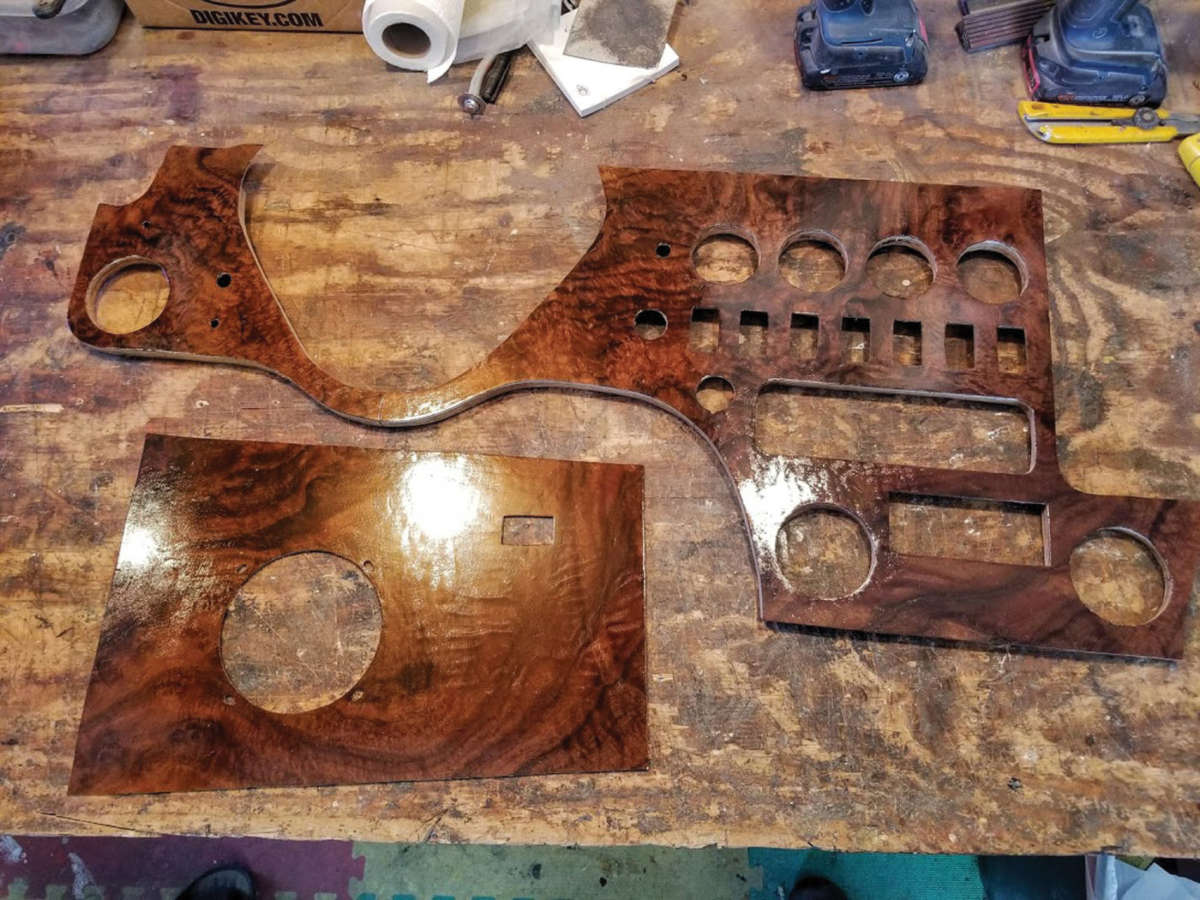
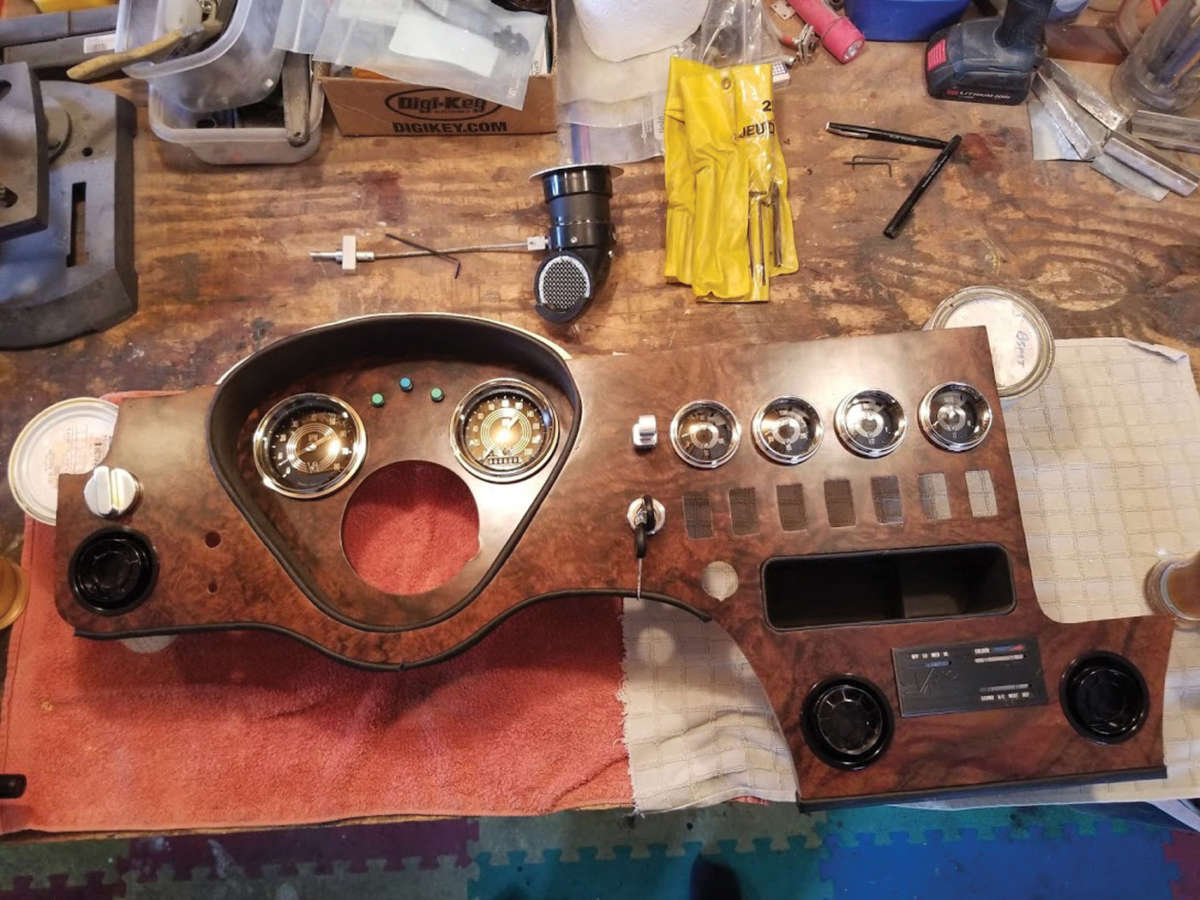

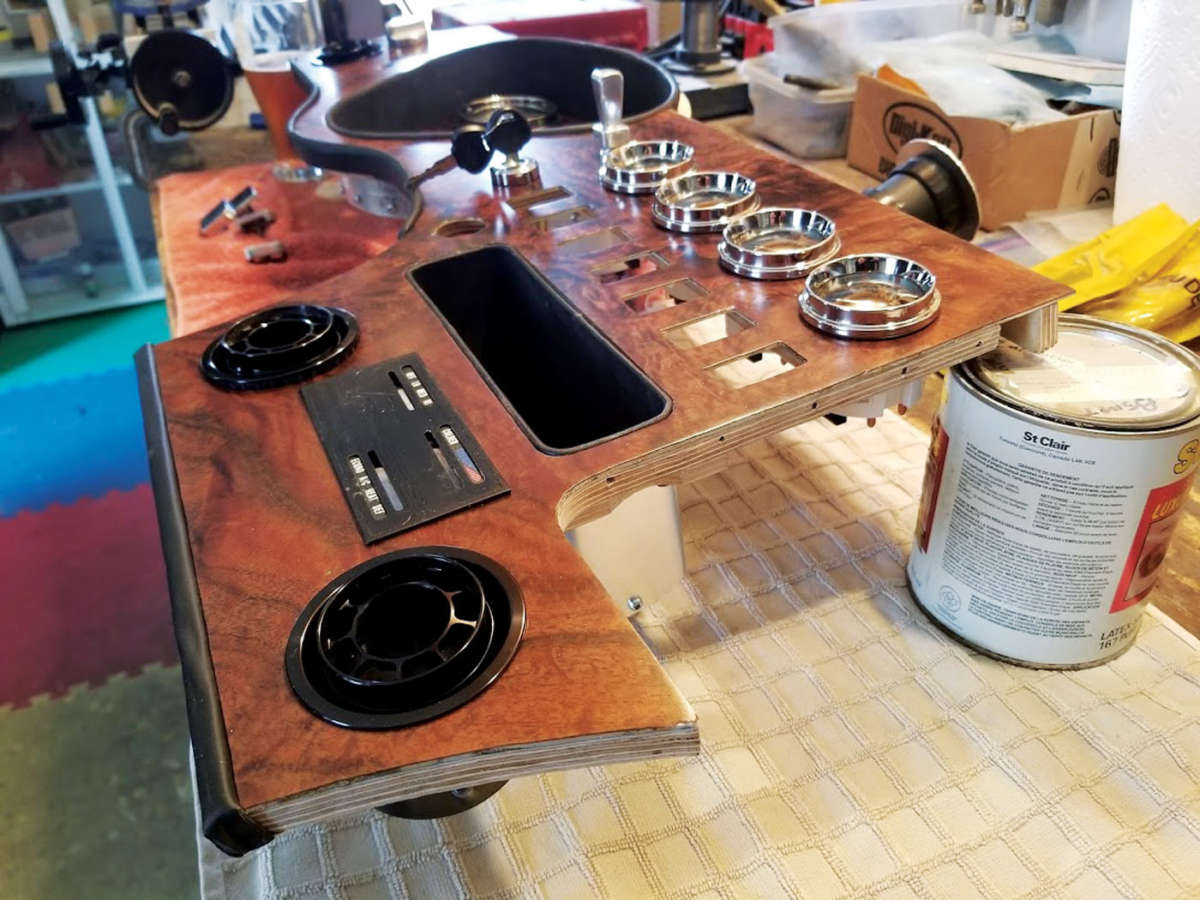
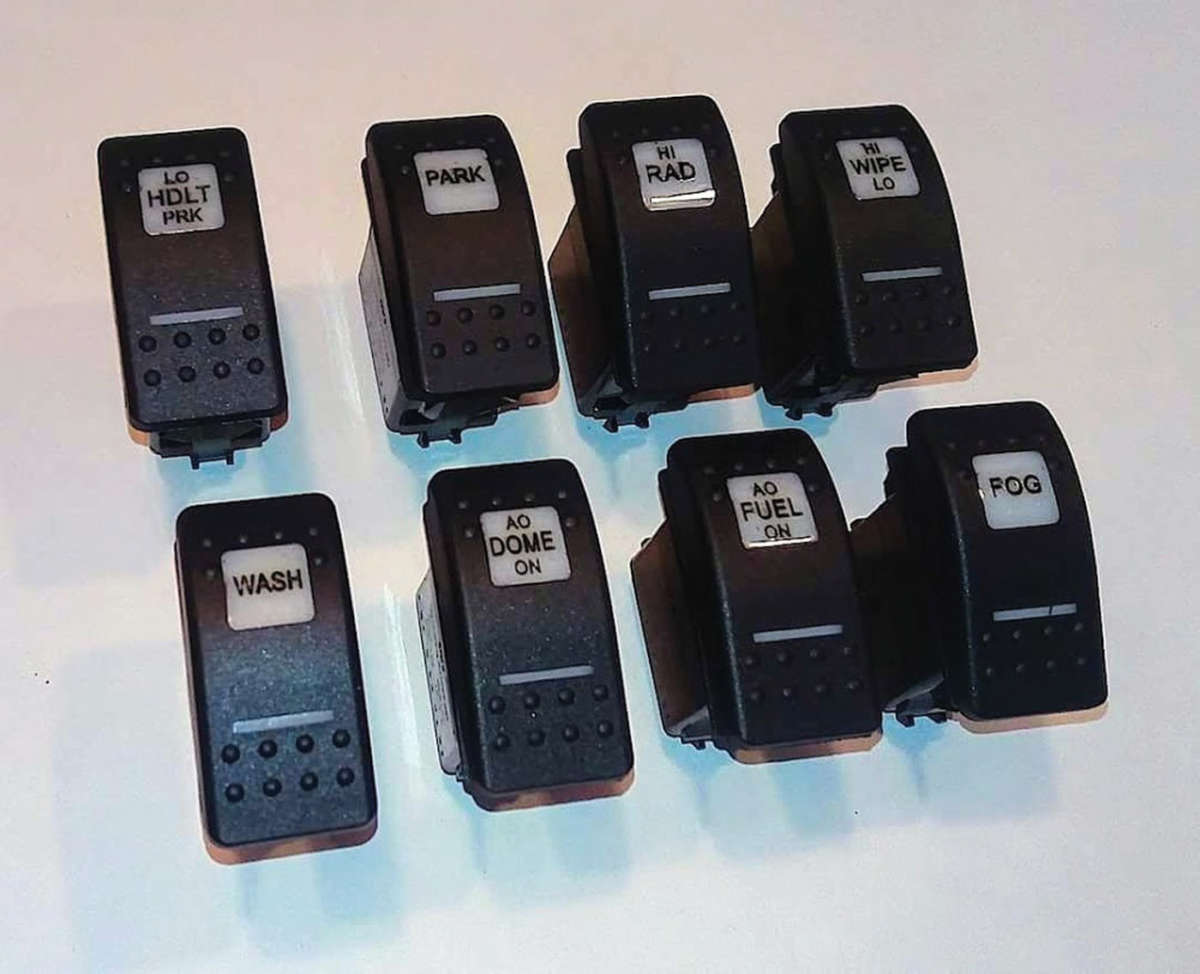
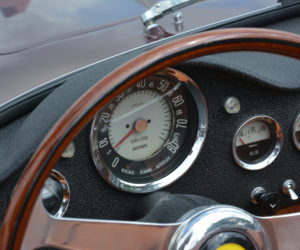
Most of our instruments and switches are mounted only in the aluminum sheet, with clearance provided in the plywood backing. Our switches were laser engraved with the required functions and then filled with black enamel so they can be read when backlit. Also, for those interested, we selected V8 Speedster series gauges from Classic Instruments.
A dash of this relative complexity requires a lot of planning and detailed dimensional sketches and drawings. Paper templates are made for everything, and measure, measure, measure. Even then, be prepared to do things twice now and then. Making a mistake toward the end of the process (after hours of work) hurts a bit, but it’s all part of the process and the fun.


Comments for: Crash-Course Cabinet Making
comments powered by Disqus