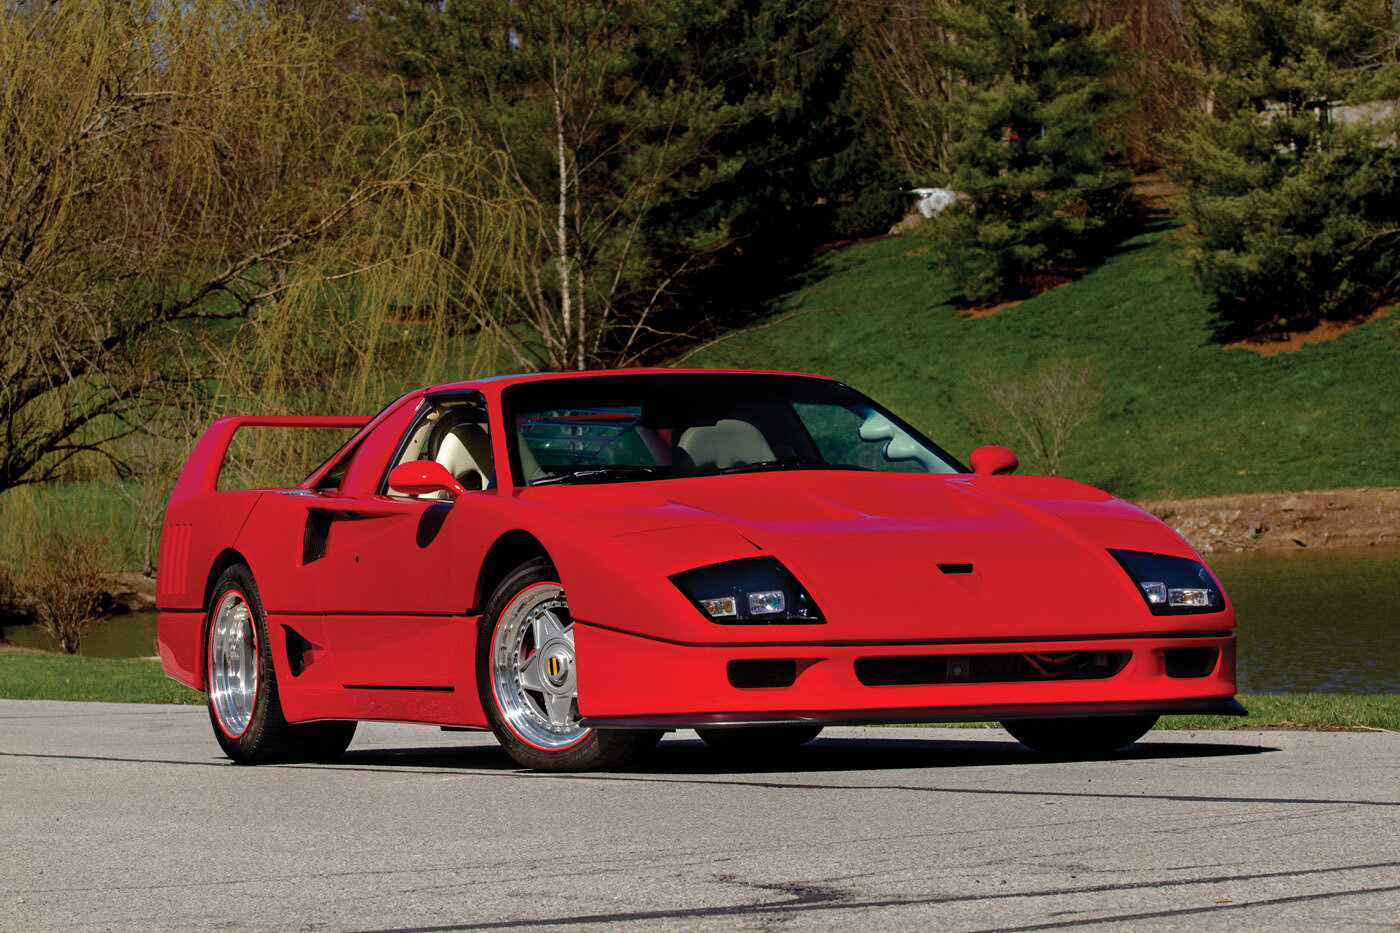
500 hp Fiero-based F40 replica
Story and Photos by Juan Lopez-Bonilla
The U.S. Navy Seabees have a hard-earned reputation for their “can do” attitude in tackling all sorts of daunting structural projects. After all, the name comes from the initials “C.B.,” which stand for construction battalion, and they have a storied legacy of creative field ingenuity, stretching from France’s Normandy to Japan’s Okinawa, and Iraq to Afghanistan. Their ingenuity and fortitude are legendary in the naval service. As shown in a WWII-era black-and-white photo, the Seabee motto was “The difficult we do now. The impossible takes a little longer.”
Former Seabee Jim Landwehr knows firsthand how to “get ‘er done,” having worked as a mechanic in Vietnam during the military conflict there. He applied this same spirit to transforming a Pontiac Fiero into a 500 hp twin-turbo exotic.
Back in 1998, Jim went to a car show and saw a F40 replica with a small-block Chevrolet power plant. Right then and there, at the age of 55, he was inspired to take on a similar project — only better. He had never built a car completely, but he had swapped several motors and transmissions in cars and had a lot of fun doing so.


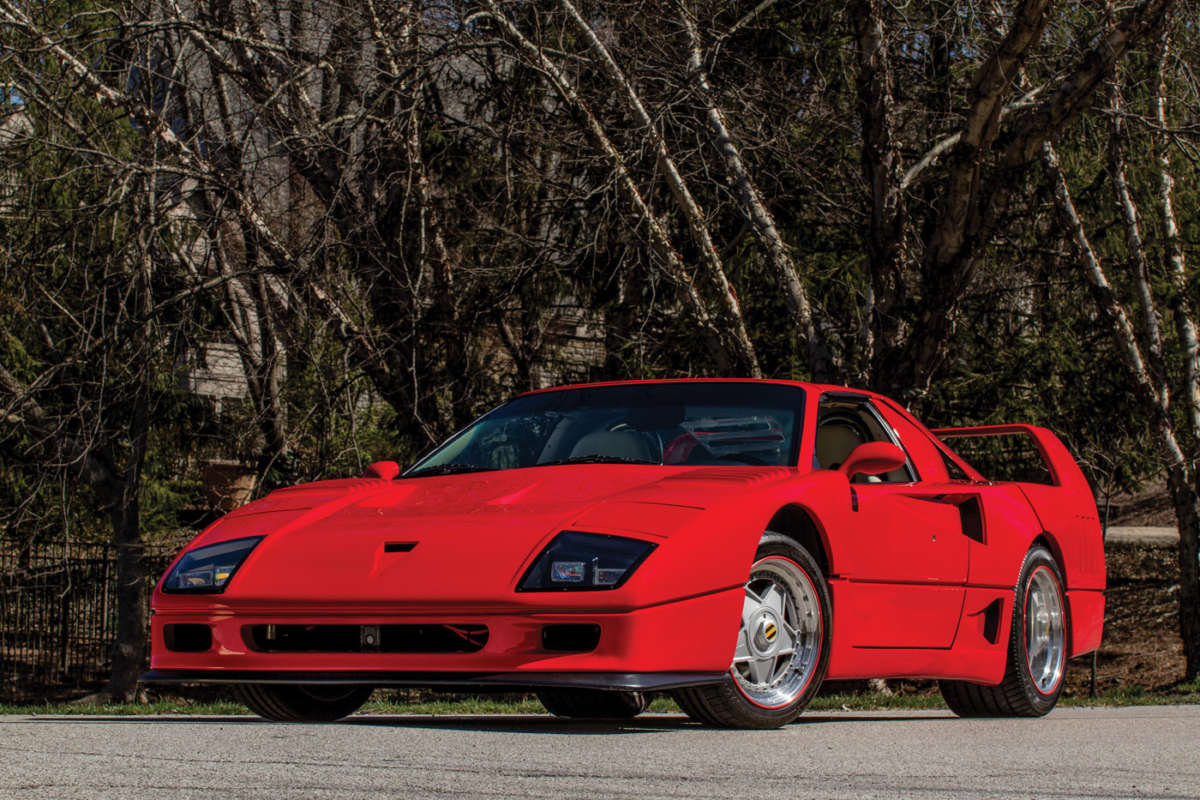
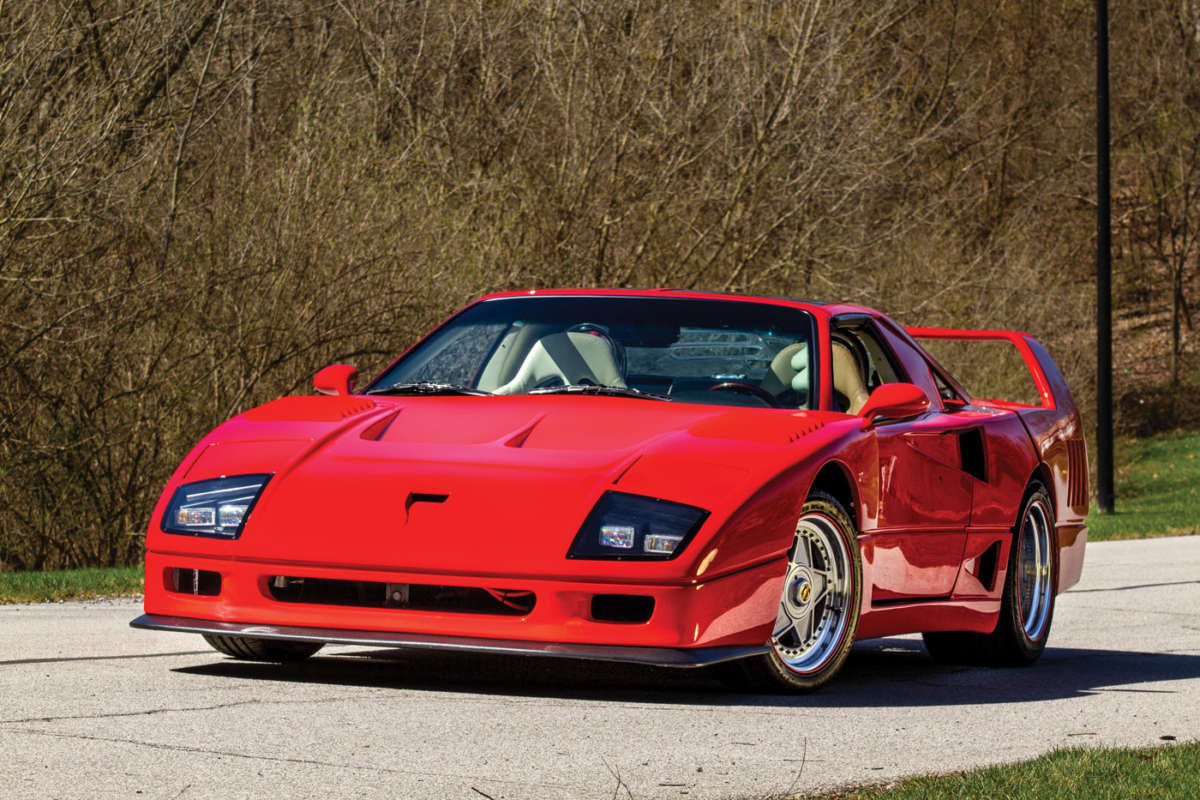
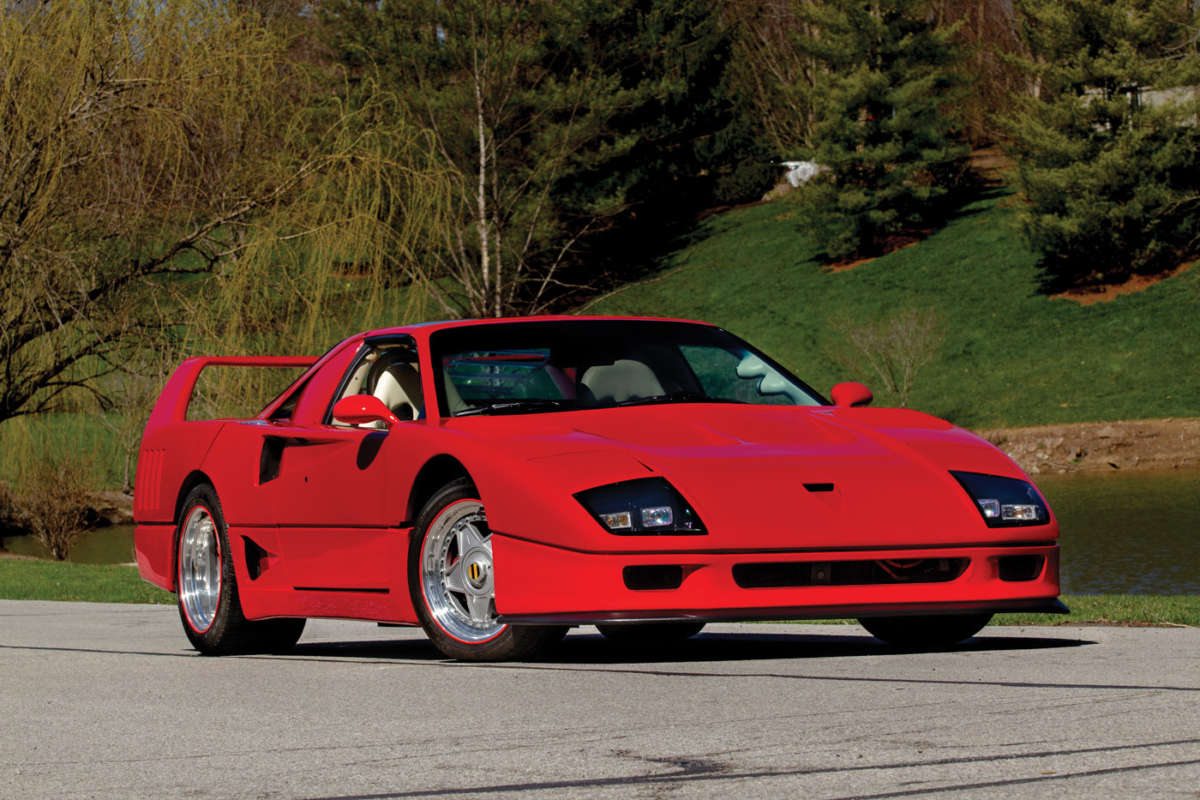
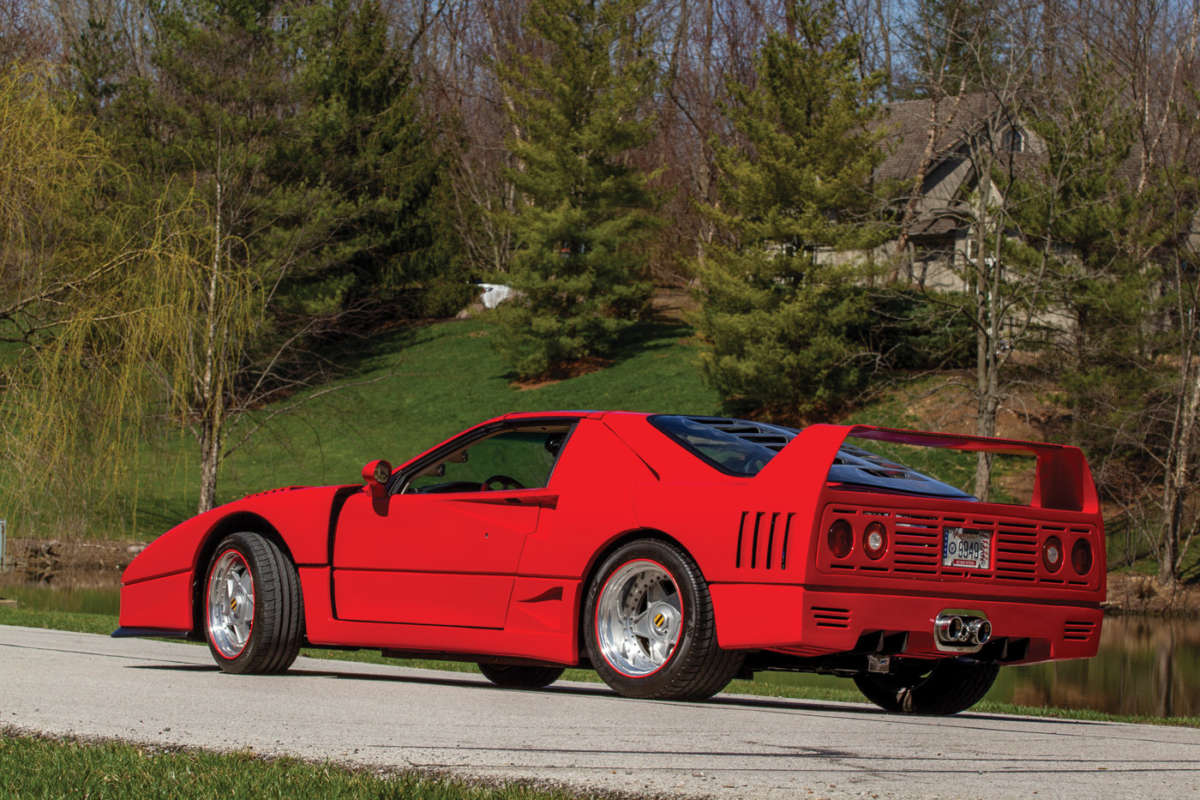
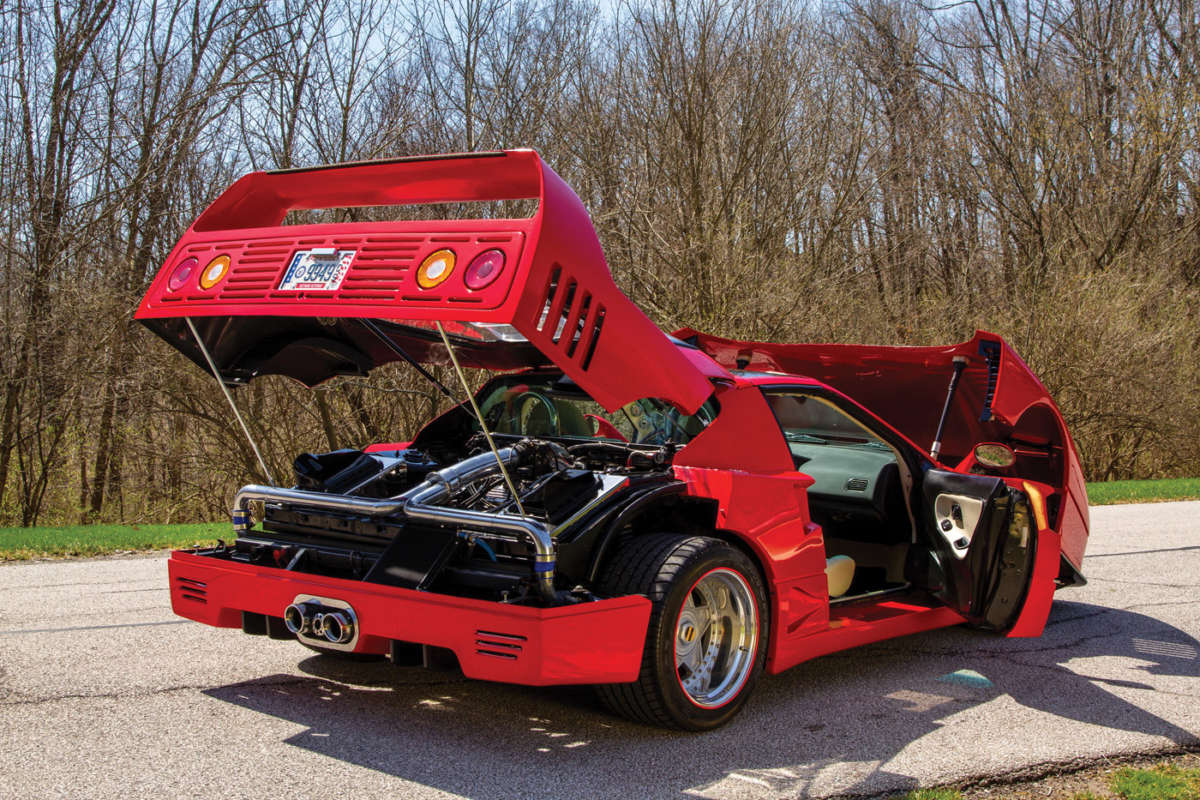
The donor car for this project was a 1987 Fiero GT that he purchased in 1988 with 3,000 miles on the odometer. The car was a daily driver until he started on the conversion by having a Euro-style body installed by Norm’s Fiberglass Design Studio. The body is not an exact copy, as it slightly differs dimensionally and has no rear side windows. Apparently these replica panels are no longer commercially available here in the states, but they possibly are overseas or through internet outlets.
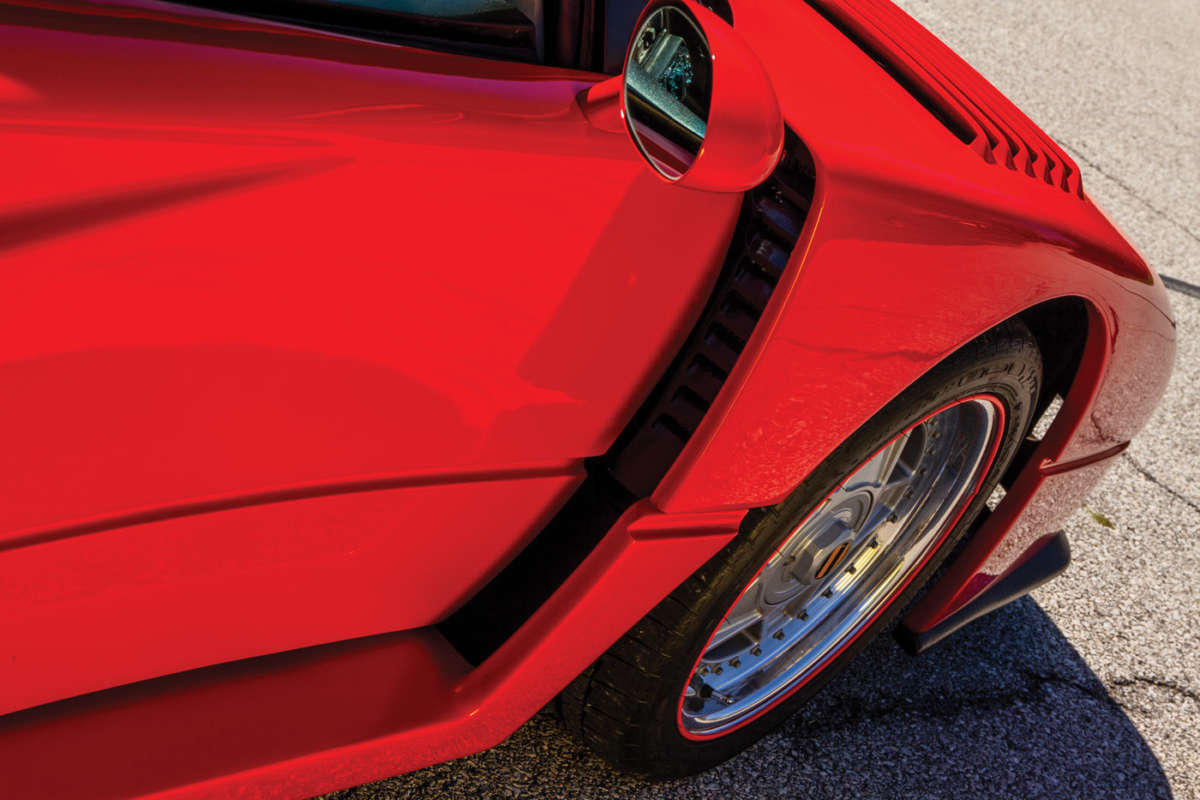
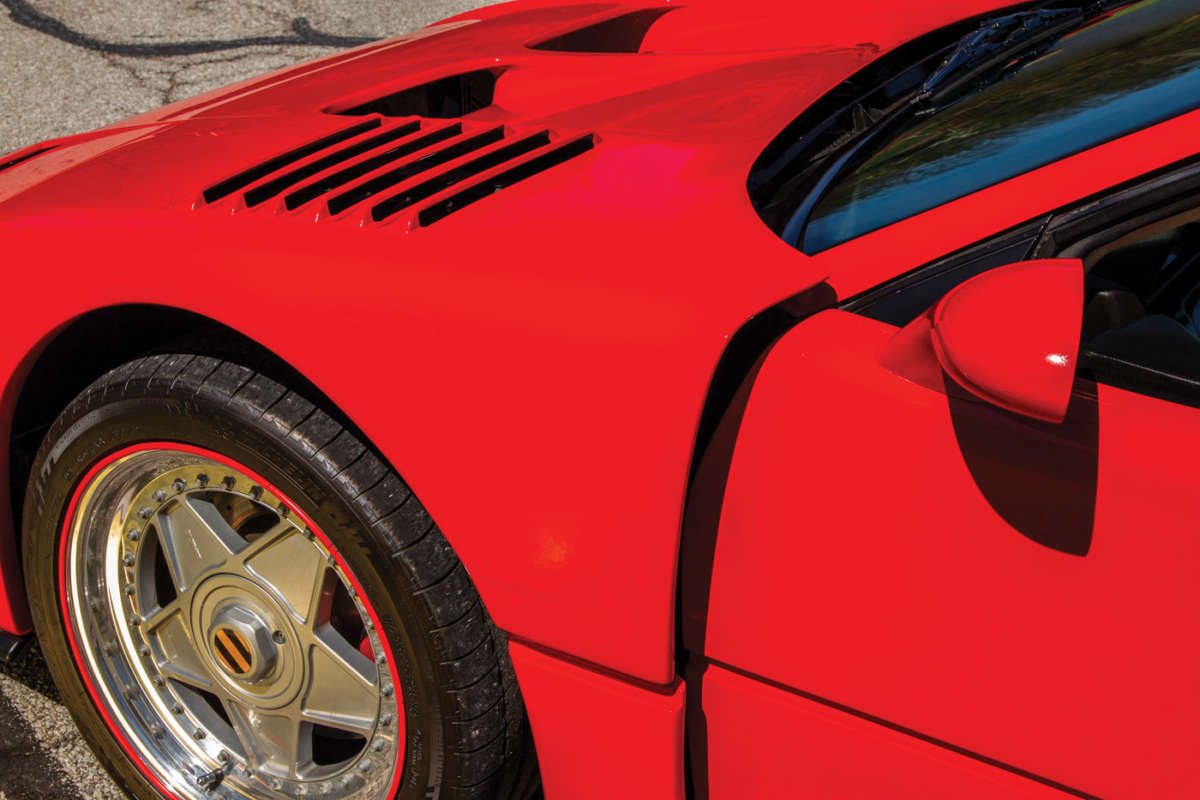
Jim says that the body was roughly installed on his frame and needed a lot of finessing for final fitment, but his can-do mentality kicked in. In order to straighten and reinforce the rear hatch, he attached stainless steel tubes with structural adhesive and then overlaid them with fiberglass. He also cut and recurved the front wheel arches so the wheels could turn without hitting the front end.
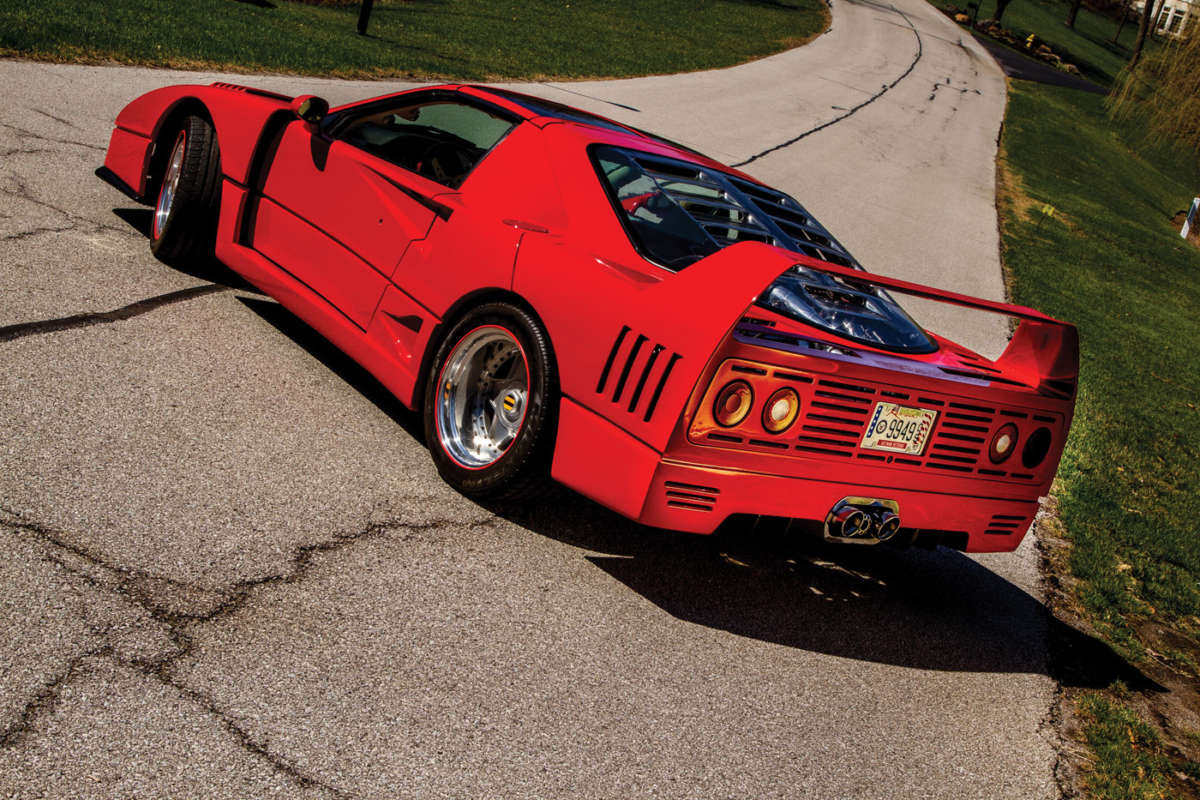

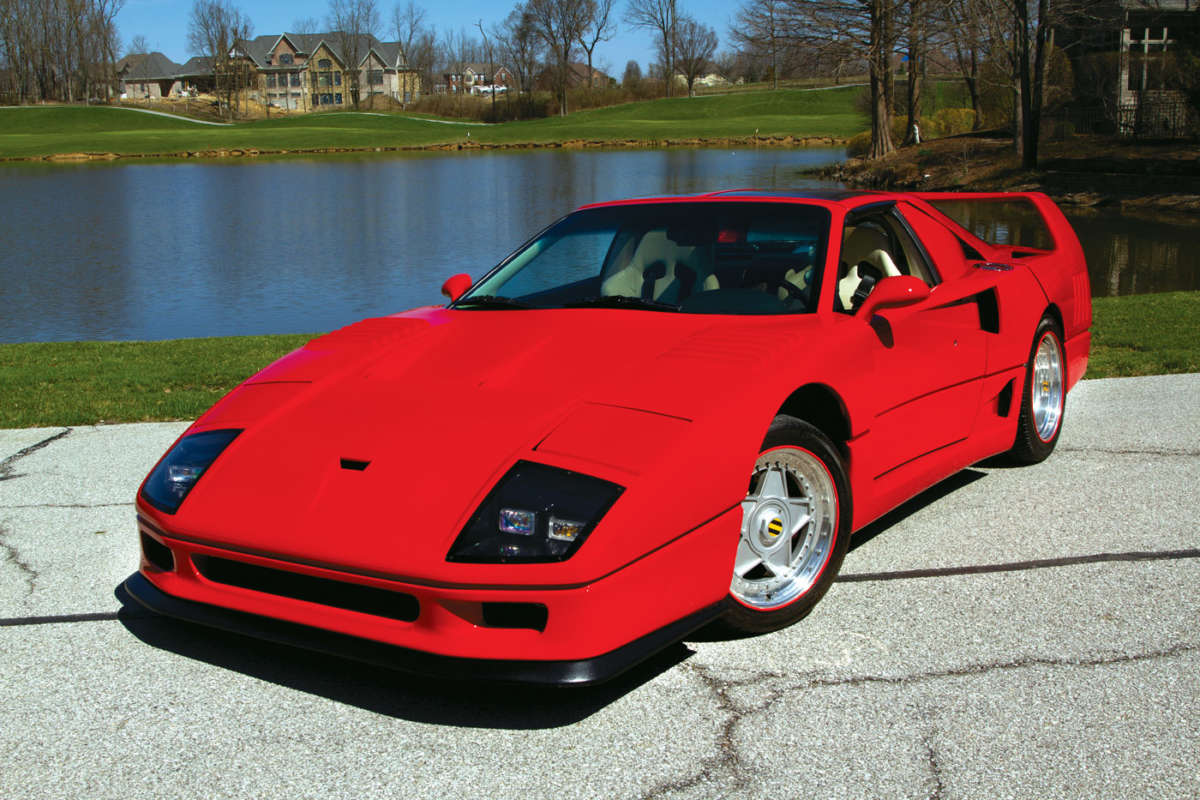
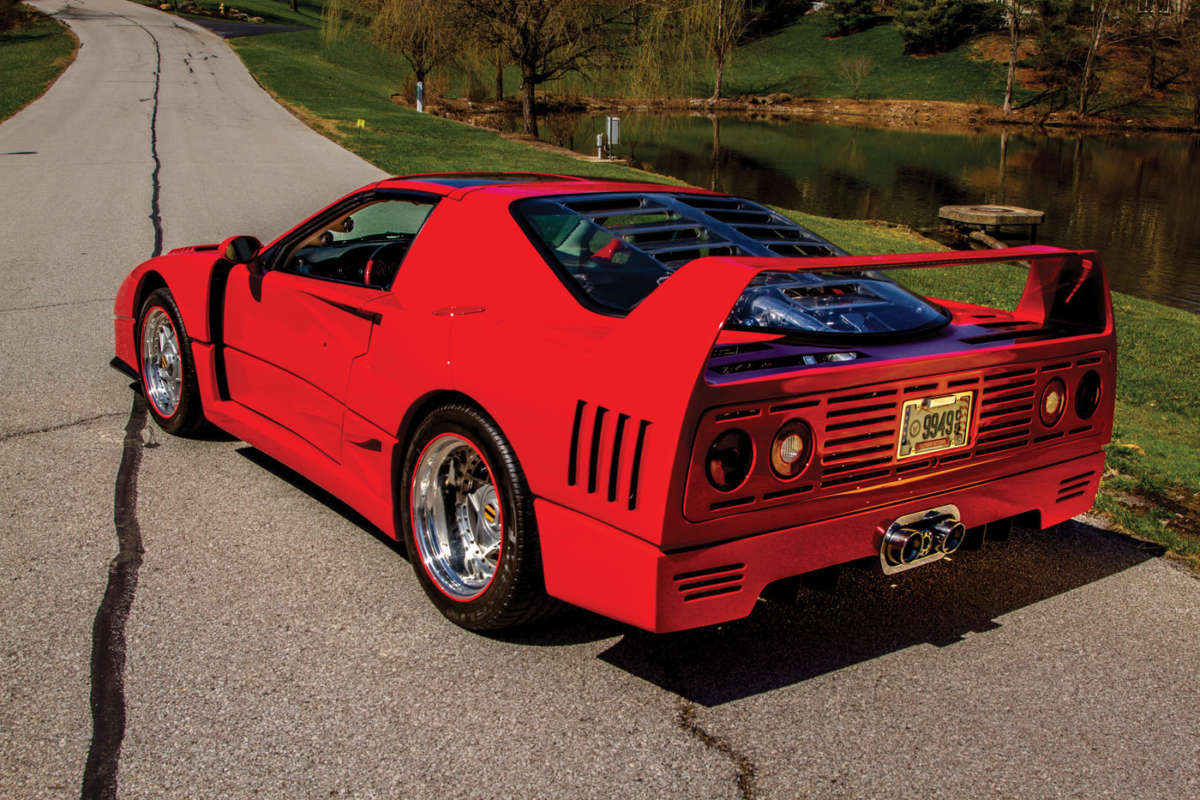
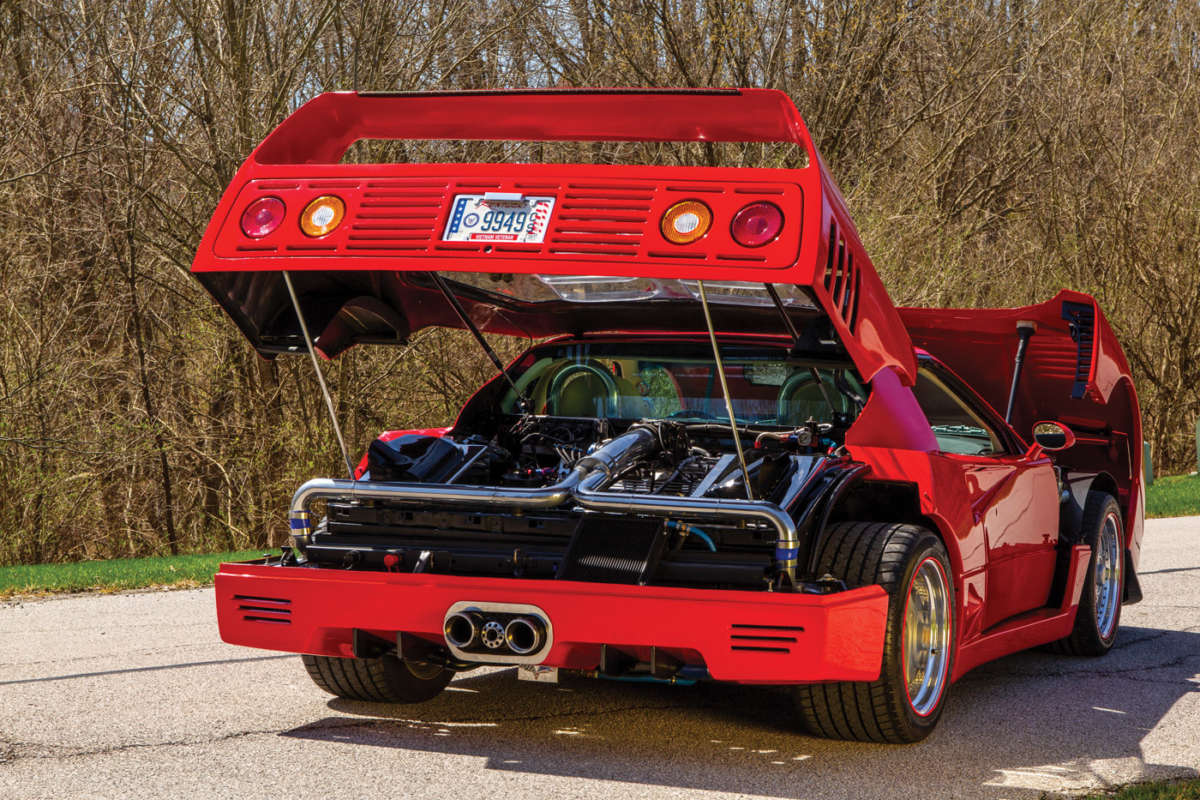
Other custom fiberglass work required included cutting holes in the upper rear quarters to add a fuel neck and pocket, as well as a door to the water tank for the turbo injection system. Another door opens to reveal a water neck for pouring water into an aluminum coolant recovery tank. Next, Jim set about making a filler panel for the T-top and fixing the panel gaps and alignment. Waves in the panels were smoothed out using multiple layers of polyester primer, with block sandings in between each application. He also sprayed on the Mazda true red paint, coated with four coats of poly clear.
The chassis went through a similar degree of transformation, starting with three separate reinforcements. For additional rigidity, Jim used steel tubing to link the front and rear sections and unibody as well. And he also welded in a box-tube subframe in the rear, along with an X-brace to tie everything together.
Next he installed a front suspension design by Formula One (now offered by Arraut Motorsports) with new control arms and Carrera shocks. Jim modified the setup by adding a powered Mustang rack and pinion setup. Custom handwork was required to mate the steering system to the General Motors steering shaft.
Later Jim installed Belltech 2-inch drop spindles and fabricated a bump-steer-correction setup using custom bolts attached to the tie rod ends and steering knuckles. He also moved the battery up front in between the new wide-track suspension crossmember for a lower center of gravity and better weight balance. Brakes were upgraded with DBA 13-inch rotors and Wilwood four-piston calipers.
For the rear, Jim bolted in a 1988 Fiero Formula four-link suspension. In order to fit in the Cadillac Northstar V8, he had to cut and splice the cradle, replacing the stock Fiero T-links with mild-steel tubing links. To finish everything off, both the front and rear suspension were then chromed.


“I had to have a machine shop shorten both sides of the Cadillac axles,” Jim relates. “I also used Cadillac bearings and had the machine shop modify the Pontiac hubs.” He could not get any information from Cadillac technicians as to how much torque the transaxle could handle, and it took several years to determine how strong the stock unit is. Through several online searches, he eventually found out that the transaxle was used on military tanks, but modified with a different stall converter to handle more than a 1,000 lb-ft of torque. The standard one can absorb more than 729 lb-ft of torque, which would be much needed, as we’ll see.
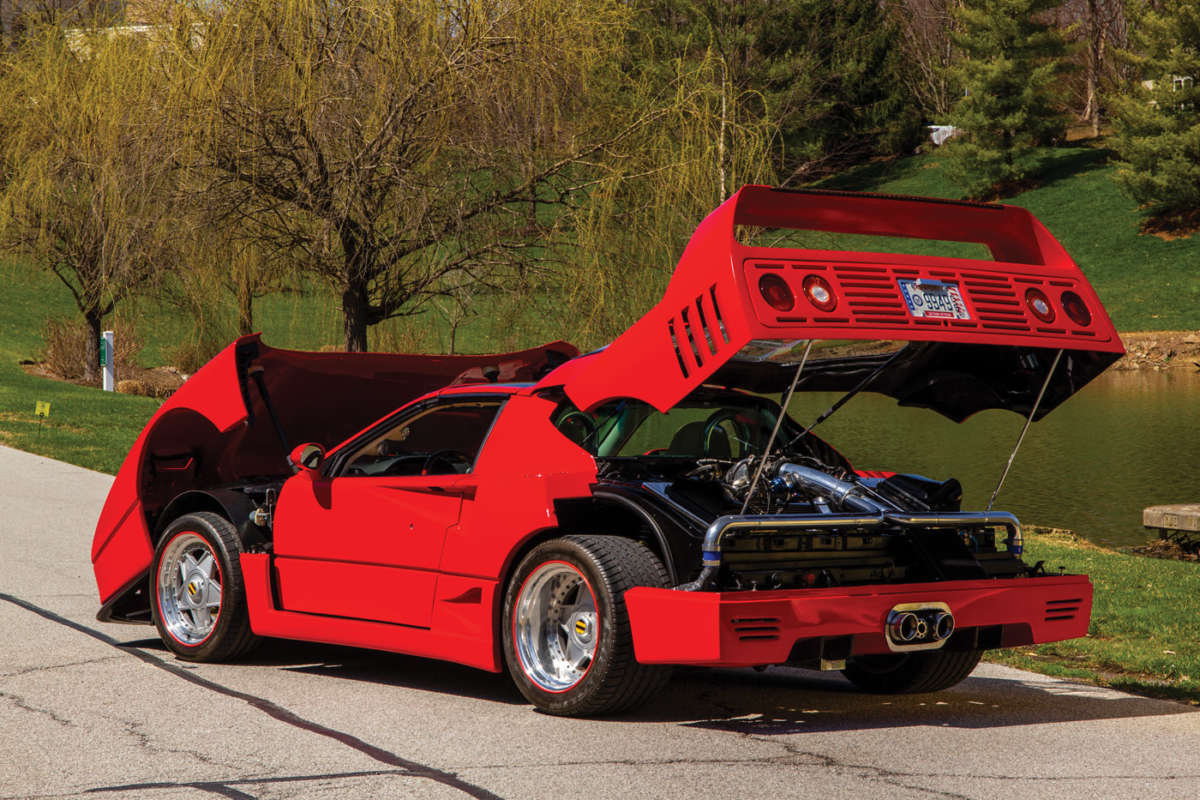
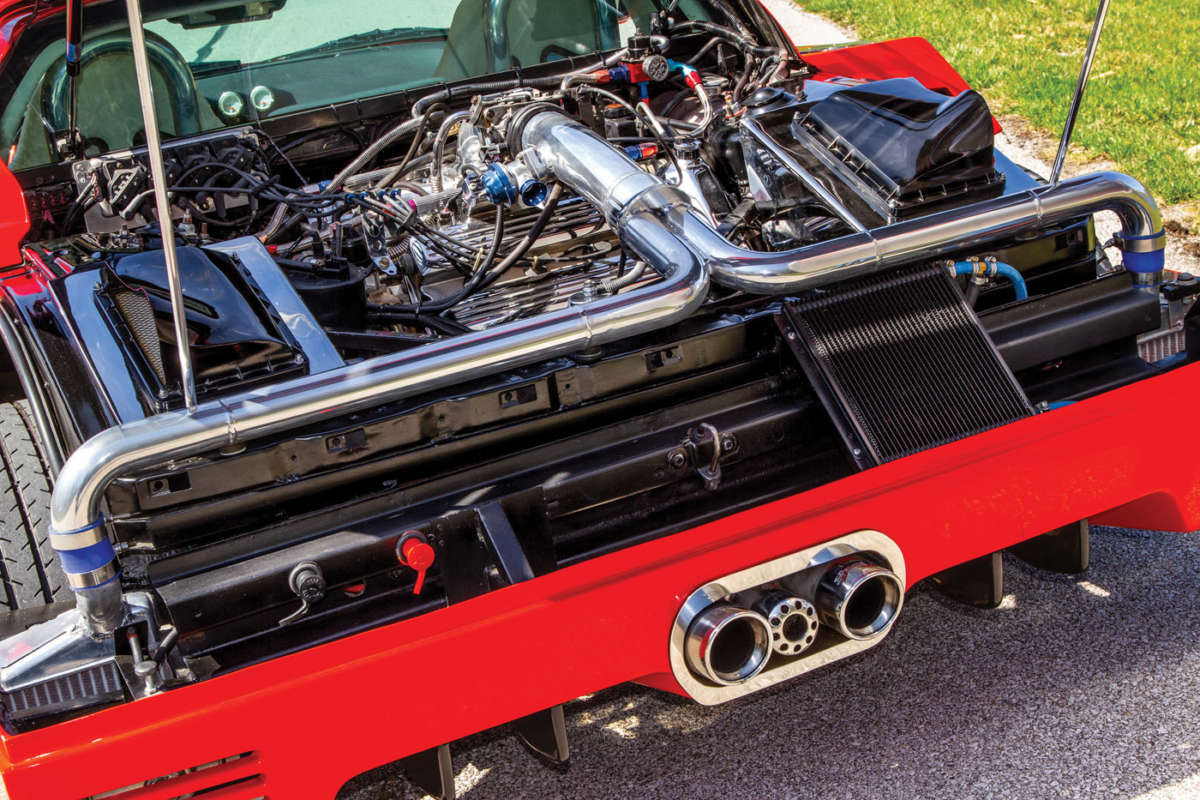
Enhancing the Fiero chassis to accommodate the Cadillac drivetrain is an ambitious undertaking in itself, but Jim wasn’t done yet. Despite having very little experience with forced induction, he dove in headfirst, crafting his own turbo system for the Cadillac mill.
“The only turbo I had ever seen was on an early model F-85 Oldsmobile,” he admits. “So building my own twin-turbo system and turbo exhaust with dual air-to-air intercoolers was a challenge.” (That’s the polite expression Seabees use for taking on a massive job.) As expected, he was fairly nonchalant about the whole deal.
“It seemed easy after going to several pull-and-save lots, removing turbos, intercoolers, wastegates, blowoff valves and oil-return lines,” he relates. “It helped me to understand how and why the engineers design these things before I rebuilt the turbos.”
Raising the output on the 1998 Cadillac Northstar V8 from less than 300 hp to 500 horses required an aluminum intake from Cadillac Hot Rod Fabricators, plus a pair of T3 turbochargers. A Cadillac electric-shift transaxle was also required, as the unit is capable of handling in excess of 700 lb-ft of torque.

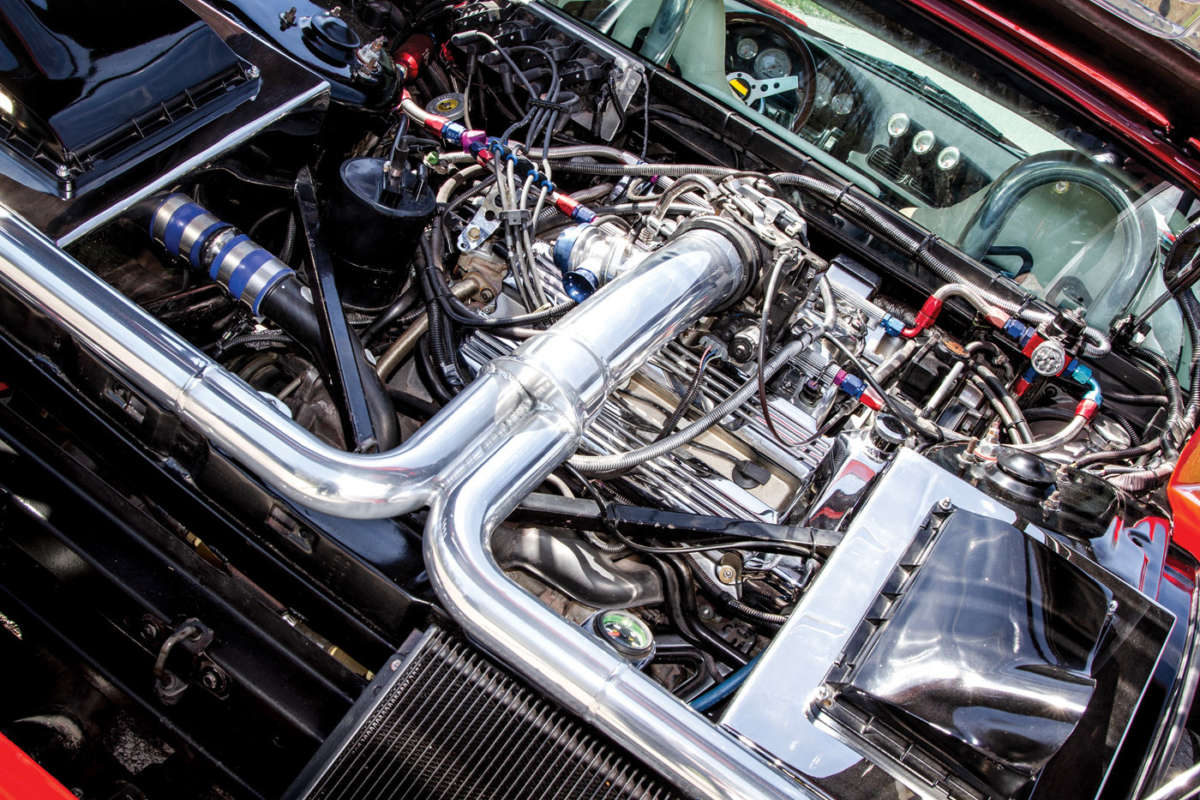
Besides installing and pulling the engine multiple times, “The computer was my most difficult challenge,” Jim admits. The stock ECU was hard to reprogram, and no engine shops would touch it. Some even suggested replacing it with a Corvette computer and harness. Jim finally added a “piggyback” unit from Perfect Power that works in conjunction with the stock ECU and allows him to use a preloaded tune. For engine longevity, the boost level is set at a modest 5.7 psi of boost, and a Hobbs switch activates water spray on the intercoolers at 2.7 psi.
The one flaw that he found in the AiResearch T3 turbos is that the oil-return port is too small, causing oil backup and resulting in oil blowby. “So I fabricated the stainless steel turbo exhaust,” Jim notes, “and then ceramic-coated it in-house.”
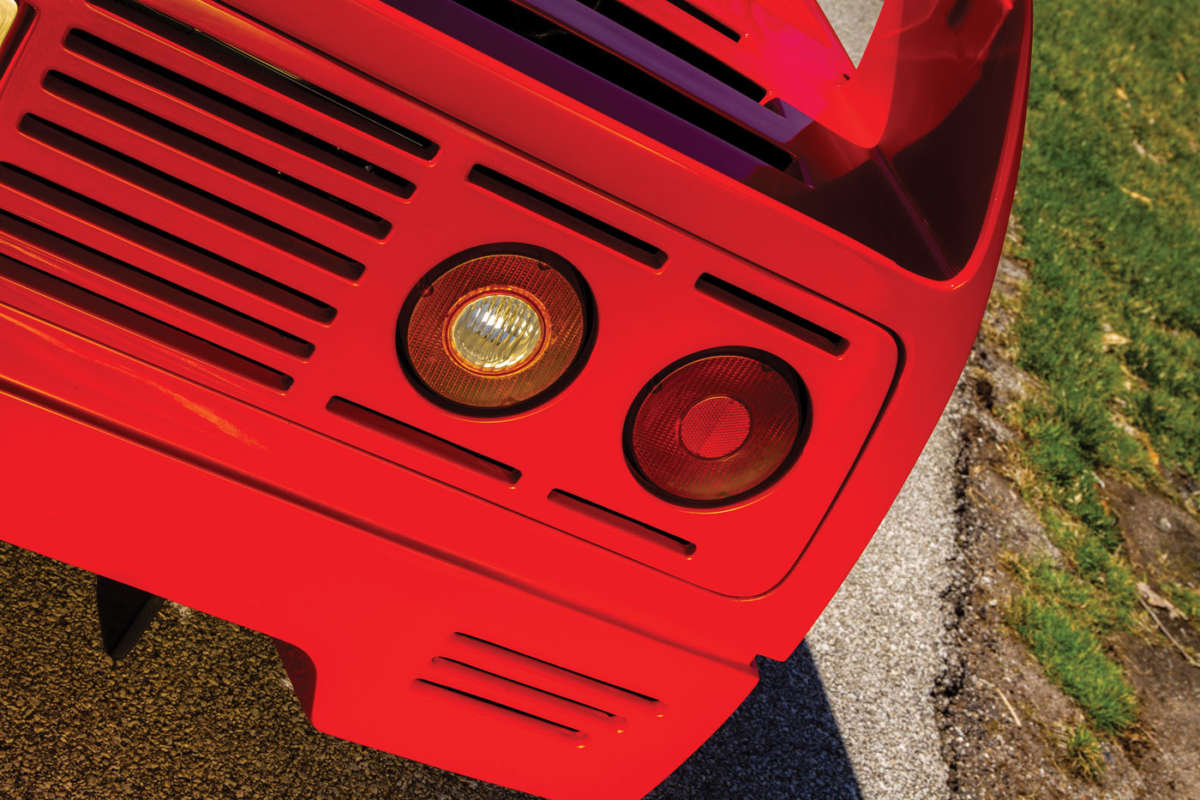
Another aspect that he did not agree with was the original location of intercoolers on top of the engine, where the most heat collects. This configuration turned the intercoolers from heat exchangers into heat absorbers, which made no sense. So he low-mounted the intercoolers instead and installed louvers from a GM transit bus to the rear valance for more airflow. His attention to detail continued, as he also designed and built rear inner fender wells from fiberglass with intake vents covered by steel mesh, allowing air in while keeping debris out. But his airflow improvements didn’t stop there.
“I designed a rear hatch panel with taillights and turn signal lights, modifying the amber lights with backup lights, all for function and style,” he notes, “and to improve airflow to release drivetrain heat.”
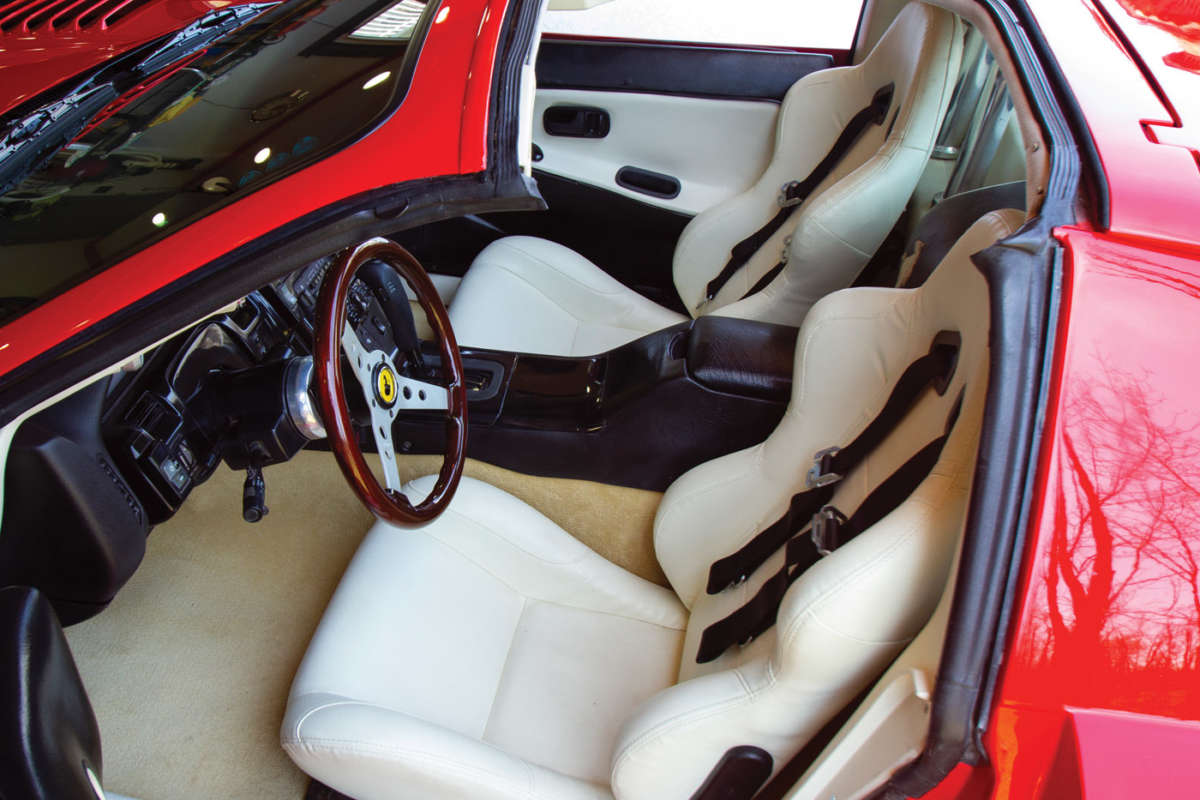
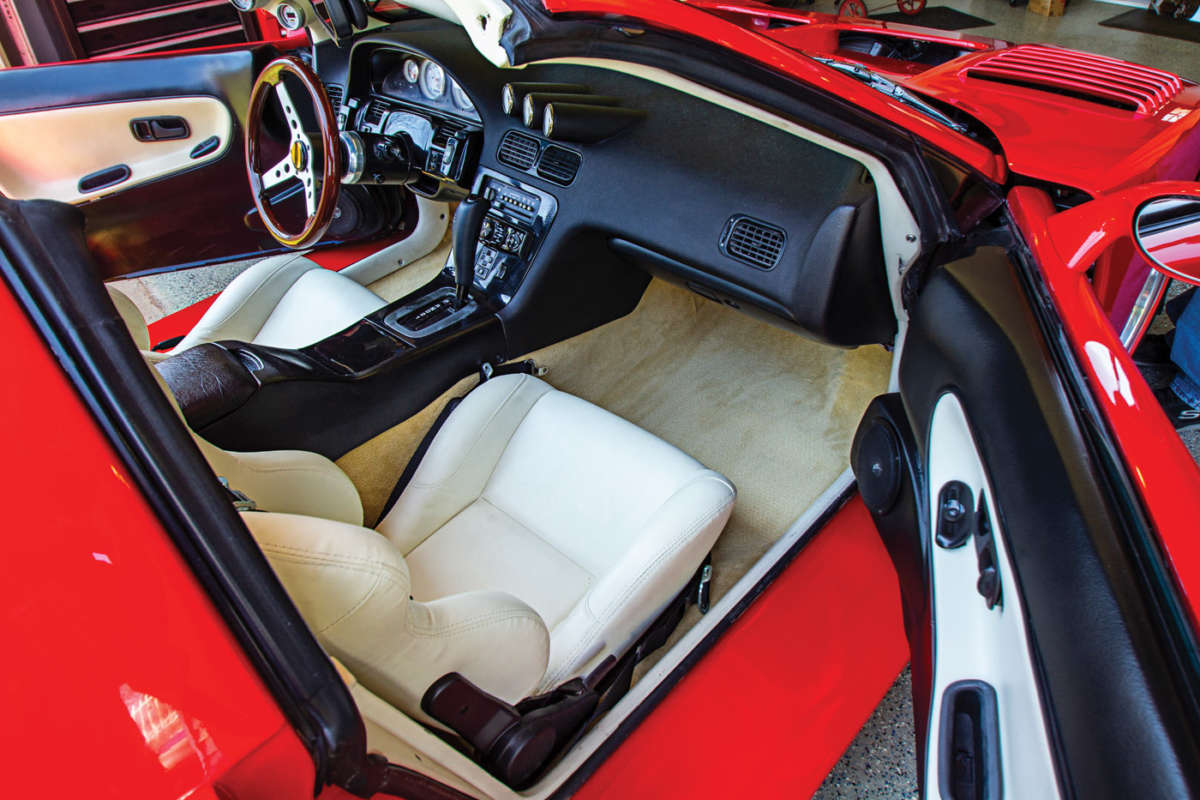
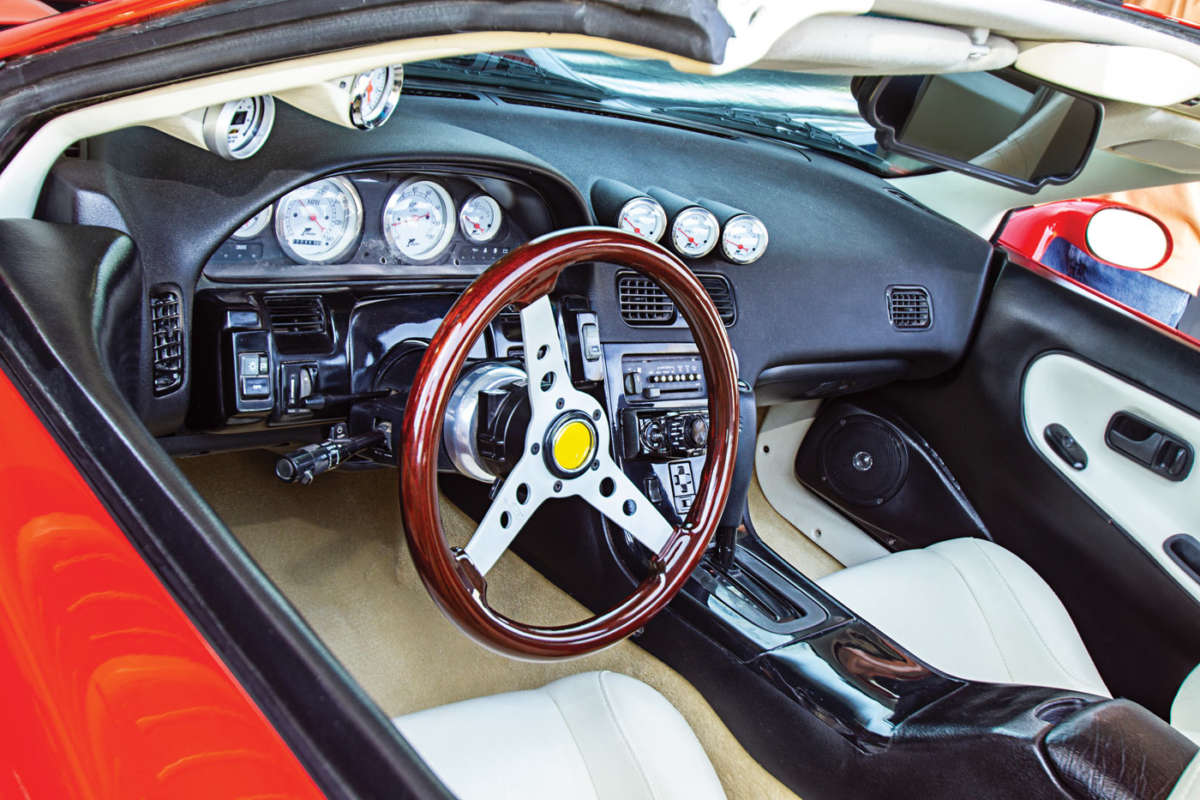
After scrutinizing the interior of the original car that he wanted to emulate, Jim didn’t care much for the spartan race-car look. So he started out using cockpit components from a 1990 Nissan 240SX, with oyster white bucket seats purchased online from China. He spent years designing and redesigning many cockpit parts little by little. For instance, the gear shifter was made by modifying four different shifters to get the fit and function he was after. He also converted the overdrive switch to activate the water pump sprayer to intercoolers and added a Grant oak rim steering wheel with a custom adaptor.
Jim redesigned the dash by fabricating three center dash pods with Dolphin gauges. The reworked door panels have power locks, and the center console now has power window and mirror switches. The sport bar behind the seats is attached to a 2-inch box tube frame welded to the side bulkhead, rear firewall and floor area, all hidden behind the interior.
Building a car while working 60 hours a week was a challenge for Jim, only accomplished through persistence and passion — and all the more impressive considering the magnitude of the build, which took over 10 years to complete. The car is impeccable, and the fit and finish is superb. Hopefully Jim’s experience serves as inspiration to get out in the garage and build the car of your dreams. Can do!


Comments for: Seabee's Solution
comments powered by Disqus